
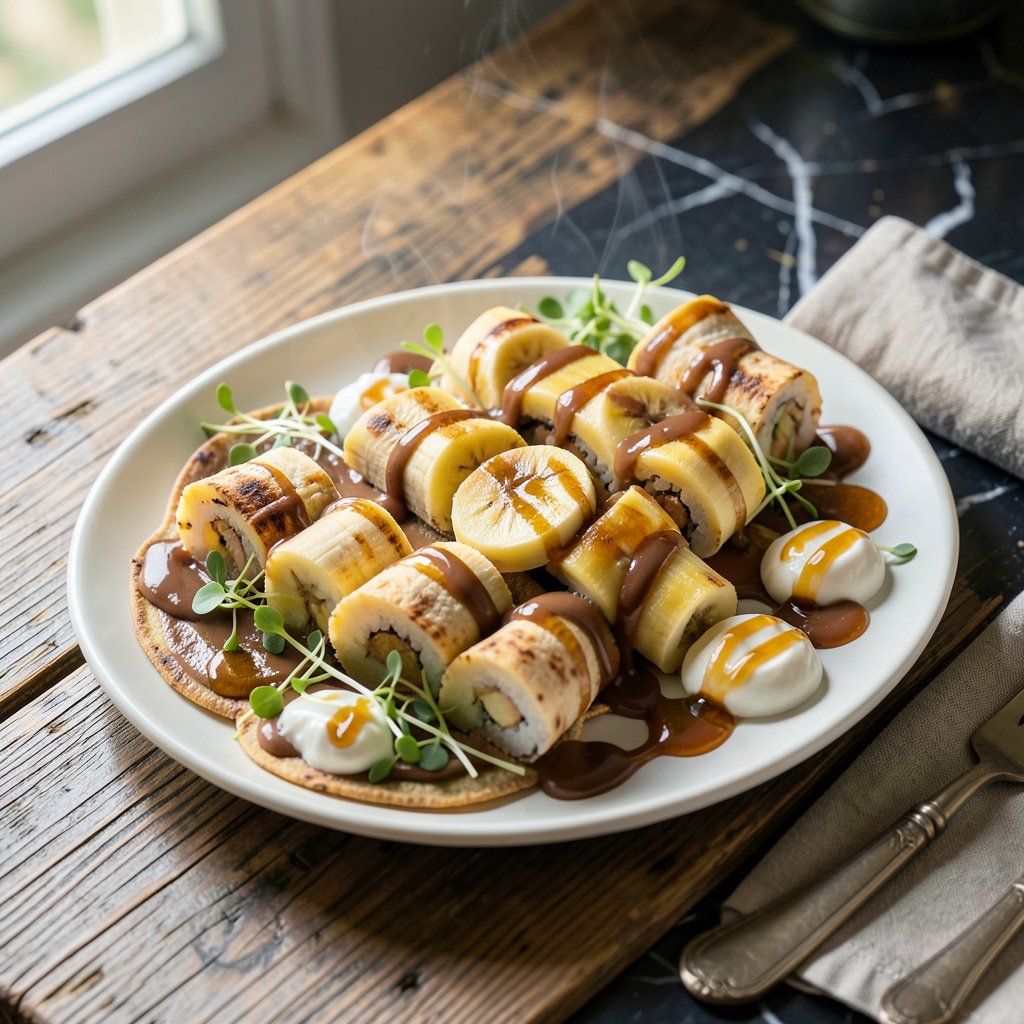
Who knew a dessert could be so playful and delicious? This banana sushi is a fun twist on traditional sushi that kids and adults alike will adore. With its creamy filling and sweet bananas, it’s perfect for any occasion. I can guarantee it’ll spark joy at your next gathering!
What makes this dish stand out is its simplicity and versatility. You only need a few basic ingredients, and the assembly is a breeze. Whether you’re using peanut butter, Nutella, or yogurt, each bite is a delightful surprise. It’s a fantastic way to get creative in the kitchen!
By the end of this process, you’ll have beautifully rolled banana sushi that’s not only visually appealing but also irresistibly creamy. Each slice reveals a colorful, tasty filling that’s sure to impress everyone. This dessert is as much about the experience as it is about the flavor.
Feel free to mix and match your fillings or add toppings like crushed nuts or sprinkles for an extra crunch! This dish is perfect for parties, snacks, or just a fun family activity. Let’s get started on this delightful dessert!
Ingredients for Banana Sushi
Who knew a dessert could be so playful and delicious? Let’s make some banana sushi!
| Ingredient | Amount | Notes |
|---|---|---|
| Bananas 🍌 | 4 whole | Ripe, but firm for rolling |
| Peanut Butter 🥜 | ½ cup | Creamy or crunchy, your choice |
| Nutella 🍫 | ½ cup | For a chocolatey twist |
| Yogurt 🥛 | ½ cup | Vanilla or plain works well |
| Tortillas 🌯 | 4 whole | Flour or whole wheat for best results |
| Honey 🍯 | 2 tbsp | Optional for extra sweetness |
| Crushed Nuts 🌰 | ¼ cup | Almonds or walnuts add crunch |
| Sprinkles 🍬 | ¼ cup | For decoration, optional but fun! |
The bananas should be ripe but still firm—too soft and they won’t roll nicely. I usually pick mine up at Whole Foods or the local farmer’s market for better flavor. For the spreads, any brand of peanut butter will do, but I love the natural ones without added sugar. If you prefer Nutella, the classic hazelnut spread is a winner too—just grab whatever’s on sale!
No peanut allergy? You can totally swap that out for almond butter or even cream cheese if you’re feeling adventurous. Yogurt can be omitted if you’re not using it as a spread, and feel free to mix fillings—granola adds a great crunch too! If you want to keep it healthier, go easy on the honey, or skip it altogether.
These beauties are best served fresh, but if you have leftovers, wrap them tightly and keep in the fridge for 1-2 days. I like to prep them ahead for parties and serve them chilled. For a fun twist, try freezing them for a cool treat on hot days—just slice them after freezing for an exciting snack!
Step-by-Step Instructions for Banana Sushi
This fun dessert is easy to make and perfect for all ages. Let’s roll!
👨🍳 Step 1: Prepare the Tortillas
Start by laying out your 4 whole tortillas on a clean surface. If they are too stiff, microwave them for 10-15 seconds to soften. This makes rolling much easier! You’ll want each tortilla pliable enough to wrap around the bananas without cracking.
Once they’re ready, I like to spread a thin layer of 0.5 cup peanut butter over each tortilla, leaving a small border around the edges. This creamy layer not only adds flavor but also helps keep everything together. Make sure to cover the entire surface evenly!
🍌 Step 2: Add the Bananas
Next, peel your 4 whole bananas and place one in the center of each tortilla. You’ll want them to be ripe but still firm for easy rolling. If they’re too soft, they may squish out when you roll them up, which can make a mess.
For an extra touch of sweetness, drizzle 2 tablespoons honey over the bananas. This step is optional but highly recommended if you love that extra sweetness! It complements the peanut butter beautifully.
🥄 Step 3: Roll It Up
Now, it’s time to roll! Start at one end of the tortilla and gently roll it over the banana, tucking it tightly as you go. Make sure to keep everything centered so it doesn’t spill out the sides. You want a snug roll, but don’t squish it too hard.
Once fully rolled, I like to slice each banana sushi into 1-inch pieces. This makes for perfect bite-sized snacks that are fun and easy to eat! You’ll see the beautiful layers of peanut butter and banana as you cut.
🍫 Step 4: Finish with Nutella and Toppings
Now comes the fun part! Take your 0.5 cup Nutella and drizzle it over the sliced pieces. This chocolatey twist adds an irresistible flavor! If you’re feeling adventurous, sprinkle on 0.25 cup crushed nuts and 0.25 cup sprinkles for some crunch and color.
Your banana sushi is now ready to serve! Arrange them on a plate and watch them disappear. They’re a hit with both kids and adults alike!
Storing and Reheating Banana Sushi
Refrigerator Storage
To keep your banana sushi fresh, wrap each roll tightly in plastic wrap or place them in an airtight container. I recommend using glass containers for better preservation. They can last in the fridge for up to 1-2 days, but the sooner you enjoy them, the better! 🍌
Freezer Storage
If you want to prepare banana sushi ahead of time, consider freezing them. Slice the rolls into 1-inch pieces and arrange them on a baking sheet lined with parchment paper. Once frozen, transfer the pieces to a freezer bag, leaving some space for expansion. They can be stored for up to 3 months. ❄️
Thawing Techniques
To thaw frozen banana sushi, simply place the pieces in the refrigerator for a few hours or overnight. If you’re in a hurry, you can also let them sit at room temperature for about 30 minutes. I like to enjoy them slightly chilled for the best flavor and texture!
Serving Suggestions
When you’re ready to serve, arrange the banana sushi on a platter and drizzle with extra Nutella or honey if desired. For added flair, sprinkle some crushed nuts or colorful sprinkles on top. This makes them visually appealing and even more delicious! 🌈
Leftover Ideas
If you find yourself with leftover ingredients, try using the banana sushi filling in smoothies or as a topping for yogurt. You can blend the peanut butter and bananas with some ice for a creamy treat. It’s a great way to avoid waste and keep enjoying those flavors!
Enjoying Freshness
For the best experience, I suggest making these delightful treats just before serving. The combination of fresh bananas and creamy spreads is unbeatable! Plus, it’s a fun activity to get the kids involved in rolling their own sushi creations. Let the good times roll! 🎉
Nutrition Facts
Frequently Asked Questions
What can I use instead of peanut butter?
If you have a peanut allergy or prefer a different taste, almond butter or cream cheese are great alternatives. They add a unique flavor while still keeping the dish creamy and delicious!
Can I prepare banana sushi in advance?
Yes, you can prepare banana sushi ahead of time! Just wrap them tightly in plastic wrap or store in an airtight container. They stay fresh in the fridge for up to 1-2 days.
How do I prevent the bananas from browning?
To prevent browning, you can squeeze some lemon juice over the bananas before rolling them up. This helps maintain their color and freshness.
What toppings can I add for extra flavor?
Crushed nuts, sprinkles, or even a drizzle of honey can enhance the flavor and texture of your banana sushi. Get creative and have fun with your toppings!