
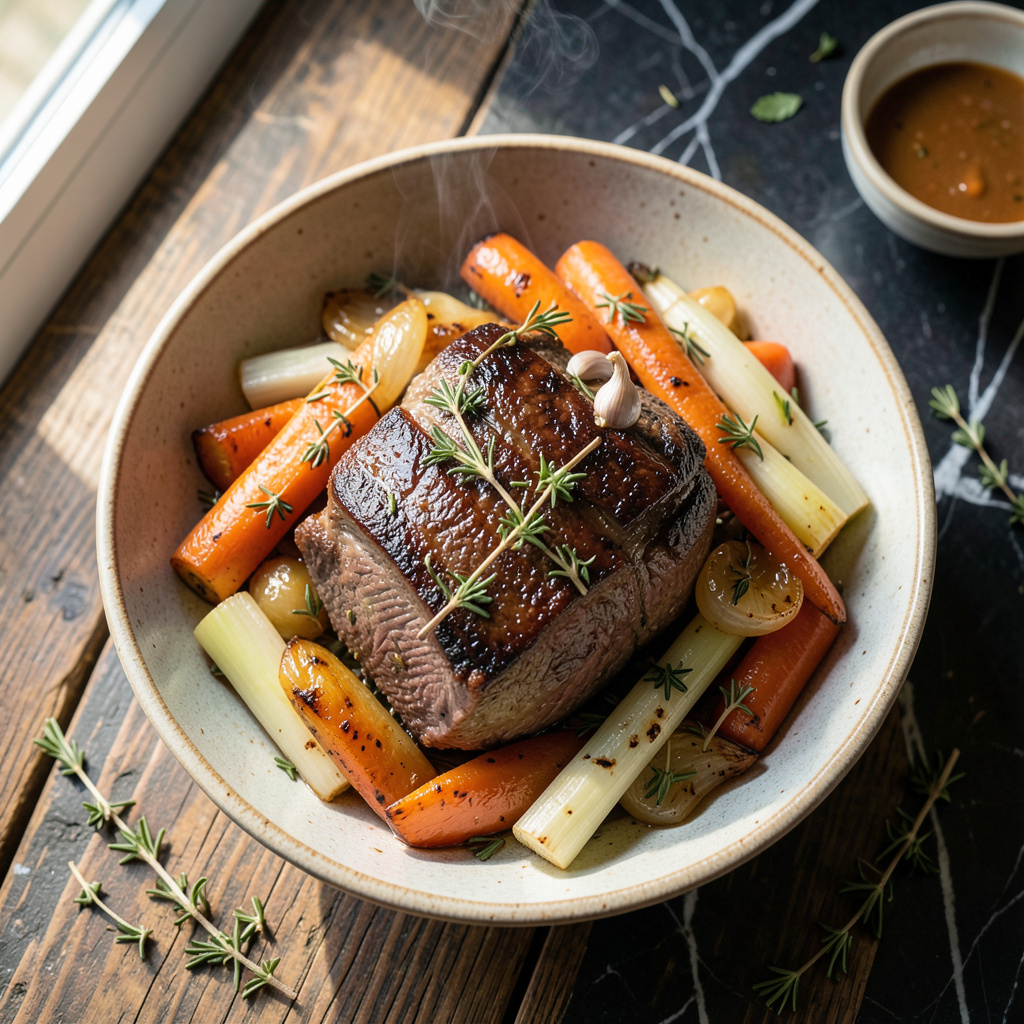
As a chef who’s spent years perfecting slow-cooking techniques, I’m excited to share my tender beef bottom round recipe that delivers perfect results every time. This cut, often overlooked, becomes incredibly flavorful when cooked low and slow.
I’ve found that a simple rub of salt, pepper, and herbs, combined with a hot sear, creates a beautiful crust that locks in juices. Roasting at a consistent 275°F ensures the meat stays tender and develops deep flavor.
The result is a roast that’s both perfectly cooked and packed with rich, beefy flavor. Serve with roasted vegetables or mashed potatoes for a comforting meal that’s sure to impress.
This recipe is a staple in my kitchen, and I’m confident it will become one in yours. With minimal prep and straightforward instructions, you’ll achieve professional-quality results that will elevate any dinner gathering.
Ingredients for Beef Bottom Round
Gather these quality ingredients for a perfectly tender beef bottom round roast.
| Ingredient | Amount | Notes |
|---|---|---|
| Beef Bottom Round Roast 🥩 | 2 ½ lb | Trimmed of excess fat |
| Kosher Salt 🧂 | 2 tbsp | Diamond Crystal preferred |
| Black Pepper 🌶️ | 1 tbsp | Freshly ground preferred |
| Fresh Thyme 🌿 | ¼ cup | Chopped, fresh leaves |
| Fresh Rosemary 🌿 | 2 tbsp | Chopped, fresh leaves |
| Garlic Cloves 🧄 | 4 cloves | Peeled, minced |
| Olive Oil 🫒 | 2 tbsp | Extra-virgin for richness |
| Beef Broth 🍜 | 1 cup | Low-sodium preferred |
| Red Wine 🍷 | ½ cup | Dry red wine optional |
| Carrots 🥕 | 2 whole | Peeled, chopped |
| Onions 🧅 | 1 whole | Peeled, chopped |
| Celery Stalks 🥕 | 2 stalks | Chopped |
The beef matters here. Choose a well-trimmed bottom round for the best results. I’ve found that Costco and Whole Foods consistently have high-quality roasts. Look for good marbling throughout the meat—this ensures tenderness. If you’re buying a larger roast, adjust the cooking time accordingly.
No fresh thyme? Dried thyme works at one-third the amount. Red wine adds depth, but beef broth with a splash of balsamic is a solid substitute. For aromatics, feel free to swap in leeks or parsnips if you don’t have carrots and celery on hand. The key is to create a flavorful base.
This roast keeps beautifully—4-5 days in the fridge, 3 months frozen. Slice thin against the grain for best results. I like to portion leftovers into containers for easy lunches throughout the week. The leftovers make amazing sandwiches when thinly sliced and served on a crusty baguette.
Step-by-Step Instructions for Tender Beef Bottom Round Roast
Follow these straightforward steps to achieve a perfectly tender and flavorful roast every time.
Step 1: Prepare the Aromatic Vegetables and Herb Mixture
Start by chopping the 2 whole Carrots, 1 whole Onions, and 2 stalks Celery Stalks into uniform pieces. I like to keep them roughly the same size so they cook evenly. In a separate bowl, combine the 0.25 cup Fresh Thyme, 2 tbsp Fresh Rosemary, and 4 cloves Garlic Cloves. The aroma of these herbs and garlic will infuse the roast beautifully.
Make sure to peel the carrots and onions before chopping them, as this will help them caramelize nicely during roasting. The celery adds a nice depth of flavor to the dish.
Step 2: Season the Beef Bottom Round Roast
Take the 2.5 lb Beef Bottom Round Roast and rub it all over with 2 tbsp Kosher Salt and 1 tbsp Black Pepper. I prefer to use Diamond Crystal kosher salt for its flaky texture and mild flavor. Make sure to coat the roast evenly, pressing the seasonings into the meat to ensure they stick.
Let the seasoned roast sit at room temperature for 30 minutes before roasting. This helps the meat cook more evenly.
Step 3: Sear the Roast and Sauté the Aromatics
Heat 2 tbsp Olive Oil in a large Dutch oven over high heat. Sear the beef bottom round roast until it’s browned on all sides, about 2-3 minutes per side. Remove the roast from the pot and set it aside. Then, add the chopped carrots, onions, and celery to the pot and cook until they’re lightly browned, stirring occasionally.
The browned bits on the bottom of the pot will add a rich flavor to the roast. Make sure to scrape them up when you add the aromatics.
Step 4: Roast to Perfection
Add the 1 cup Beef Broth and 0.5 cup Red Wine to the pot, scraping up any browned bits from the bottom. Return the roast to the pot and cover it with a lid. Transfer the pot to a preheated oven at 300°F and roast for 2-3 hours, or until the meat reaches your desired level of tenderness.
Check the roast periodically to ensure it’s cooking evenly. You’re looking for the meat to be tender and easily shreddable with a fork.
Step 5: Rest and Serve
Once the roast is done, remove it from the pot and let it rest for 15-20 minutes before slicing. This allows the juices to redistribute, making the meat even more tender. Slice the roast against the grain and serve with the cooked vegetables and juices.
The result is a perfectly tender and flavorful beef bottom round roast that’s sure to impress. Enjoy!
Essential Equipment for Perfect Results
Essential Cooking Vessel
A large Dutch oven is crucial for this recipe as it allows for both stovetop searing and oven roasting. I prefer Le Creuset or Lodge cast iron for their heat retention and even cooking. The size matters—look for at least 5-quart capacity to accommodate the roast and vegetables comfortably.
Accurate Temperature Control
Investing in a reliable meat thermometer is essential for achieving perfect doneness. I swear by ThermoWorks Smoke or Thermapen Mk4 for their accuracy and quick response time. This ensures your roast reaches the desired temperature without overcooking. 🔥
Sharp Knife for Prep
A sharp chef’s knife makes quick work of chopping vegetables and trimming the roast if needed. I recommend a 8-inch chef’s knife from Wüsthof or Shun. Keep it sharp with a regular honing routine to make prep work effortless.
Heavy-Duty Tongs
You’ll need heavy-duty tongs for flipping the roast during searing. Look for ones with silicone-coated handles for comfort and stainless steel construction for durability. OXO Good Grips makes excellent tongs that won’t slip during use.
Oven Thermometer
An oven thermometer ensures your oven is at the correct temperature, which is critical for slow roasting. I place mine on the middle rack to get an accurate reading. This simple tool prevents over or undercooking your roast.
Resting Tools
After roasting, you’ll need a carving board and sharp carving knife for slicing. I prefer a large wooden cutting board to catch all the juices. A 12-inch slicing knife from Dexter-Russell makes clean, even slices every time.
Nutrition Facts
540kcal
Frequently Asked Questions
What’s the best temperature for cooking beef bottom round?
Cooking at 300°F works best for this cut, allowing it to become tender and develop rich flavor. This low temperature helps break down the connective tissues, resulting in a melt-in-your-mouth texture.
How long does it take to roast a 2.5-pound beef bottom round?
For a 2.5-pound roast, expect 2-3 hours of cooking time. The key is to cook until it reaches your desired tenderness, rather than strictly following the time. Using a meat thermometer ensures perfect doneness every time.
Can I prepare beef bottom round ahead of time?
Yes, you can season the roast up to 24 hours in advance and store it in the refrigerator. Let it come to room temperature before roasting for more even cooking. You can also roast it ahead and reheat it gently – the leftovers are just as delicious!
What’s the best way to slice beef bottom round?
Always slice against the grain using a sharp carving knife. This makes the meat more tender and easier to chew. Letting it rest for 15-20 minutes before slicing also helps retain the juices, making each bite more flavorful.