
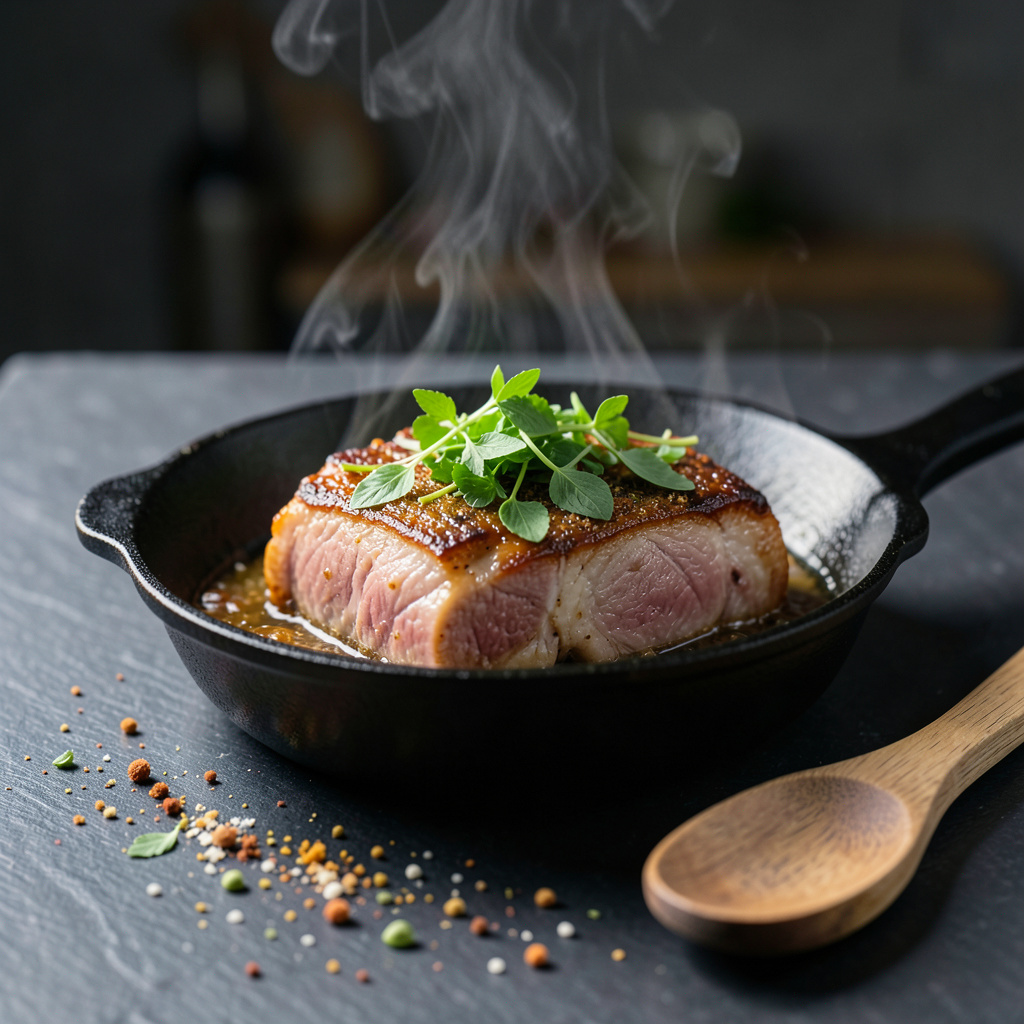
Berkshire pork belly is more than just a dish – it’s a culinary experience that transforms any meal into comfort food heaven. I’ve spent years perfecting this recipe, and the result is a tender, unctuous masterpiece that’ll become a family favorite.
The secret lies in the quality of the Berkshire pork belly itself. Sourcing from local farms ensures the best flavor and texture. I remember my time on the Southeast BBQ circuit, where slow-cooked pork was always the star.
To achieve that perfect balance of crispy skin and melt-in-your-mouth fat, we need to focus on precise temperature control. A low-and-slow roast at 275°F for about 3 hours works wonders.
Serve this Berkshire pork belly with classic Southern sides like creamy mashed potatoes or tangy braised greens. The rich pork pairs beautifully with sharp vinegar-based accompaniments. Get ready for a truly unforgettable dining experience that’ll leave everyone craving more of that comforting pork belly goodness.
Ingredients for Berkshire Pork Belly
Quality Berkshire pork belly makes all the difference in this comforting dish.
| Ingredient | Amount | Notes |
|---|---|---|
| Berkshire Pork Belly 🥩 | 2 lb | Skin on, high quality |
| Kosher Salt 🧂 | 2 tbsp | Diamond Crystal preferred |
| Black Pepper 🌶️ | 1 tbsp | Freshly ground |
| Brown Sugar 🍮 | 2 tbsp | Dark or light |
| Smoked Paprika 🌿 | 1 tsp | For smoky flavor |
| Garlic Powder 🧄 | 1 tsp | Not garlic salt |
| Onion Powder 🧅 | 1 tsp | For depth |
| Apple Cider Vinegar 🍎 | ¼ cup | For braising liquid |
| Olive Oil 🫒 | 2 tbsp | For rubbing pork |
| Fresh Thyme 🌿 | 4 sprigs | For aromatics |
| Bay Leaves 🍃 | 2 whole | For braising |
| Water 💧 | 1 cup | For braising liquid |
[recipeingredientscaler]
The pork belly matters here. Look for local farms or specialty butchers that source Berkshire pork. I’ve had great success with heritage pork from local farms. The quality shows in the final dish—better marbling means better flavor. If you can’t find Berkshire, look for other heritage breeds as a substitute.
No apple cider vinegar? White wine vinegar or rice vinegar can work as substitutes, but keep in mind they’ll change the flavor profile slightly. For the spices, Penzeys has excellent smoked paprika and high-quality black pepper. If you can’t find smoked paprika, regular paprika will do in a pinch. Fresh thyme is worth the trip to the farmer’s market if you’ve got one nearby.
This dish keeps beautifully—4-5 days in the fridge, 3 months in the freezer. Reheat low and slow to maintain that tender texture. I portion it into containers for easy reheating throughout the week. The flavors actually meld together better after a day or two, so it’s worth making ahead if you can.
❤️
Why You’ll Love berkshire pork belly
- Hands-Off Dinner: I love that this Berkshire pork belly recipe is basically a set-it-and-forget-it deal – I just rub the pork belly with kosher salt, black pepper, brown sugar, and smoked paprika, and let the magic happen.
- Smoky Sweetness: The combination of brown sugar and smoked paprika gives this pork belly a ridiculously good balance of sweet and smoky flavors that I just can’t get enough of – that crispy edge with the creamy center is basically perfection.
- Feeds the Crew: Honestly, this recipe makes a big enough batch that I can use it for meal prep throughout the week, or serve it to a crowd on the weekend – it’s my go-to for when I’ve got a lot of mouths to feed.
- Leftover Goldmine: I’ll be real: the leftovers from this Berkshire pork belly recipe are basically the best part – I use them to make sandwiches, salads, or just eat them straight out of the fridge (no judgments, right?).
Step-by-Step Instructions for Berkshire Pork Belly
Here’s the method to achieve that perfect, unctuous Berkshire pork belly you’ve been craving.
Step 1: Prepare the Pork Belly
Start by prepping the 2 lb Berkshire Pork Belly. I like to leave the skin on for that perfect crackling texture. Pat the pork belly dry with paper towels, making sure to remove any excess moisture. This step is crucial for achieving that perfect crispy skin later.
Next, mix together the 2 tbsp Kosher Salt, 1 tbsp Black Pepper, 2 tbsp Brown Sugar, 1 tsp Smoked Paprika, 1 tsp Garlic Powder, and 1 tsp Onion Powder in a small bowl. I find that using Diamond Crystal kosher salt gives the best flavor. Rub this spice mixture all over the pork belly, making sure to coat it evenly. Don’t be shy – use all of the spice mixture to get that perfect balance of flavors.
Step 2: Sear the Pork Belly
Heat 2 tbsp Olive Oil in a large Dutch oven over medium-high heat. When the oil is hot and shimmering, add the pork belly, skin side down if it has skin. Sear for 5-7 minutes on each side until it’s nicely browned. You’ll know it’s ready when the skin is crispy and golden brown. Remove the pork belly from the pot and set it aside on a plate.
Don’t worry if the pork belly sticks to the bottom of the pot at first – it will release once it’s properly seared. If you’re concerned about the oil smoking, you can add a pinch of the 2 tbsp Kosher Salt to help lower the smoke point.
Step 3: Braise the Pork Belly
Preheat your oven to 300°F. In the same Dutch oven, add the 0.25 cup Apple Cider Vinegar and 1 cup Water. Scrape up any browned bits from the bottom of the pot with a wooden spoon – these are packed with flavor. Bring the liquid to a simmer and cook for 2-3 minutes until it’s slightly reduced.
Return the pork belly to the pot, fat side up. Add the 4 sprigs Fresh Thyme and 2 whole Bay Leaves on top of the pork. Cover the pot with a lid and transfer it to the preheated oven. Braise for 2 1/2 to 3 hours until the pork is tender and easily shreds with a fork. You’ll know it’s done when the meat is fall-apart tender and the skin is crispy.
Step 4: Rest and Serve
Remove the pork belly from the oven and let it rest in the pot for 15-20 minutes before slicing. This allows the juices to redistribute, making the pork even more tender and flavorful. Slice the pork belly into thick slabs and serve with the braising liquid spooned over the top. I like to serve it with some crusty bread to mop up all that delicious sauce.
As you take your first bite, the tender meat should just melt in your mouth, and the crispy skin should provide a satisfying crunch. It’s the perfect comfort food dish that’s sure to impress your guests.
👨🍳
Pro Tips for Making berkshire pork belly
- Salt Early: Rub the Berkshire Pork Belly with kosher salt at least 2 hours before cooking to allow the meat to absorb the seasoning. This step makes a real difference in the depth of flavor.
- Low and Slow: Cook the pork belly at a low temperature, around 275°F, to break down the fat and connective tissues, resulting in tender and unctuous meat. I learned this the hard way—higher heat just doesn’t give the same results.
- Don’t Overcrowd: Make sure to give the pork belly enough space in the pan, as overcrowding can lead to steaming instead of browning. This is crucial for developing that perfect crust on the outside.
- Rest the Meat: After cooking, let the pork belly rest for 10-15 minutes before slicing. This allows the juices to redistribute, making the meat even more tender and flavorful.
Essential Equipment for This Dish
Essential Cooking Equipment
For this Berkshire pork belly recipe, you’ll need some essential equipment to achieve that perfect balance of crispy skin and tender meat. First and foremost, a large Dutch oven is crucial for both searing and braising the pork belly. I prefer using Le Creuset or Lodge cast iron as they retain heat beautifully and distribute it evenly.
Temperature Control Tools
Temperature control is critical when cooking pork belly. I always use a dual-probe thermometer to monitor both the oven temperature and the internal temperature of the meat. This ensures that your pork belly reaches the perfect internal temperature of 190-195°F for tender, fall-apart meat. My go-to brand is ThermoWorks as they offer accurate and reliable readings.
Preparation Tools
Having the right tools for preparation makes a big difference. You’ll need sharp boning knives for trimming the pork belly if necessary, and a meat mallet can be helpful for scoring the skin. I also recommend having a large cutting board for prepping your ingredients and a wooden spoon for scraping up those delicious browned bits from the Dutch oven.
Oven and Storage Equipment
A reliable oven thermometer ensures your oven is at the correct temperature, which is vital for slow-cooking the pork belly. For storage, I use glass containers with airtight lids to keep the leftovers fresh. If you plan on freezing some, heavy-duty freezer bags are perfect for maintaining quality.
Optional but Helpful Equipment
While not essential, a smoker can add an extra layer of flavor to your pork belly if you’re feeling adventurous. For serving, having a sharp slicing knife will help you achieve clean, even slices. I also appreciate using tongs for handling the pork belly during cooking and serving.
Tips & Tricks for Perfect Berkshire Pork Belly
A few key techniques can elevate this dish from great to unforgettable comfort food.
The Searing Technique: In Step 2, when searing the pork belly, make sure your Dutch oven is hot enough that the oil shimmers. This creates a beautiful crust on the pork belly. If you’re concerned about oil smoking, add a pinch of the 2 tbsp Kosher Salt to help lower the smoke point.
Braising Liquid Magic: When creating the braising liquid in Step 3, don’t skip scraping up those browned bits from the bottom of the pot. These add depth and complexity to the dish. The 0.25 cup Apple Cider Vinegar adds a nice tanginess that balances the richness of the pork.
Resting is Crucial: After braising, let the pork belly rest in the pot for the full 15-20 minutes before slicing. This allows the juices to redistribute, making the pork even more tender and flavorful. Trust me, the wait is worth it!
Serving Suggestion: I like to serve this Berkshire pork belly with crusty bread to mop up the delicious braising liquid. You can also serve it with roasted vegetables or mashed potatoes for a hearty meal.
Nutrition Facts
540kcal
Frequently Asked Questions
What’s the best way to achieve crispy skin on Berkshire pork belly?
To get that perfect crispy skin,
Can I make Berkshire pork belly ahead of time?
Yes, Berkshire pork belly is a great make-ahead dish. You can cook it up to 3 days in advance and store it in the refrigerator. Simply reheat it in the oven at 275°F until warmed through. This allows the flavors to meld together even more, making it even more delicious.
How do I store leftover Berkshire pork belly?
Store leftover Berkshire pork belly in an airtight container in the refrigerator for up to 4-5 days. You can also freeze it for up to 3 months. When reheating, do so gently in the oven with a bit of the braising liquid to keep it moist. This will help maintain the tender texture and rich flavors.