
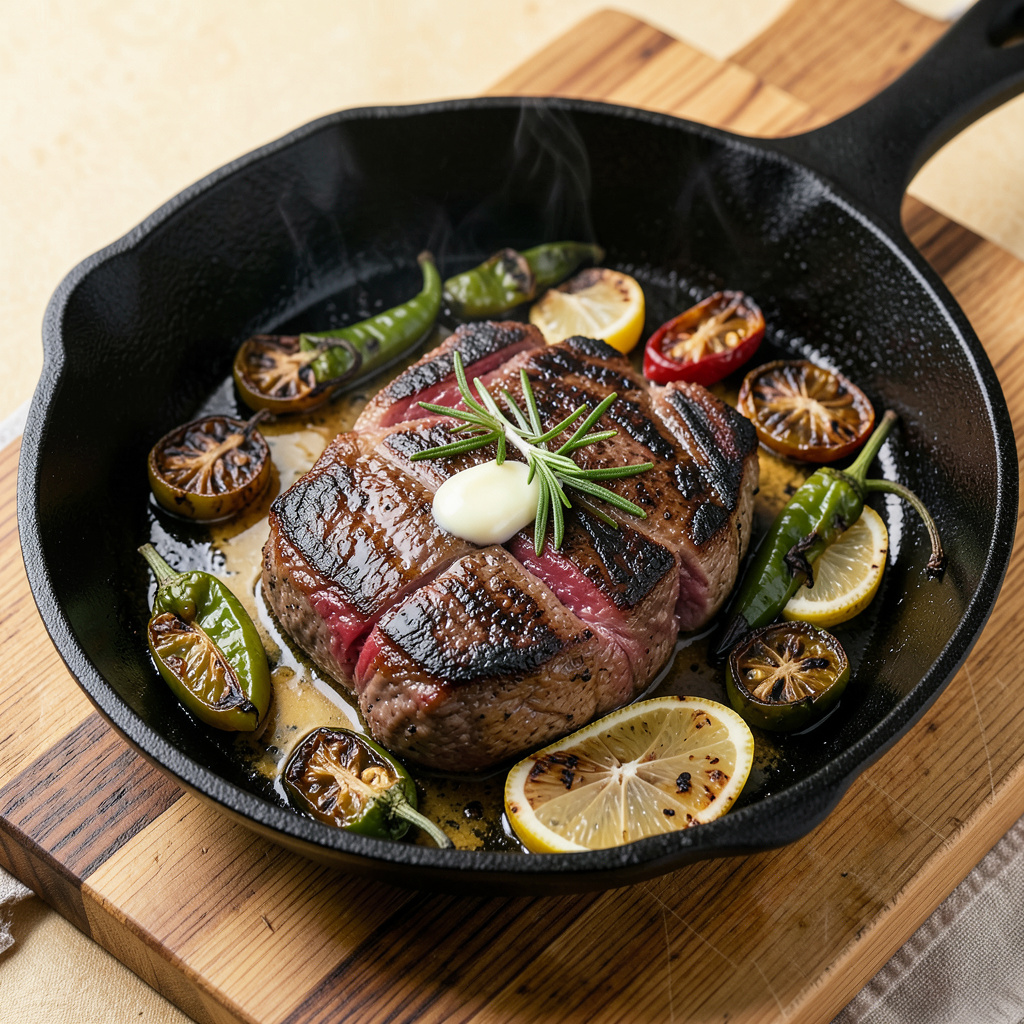
Here’s the thing—you don’t need a fancy broiler to get that perfect charred finish on your food. After years of working in professional kitchens (and plenty of trial and error at home), I’ve mastered the art of stovetop broiling using just a cast iron skillet and some smart heat management. This technique changed how I cook everything from steaks to vegetables.
The secret lies in using the right equipment and understanding how to control your heat source. A heavy cast iron skillet or grill pan becomes your broiler when you crank the heat to high and let it get screaming hot. I’ve used this method to achieve perfectly charred results on everything from salmon fillets to thick-cut pork chops—all without turning on my oven’s broiler.
What you’ll end up with is food that has that coveted crispy, caramelized exterior while staying juicy inside. The high heat creates those beautiful grill marks and deep flavors that make restaurant-quality dishes so satisfying. And here’s the bonus: cleanup is easier than dealing with a broiler pan, and you can do it year-round regardless of weather.
Whether you’re cooking in a tiny apartment kitchen or your oven’s broiler is on the fritz, this stovetop method delivers. Let me show you exactly how to set it up for foolproof results every time—no special equipment required beyond what you already have in your kitchen.
📚 In This Guide
- What You’ll Need
- Instructions
- Tips and Common Mistakes
What Youll Need
- ● Stovetop: A gas or electric stove with adjustable heat settings (high heat capability required).
- ● Heavy-bottomed skillet or grill pan: 10–12 inches, preferably cast iron or stainless steel for even heat distribution.
- ● Cooking oil: 1–2 tbsp of high-smoke-point oil (avocado, grapeseed, or refined coconut oil).
- ● Tongs or heat-resistant spatula: For flipping food safely.
- ● Oven mitts: Heat-resistant gloves to handle hot pans.
- ● Meat or veggies: Your choice (e.g., steak, chicken, asparagus, or bell peppers).
- ● Salt & seasonings: To taste (coarse salt works best for crust formation).
- ○ Optional: Meat thermometer (for precise doneness 🌡️).
- ● Butter or herbs (for basting).
- ● Exhaust fan or open window (for ventilation).
Step-by-Step Instructions for Broiling on the Stove
Here’s exactly how to get that perfect charred finish without an oven broiler—simple, effective, and foolproof.
Choose the Right Pan and Heat Source
Start by selecting a heavy-bottomed skillet or cast iron pan. I prefer cast iron because it retains heat beautifully and gives you that even char. Place it over medium-high heat and let it preheat for 5 minutes—you want it screaming hot before anything touches it.
This step is crucial because insufficient heat won’t give you that broiler-like effect. You’ll know it’s ready when you sprinkle a few drops of water on the surface and they dance across the pan before evaporating instantly. That’s your signal that the pan is hot enough to create the Maillard reaction we’re after.
Step 2: Prepare Your Food for Maximum Char
While the pan heats, pat your food completely dry with paper towels. Moisture is the enemy of good browning—it creates steam instead of that beautiful caramelization. I always use a second towel to make sure I’ve absorbed every last drop.
If you’re working with thicker cuts like steaks or chicken breasts, brush them lightly with high-smoke-point oil (avocado or grapeseed work well). For vegetables, toss them in just enough oil to coat lightly. This thin layer helps conduct heat and promotes even browning without making your food greasy.
Create the Broiler Effect with a Simple Technique
Here’s the secret: place a heatproof metal rack (like a cooling rack) inside your hot pan. This elevates your food so heat circulates all around it, mimicking a broiler’s top-down heat. Arrange your food on the rack in a single layer with space between pieces.
For thin items like fish fillets or sliced vegetables, you’ll only need 2-3 minutes per side. Thicker items like steaks or chicken breasts will need 4-5 minutes per side. Watch for that perfect golden-brown crust—it should form quickly. Don’t walk away; this happens fast!
Flip and Finish with Precision
Use tongs to flip your food—never pierce it with a fork. You’ll lose those precious juices we worked so hard to preserve. After flipping, you might notice the second side chars faster. That’s normal because the pan is even hotter now.
For the final touch, I like to add a pat of butter, some crushed garlic, and fresh herbs to the pan during the last minute. As the butter melts, spoon it over your food repeatedly. This basting technique adds incredible flavor and helps develop that glossy, restaurant-quality finish.
Rest and Serve Immediately
Transfer your beautifully charred creation to a warm plate and let it rest for 2-3 minutes before serving. This brief rest allows the juices to redistribute throughout the food instead of running out onto your plate when you cut into it.
The result should be perfectly caramelized on the outside with juicy, tender interior. You’ll get that distinctive broiled flavor—slightly smoky, deeply caramelized edges—without ever turning on your oven broiler. Serve immediately while the crust is still crisp and the interior is at its juiciest.
Tips and Common Mistakes for Perfect Stove-Top Broiling
Mastering this technique comes down to understanding heat behavior and timing. Here’s what I’ve learned from years of perfecting charred results without a broiler.
Heat Control: The 5 minutes of preheating in Step 1 isn’t arbitrary—it’s essential for building that intense, even heat. I’ve found that cast iron needs the full time to develop the thermal mass required for proper charring. If you rush this step, you’ll end up with pale, steamed food instead of that beautiful caramelization. Trust me, I’ve ruined more than one steak by being impatient with preheating.
The Technique That Changed Everything: When using the metal rack in Step 3, make sure it’s positioned so your food sits about 1-1.5 inches above the pan surface. This elevation creates the air circulation needed for even browning. I use a standard cooling rack turned upside down for stability. The 2-3 minutes for thin items and 4-5 minutes for thicker cuts are perfect benchmarks, but watch for that golden-brown color rather than the clock—it develops faster than you think.
Equipment Recommendation: Invest in a good pair of long-handled tongs for Step 4. The pan will be extremely hot, and you need precision when flipping. I prefer 12-inch tongs that give me control without getting my hands near the heat. The basting technique at the end is worth the extra effort—it adds that professional touch that makes restaurant-quality results achievable at home.
Resting is Critical: Those 2-3 minutes of resting in Step 5 might seem insignificant, but they make all the difference. I learned this the hard way after serving beautifully charred steaks that bled all over the plate when cut. The rest allows the muscle fibers to relax and reabsorb juices, keeping every bite tender and flavorful.
Pro Tips for Broil On Stove
- Mastering this technique comes down to understanding heat behavior and timing. Here’s what I’ve learned from years of…
- Heat Control: The 5 minutes of preheating in Step 1 isn’t arbitrary—it’s essential for building that intense, even he…
- The Technique That Changed Everything: When using the metal rack in Step 3, make sure it’s positioned so your food si…
Frequently Asked Questions
Can I broil on a stove if my oven doesn’t have a broiler?
Use a heavy skillet (cast iron works best) on high heat. Preheat it for 5–10 minutes, then add oil and your food. The direct heat mimics a broiler, creating a crispy, caramelized crust. Just watch closely to avoid burning!
How long does it take to broil on a stove compared to an oven?
Stove-top broiling is faster—most foods cook in 3–8 minutes per side (vs. 10–15 in an oven). Thin cuts (like fish or steak) may take just 2–4 minutes. Always check for doneness with a meat thermometer for safety.
What’s the best oil for stove-top broiling?
Choose oils with a high smoke point: avocado oil (520°F), refined coconut oil (450°F), or grapeseed oil (420°F). Avoid butter or olive oil—they burn easily. Lightly coat the pan and food to prevent sticking and maximize crispiness.
Why is my food burning instead of browning?
Two common culprits: heat too high or uneven pan contact. Reduce heat slightly and press food gently with a spatula for even searing. If using thin cuts, lower the temp and extend cooking time by 1–2 minutes.
Can I broil frozen food on the stove?
It’s risky—frozen food releases moisture, causing steam instead of a sear. Thaw first and pat dry for best results. If in a hurry, use medium heat and cover the pan for 2–3 minutes to melt ice, then uncover to broil.
Mastering how to broil on a stove opens up a world of crispy, caramelized flavors—no fancy broiler required! 🌟 With just a heavy pan, high heat, and a watchful eye, you can achieve restaurant-worthy char on meats, veggies, and even fruits. The key is patience and precision, so don’t rush the process.
Ready to put your new skills to the test? Grab your favorite protein or veggies and start searing tonight—your taste buds will thank you! For more stovetop tricks, check out our guide on reverse searing next. Happy cooking! 🍳