
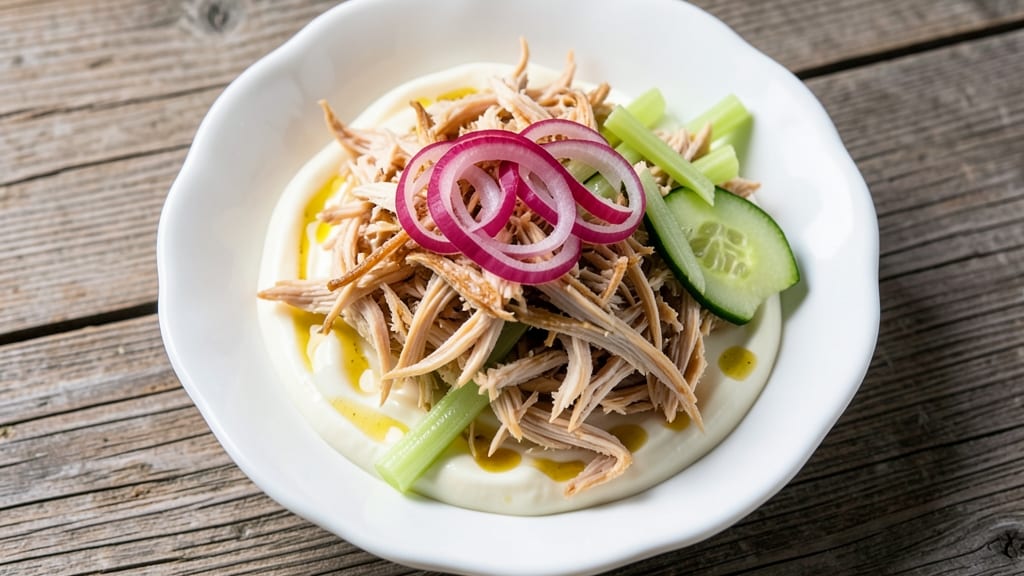
This chicken salad sliders recipe transforms a classic dish into crispy, handheld bites perfect for parties or quick lunches. The secret lies in perfectly seasoned chicken, creamy dressing, and tortillas baked until golden—no soggy sandwiches here.
I developed this version after years of hosting gatherings where guests always asked for “more of those sliders.”
The magic starts with shredded chicken tossed in a tangy mayo-based dressing, then folded into crispy tortilla shells that hold up to handling. Each slider delivers a satisfying crunch with every bite, thanks to a foolproof baking technique that ensures the tortillas stay sturdy.
This recipe serves 12 sliders in under 30 minutes, making it ideal for game days or potlucks.
What you’ll end up with is a plate of crispy sliders with tender chicken, creamy dressing, and a golden tortilla shell that won’t fall apart. The flavor balance is key—sweet, tangy, and savory all in one bite.
These sliders are hearty enough to be a main dish but light enough to serve as appetizers.
Pair with pickles, honey mustard, or a simple side salad for a complete spread. The recipe scales easily, so double the batch for a crowd. Let’s get started on these crowd-pleasing bites!
Ingredients for chicken salad sliders
Twelve crispy sliders with creamy chicken filling and golden tortilla shells—perfect for parties or game day.
| Ingredient | Amount | Notes |
|---|---|---|
| Cooked Chicken Breast 🍗 | 2 ½ lbs | Shredded, boneless, skinless |
| Mayonnaise 🥫 | ¾ cup | High-quality, full-fat preferred |
| Celery Stalks 🥬 | 2 whole | Finely diced, fresh |
| Red Onion 🧅 | ¼ cup | Finely diced, white or red |
| Fresh Cucumber 🥒 | ½ cup | Seedless, finely diced |
| Grapeseed Oil 🫒 | 1 tbsp | For crispy tortillas |
| Lemon Juice 🍋 | 2 tbsp | Freshly squeezed |
| Dijon Mustard 🍯 | 1 tbsp | For tangy dressing |
| Corn Flour Tortillas 🌽 | 12 whole | Medium size, 6-inch |
| Salt 🧂 | 1 tsp | Kosher or sea salt |
| Black Pepper 🌶️ | ½ tsp | Freshly ground |
| Garlic Powder 🧄 | ½ tsp | For seasoning chicken |
| Paprika 🌶️ | ½ tsp | Smoked for extra flavor |
The chicken is the foundation, so choose boneless, skinless breast for tender texture. I always shred it myself—rotisserie chicken works in a pinch but lacks the same freshness. For extra flavor, season the chicken with garlic powder, salt, and smoked paprika before cooking. The tortillas are key too—Mission brand gives the best crispiness, but any medium-sized corn tortilla will do. Look for ones with minimal preservatives if you can find them.
No fresh celery or cucumber? Dried celery seed and pickles can mimic the crunch, though texture will differ. For the dressing, Hellmann’s or Duke’s mayo is ideal, but any full-fat mayo works. If you’re watching calories, light mayo with extra lemon juice keeps it tangy. The lemon juice brightens everything up—freshly squeezed is best, but bottled works if you’re short on time. For extra tang, add a dash of hot sauce or sriracha to the dressing.
Prep the chicken and dressing ahead—they keep well for 2 days in the fridge. Tortillas stay crispy for 30 minutes at room temperature, so bake them fresh before serving. For make-ahead sliders, assemble and refrigerate uncooked, then bake straight from the fridge (add 2-3 minutes to baking time). These reheat beautifully—microwave 10 seconds for quick servings or toaster oven 2 minutes for extra crispiness.
Why You’ll Love This Recipe
- Here’s what sold me: I can make a big batch, store it in the fridge, and pull out sliders for days. The chicken stays juicy, the veggies don’t get soggy, and I’m not scrambling to figure out dinner. Plus, the onion and celery last longer than you’d think—win.
- Fridge-to-Table Magic: I swear by this recipe when I forget to meal prep—just shred leftover chicken, chop celery and onion (no knife skills required), mix with mayo, and boom. The cucumber adds that cool crunch without extra effort, and the sliders are ready faster than takeout.
- Creamy-Crunchy Balance: That mayo-soaked chicken with crisp celery and sharp red onion? It’s the kind of flavor combo that makes you pause mid-bite. The cucumber keeps it light, but the onion gives it a little kick—like a hug for your taste buds.
- Game Day Every Day: Between us, these sliders are my secret weapon for game nights, potlucks, or even a lazy Sunday. Serve them on Hawaiian rolls for a fancy touch, or just pile them on toast for a quick lunch. They’re the one dish that never feels like a chore to bring.
Step-by-step instructions for chicken salad sliders
Here’s how to assemble these crispy, flavorful sliders with perfect texture every time.
Prepare the Chicken Salad Filling
In a large mixing bowl, combine the 2.5 lbs shredded cooked chicken breast with the 0.75 cup mayonnaise. Use your hands to break up any large chicken chunks and distribute the mayonnaise evenly. This ensures a smooth, creamy base for your salad.
Next, add the finely diced celery stalks, 0.25 cup red onion, and 0.5 cup fresh cucumber. These vegetables add freshness and crunch while balancing the richness of the chicken. Stir well to incorporate everything completely. Taste the mixture and adjust seasoning with the 1 tsp salt, 0.5 tsp black pepper, 0.5 tsp garlic powder, and 0.5 tsp paprika as needed. The salad should be well-seasoned but not overly salty.
Make the Tangy Dressing
In a small bowl, whisk together the 2 tbsp lemon juice and 1 tbsp Dijon mustard. This combination adds a bright, tangy flavor that cuts through the richness of the chicken and mayo. Slowly drizzle in the 1 tbsp grapeseed oil while continuing to whisk until the dressing is smooth and emulsified.
Add this dressing to the chicken salad mixture and fold gently with a spatula. Be careful not to overmix, as this could break down the texture of the vegetables. The salad should be moist but not soupy. Cover the bowl and refrigerate for at least 30 minutes to allow the flavors to meld together. This chilling step also helps the flavors develop fully and makes the salad easier to handle when assembling the sliders.
Prepare the Crispy Tortilla Bites
Preheat your oven to 375°F and line a baking sheet with parchment paper. Brush each of the 12 corn flour tortillas lightly with a thin layer of the grapeseed oil using a pastry brush. This step is crucial for achieving that crispy texture you’re after. Place the oiled tortillas on the prepared baking sheet, arranging them in a single layer.
Bake for 5-7 minutes until the edges are golden brown and crispy. Watch them closely during the last minute to prevent burning. Once they’re done, remove the tortillas from the oven and let them cool for 2-3 minutes before handling. The tortillas will continue to crisp up as they cool, so don’t worry if they don’t look fully crisp immediately.
Assemble the Sliders
Once the tortillas are cool enough to handle, cut each one into quarters, creating 48 triangular pieces. This gives you enough for 12 sliders with 4 pieces per slider. Spread a generous spoonful of the chilled chicken salad onto each tortilla quarter. Be careful not to overfill, as the tortillas are delicate and may tear if overloaded.
For an extra touch, you can lightly toast the tortilla pieces in a dry skillet over medium heat for 30 seconds per side to enhance their crispiness. Arrange the sliders on a serving platter, ensuring they’re evenly spaced. Serve immediately while the tortillas are still crispy and the chicken salad is fresh. These sliders are perfect for parties, picnics, or a fun lunch option.
Pro Tips For Making Chicken Salad Sliders
- SHRED THE CHICKEN COLD: I learned this the hard way—warm chicken turns mushy in mayo. Let the cooked breast cool completely before shredding, or it’ll release too much moisture and make your sliders soggy. Pop it in the fridge for 10-15 minutes if you’re impatient to cut.
- DICE THE ONION SMALL: Big chunks of red onion scream “amateur.” Finely dice it—about 1/8-inch pieces—so it blends seamlessly into the salad without biting into your sandwich. (Yes, even if you hate chopping, this is the thing that matters most.)
- PRESS OUT CELERY MOISTURE: Celery’s natural water is the enemy of creamy texture. After dicing, wrap the stalks in a clean towel and squeeze gently to remove excess liquid. Trust me, your sliders will thank you—no one likes a watery bite.
- USE A SPLIT-SLICE CUCUMBER: Skip the peeling—just halve the cucumber lengthwise, scoop out the seeds with a spoon, and dice the flesh. It stays crisp longer and adds brightness without turning your salad into a swamp. (Your future self will thank you.)
Make-ahead tips for this chicken salad sliders
Prep Ahead
Make the chicken salad filling 2 days in advance—it tastes even better after flavors meld. Store it in an airtight container in the fridge. The tortillas, however, should be baked fresh 30 minutes before serving to maintain crispness.
If you must prep ahead, bake the tortillas, then store them in a single layer between parchment paper at room temperature. Reheat in a toaster oven at 350°F for 3-4 minutes before assembling sliders. 💡
Freezer-Friendly Assembly
For ultimate convenience, assemble the sliders unbaked and freeze them on a parchment-lined tray. Once frozen solid, transfer to a ziplock freezer bag with parchment between layers. Thaw in the fridge overnight, then bake straight from frozen at 375°F for 10-12 minutes (add 2-3 minutes if using a convection oven).
The tortillas will crisp up beautifully during baking. This method keeps them sturdy for 3 months in the freezer. ❄️
Reheating Secrets
Microwave reheating works in a pinch, but for best texture, use a toaster oven or air fryer. Place sliders on a wire rack over a baking sheet and heat at 350°F for 3-4 minutes—this prevents soggy tortillas.
For extra crispiness, sprinkle with powdered sugar or crushed cornflakes before reheating. If using a microwave, cover with a damp paper towel and heat in 20-second bursts until warm. Always check internal temperature reaches 165°F. 🔥
Batch Prep Tips
Double the recipe for crowds—just scale up all ingredients proportionally. Use two 9×13-inch baking sheets for tortillas to maximize oven space. Label containers with dates to track freshness. For large gatherings, pre-assemble sliders on foil-lined trays and refrigerate until serving.
Keep a small skillet nearby to crisp tortillas in batches as needed. This keeps everything organized and ready to serve. 💪
Flavor Boosts
Enhance make-ahead sliders with extra flavor layers. Add 1 tbsp chopped dill or 1 tsp dried tarragon to the chicken salad before refrigerating. For smoky depth, sprinkle ½ tsp smoked paprika on baked tortillas before cutting.
If storing longer than 24 hours, add a dash of hot sauce to the dressing to keep flavors vibrant. These tweaks make prepped sliders taste freshly made. 🌶️
Nutrition facts
Frequently asked questions
Can I use rotisserie chicken instead of cooked chicken breast?
Rotisserie chicken works perfectly and saves time. Just remove the skin and bones, then shred the meat into 2.5 lbs worth. For extra flavor, toss the shredded chicken with ½ tsp garlic powder and ½ tsp smoked paprika before mixing with the mayo. The texture will be slightly different but still delicious.
How do I keep the tortillas from getting soggy?
Prevent soggy tortillas by baking them fresh before assembling. Brush with grapeseed oil and bake at 375°F for 5-7 minutes until golden. Let them cool 2-3 minutes before cutting into quarters. For extra crispiness, toast the tortilla pieces in a dry skillet for 30 seconds per side before adding the filling.
What’s the best way to store leftovers?
Store assembled sliders in an airtight container with parchment paper between layers to maintain crispness. They’ll keep for 2 days in the fridge. For longer storage, freeze unbaked sliders on a tray, then transfer to a freezer bag for up to 3 months. Reheat in a toaster oven at 350°F for 3-4 minutes for best results.
Can I make these sliders gluten-free?
Yes! Swap the corn tortillas for gluten-free corn tortillas (like Mission brand) or use gluten-free slider buns if you prefer a softer texture. Just ensure all ingredients—like mayo and mustard—are certified gluten-free to avoid cross-contamination. The flavor and texture will be just as good.
What are the best toppings for these sliders?
Classic toppings include sliced pickles, honey mustard drizzle, or crumbled blue cheese. For extra crunch, add toasted almonds or crushed potato chips. Serve with a side of creamy coleslaw or roasted sweet potato wedges for a complete spread.