
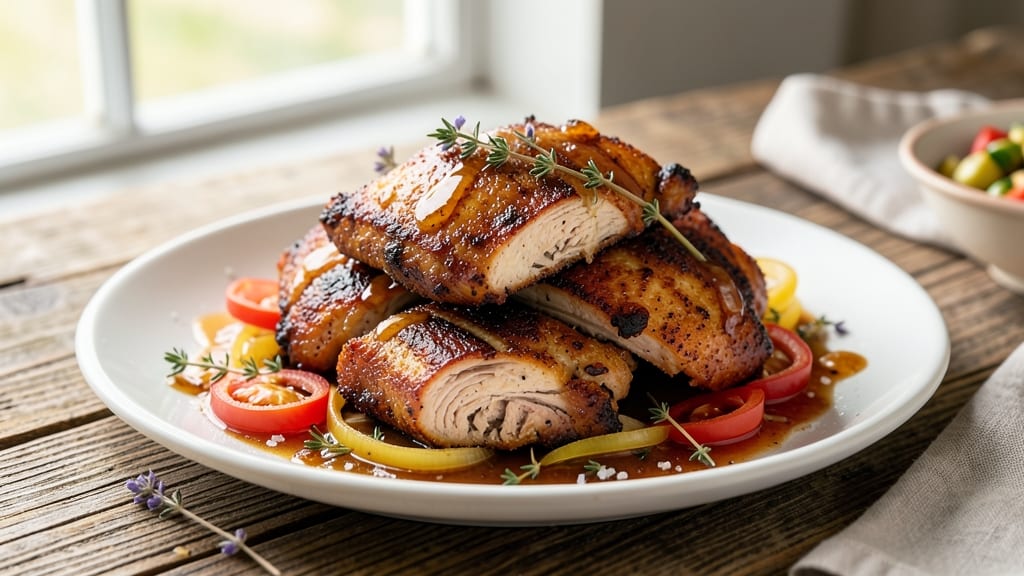
This chicken sandwich meat recipe transforms simple chicken thighs into crispy-topped, melt-in-your-mouth shreds that rival fast-food quality—without the grease. The secret lies in slow-cooking the chicken until tender, then finishing it under a broiler for that golden, crispy crust that holds every bite together.
I developed this method after years of experimenting with restaurant-style chicken sandwiches, and it’s now my go-to for homemade burgers, wraps, or loaded sandwiches that impress every time.
The process is straightforward but yields restaurant-quality results: bone-in chicken thighs stay juicy while the skin crisps to perfection, creating a texture that’s impossible to resist.
You’ll need just 30 minutes of active time followed by 2-3 hours of hands-off cooking, making it ideal for meal prep or a stress-free weeknight dinner.
The key steps—searing the chicken first, then braising it low and slow—ensure maximum flavor and tenderness, while the final broil delivers that coveted crispy finish.
Once shredded, this chicken transforms into a versatile filling for homemade burgers, loaded sandwiches, or even tacos, with a texture that’s crispy on top and juicy inside. The recipe serves 6-8 sandwiches, making it perfect for feeding a crowd or prepping meals ahead.
Pair it with your favorite buns, toppings, and sides for a complete meal that tastes like it came from a diner—but made with love (and better ingredients) at home.
For extra flavor, consider adding a pinch of smoked paprika or garlic powder to the braising liquid, or brush the chicken with a quick glaze of honey and mustard before broiling. The possibilities are endless, but the foundation—crispy, juicy, homemade chicken—is foolproof. Let’s get cooking!
Ingredients for chicken sandwich meat
These 12 ingredients deliver crispy, juicy chicken perfect for sandwiches, burgers, or wraps.
| Ingredient | Amount | Notes |
|---|---|---|
| Bone-In Chicken Thighs 🍗 | 4 lb | Skin-on for crispy texture, trimmed of excess fat |
| Yellow Onion 🧅 | 1 whole | Chopped into 1/2-inch pieces |
| Garlic Cloves 🧄 | 6 cloves | Smashed for maximum flavor |
| Chicken Broth 💧 | 2 cups | Low-sodium preferred |
| Apple Cider Vinegar 🍎 | 2 tbsp | For tenderizing and tang |
| Dried Thyme 🌿 | 1 tsp | Or 1 tbsp fresh thyme leaves |
| Smoked Paprika 🌶️ | 1 tsp | For subtle smoky depth |
| Ground Black Pepper 🌶️ | 1 tsp | Freshly cracked for best flavor |
| Kosher Salt 🧂 | 1 ½ tsp | Diamond Crystal preferred |
| Olive Oil 🫒 | 2 tbsp | For searing chicken |
| Unsalted Butter 🧈 | 2 tbsp | For final crispy finish |
| Fresh Parsley 🌿 | ¼ cup | Chopped for garnish |
The bone-in chicken thighs are non-negotiable here—they stay juicier than breasts and give you that crispy skin you crave. Grab family-sized thighs from the butcher section or pre-cut packs at Costco if you’re feeding a crowd. Look for thighs with a good layer of fat between the meat and skin, which guarantees crispiness. If you’re using pre-cut thighs, trim any excess fat to avoid greasiness. For extra flavor, ask the butcher to leave the skin on—it’s what creates that golden crust when seared properly. Trader Joe’s often has great deals on bone-in thighs, and their organic selection is worth the splurge if you’re into that.
No chicken broth? Low-sodium vegetable broth works in a pinch, but add a splash of soy sauce for depth. Fresh thyme is ideal, but dried thyme at one-third the amount gets you close—just make sure it’s not ancient dust in your spice rack. Smoked paprika is the secret weapon here; if you only have regular paprika, add a pinch of liquid smoke for that smoky kick. For the vinegar, apple cider vinegar gives the best balance, but white vinegar or red wine vinegar will work too. The olive oil should be light or extra-virgin—nothing fancy, just something you’d use for cooking. And that butter? Use unsalted so you control the seasoning, but don’t skimp on quality—Plugrá or Land O’Lakes are solid choices.
This chicken keeps beautifully—3-4 days in the fridge if stored properly. Shred it and portion into airtight containers with a layer of foil over the top to keep that crispy texture. For longer storage, freeze portions for up to 3 months. The best part? It reheats like a dream—30 seconds in the microwave or 5 minutes in a 350°F oven brings it back to life. Pro tip: Broil for 2-3 minutes before serving to restore that crispy top. Leftovers transform into loaded salads, breakfast hash, or even chicken pot pie—just toss them with some gravy and bake until bubbly.
Why You’ll Love This Recipe
- One-Pan Magic: I swear by this recipe because it’s the kind of meal that lets me multitask—simmer the thighs and onions in the same pot, then just shred when they’re tender. No chopping boards to clear, no extra pots to wash.
- Deep, Tangy Richness: That apple cider vinegar? It’s the secret—cuts through the fat of the bone-in thighs and leaves you with a sauce that’s sticky, sweet, and just a little sharp. Honestly, it’s the kind of flavor that makes you want to eat it straight from the spoon.
- Sandwich Hero: Between us, this is my go-to for game day, potlucks, or lazy Sundays. Slap it on a bun with pickles and hot sauce, or stuff it into wraps for a quick lunch. It’s the kind of meat that doesn’t quit—works every time.
- Budget-Friendly Leftovers: Bone-in thighs are cheaper than breasts, and this recipe stretches easily. I make a big batch, freeze half, and still have enough for sandwiches all week. (Yes, even on a Tuesday night.)
Step-by-step instructions for crispy-topped chicken sandwich meat
Here’s how to transform simple chicken thighs into perfectly crispy, flavorful shreds for burgers or sandwiches.
Sear the Chicken Thighs for Maximum Flavor
Pat the 4 lb bone-in chicken thighs completely dry with paper towels—this is crucial for crispy skin. Heat a large Dutch oven over medium-high heat and add 2 tbsp olive oil. Once shimmering, carefully place the thighs skin-side down in the pan. Press down gently on each piece for 30 seconds to prevent curling, then let them sear undisturbed for 5-6 minutes until the skin turns deep golden brown and crispy.
Flip the thighs and cook for another 4-5 minutes on the second side until they reach 165°F internally. Remove them from the pan and set aside on a plate, leaving the rendered fat in the pot. This initial sear creates the crispy texture you want in your sandwich meat while locking in juices.
Build the Flavorful Base with Aromatics
In the same Dutch oven (with all that delicious rendered fat), add 1 whole yellow onion chopped into ½-inch pieces and 6 smashed garlic cloves. Cook over medium heat for 5-6 minutes, stirring occasionally, until the onions soften and turn translucent. You’ll smell the garlic release its aroma—this is when you know it’s ready.
Stir in 2 tbsp apple cider vinegar, scraping up any browned bits from the bottom of the pot. This step deglazes the pan, capturing all those meaty flavors. Add 1 tsp dried thyme, 1 tsp smoked paprika, 1 tsp ground black pepper, and 1.5 tsp kosher salt, mixing well to coat the onions and garlic. Let the spices toast for 30 seconds—this deepens their flavor before we add the liquid.
Simmer in Flavorful Broth for Tender Shreds
Pour in 2 cups chicken broth and bring to a gentle simmer. Return the chicken thighs to the pot, skin-side up, and cover partially with a lid. Simmer over low heat for 30-40 minutes, until the chicken is fork-tender and the meat easily pulls apart. You’ll know it’s done when the juices run clear and the meat shreds with minimal resistance.
Here’s the thing—don’t rush this step. The low and slow cooking ensures tender, juicy chicken that won’t turn to mush when shredded. If the broth reduces too much, add a splash of water to keep the chicken moist. The skin should remain crispy while the meat becomes fall-apart tender.
Finish with Butter for Extra Crispiness
Once the chicken is fully cooked, remove the thighs from the pot and transfer them to a cutting board. Let them rest for 5 minutes before shredding with two forks. Discard any bones or excess fat. Return the shredded chicken to the pot with the onion and garlic mixture.
Add 2 tbsp unsalted butter and stir over medium heat for 2-3 minutes until the butter melts and the chicken is coated. This final step adds richness and helps create that perfect crispy texture on top of your sandwich meat. Taste and adjust seasoning if needed—you want a balance of savory, slightly tangy, and smoky flavors.
Garnish and Prepare for Serving
Remove the pot from heat and stir in 0.25 cup chopped fresh parsley. The parsley adds a bright, fresh finish that cuts through the richness of the chicken. Let the mixture cool for 5 minutes before serving—this allows the flavors to meld together and makes it easier to handle.
Your crispy-topped chicken sandwich meat is now ready to use! Pile it high on buns with your favorite toppings, or form into patties for homemade burgers. The crispy texture on top contrasts beautifully with the tender, juicy interior—this is what makes homemade sandwich meat worth the effort. Store any leftovers in the refrigerator for up to 4 days or freeze for 3 months.
Pro Tips For Making Chicken Sandwich Meat
- SEAR THE SKIN FIRST: Hit the bone-in thighs skin-side down in a hot pan—no oil needed, just let the fat render. I learned this the hard way: skipping the sear means flavorless, greasy meat instead of crispy, golden edges that hold up to shredding.
- CHAR THE ONIONS: Don’t just slice—cut onions into thick wedges and blacken them in the same pan before adding broth. The caramelized bits dissolve into the sauce, giving that deep, smoky sweetness you’d pay extra for at a sandwich shop.
- DON’T RUSH THE VINEGAR: Add apple cider vinegar last, when the chicken’s almost done, and let it simmer just 2–3 minutes. Too early, and the acid turns the meat rubbery; too late, and you miss the bright tang that cuts through the richness.
- SHRED WITH TWO FORKS: After pulling the chicken, give it a solid 5-minute rest under foil—then shred with two forks, not a knife. The forks catch the connective tissue, making the meat pull apart cleanly into sandwich-friendly strands. (Yes, even if you’re impatient like me.)
Wine and beer pairings for this chicken sandwich meat
Crispy Chicken & Lager
For a classic pub-style pairing, reach for a crisp, refreshing American lager like Bud Light Platinum or Coors Banquet. The light body and subtle malt sweetness complement the smoky, slightly tangy flavors of the chicken without overpowering it.
I love how the effervescence cleanses your palate between bites of crispy, buttery chicken. 🍺
If you prefer a craft option, try a Belgian witbier like Hoegaarden—the citrusy coriander notes and slight tartness mirror the apple cider vinegar in the recipe. The effervescence also helps cut through the richness of the butter-finished chicken. Serve both beers chilled to 40°F for optimal flavor.
Bold Red Wine
A medium-bodied Pinot Noir from Oregon or California is my go-to wine pairing. Look for bottles with notes of cherry, vanilla, and subtle earthiness—these harmonize beautifully with the smoked paprika and thyme in the chicken.
I recommend La Crema Sonoma Coast Pinot Noir or Belle Glos Pinot Noir for their food-friendly balance. 🍷
For a bolder option, try a Zinfandel with 12-14% ABV, like Ravenswood Old Vine Zinfandel. The fruit-forward flavors and slight spice complement the crispy chicken, while the alcohol helps cut through the butter. Serve slightly cooler than room temperature (55-60°F) to enhance its freshness.
Lighter White Wine
If you prefer white wine, a dry Riesling from Germany or Washington State works surprisingly well. The bright acidity and mineral notes contrast the richness of the chicken, while the subtle sweetness balances the tangy vinegar.
I love Dr. Loosen Blue Slate Riesling or Chateau Ste. Michelle Riesling for their versatility. Chill to 45-50°F for the best experience.
Avoid heavy, oaky whites like Chardonnay—they’ll clash with the smoky, crispy flavors. Instead, opt for something crisp and mineral-driven, like a Sauvignon Blanc with citrus and herbaceous notes, such as Kim Crawford Sauvignon Blanc from New Zealand.
Non-Alcoholic Options
For a refreshing non-alcoholic pairing, try a sparkling apple cider like Martinelli’s Sparkling Cider. The fizzy, slightly tart profile mirrors the apple cider vinegar in the recipe while keeping the meal light. Serve chilled to 40°F for the best experience. 🍎
Another great option is a ginger beer, like Brew Dr. Brown’s. The spicy kick and effervescence complement the smoky, crispy chicken beautifully. Look for versions with real ginger and no added sugar to keep it refreshing. Pair it with a side of pickles for a classic diner-style combo.
Nutrition facts
Frequently asked questions
Why use bone-in chicken thighs instead of breasts?
Bone-in thighs stay juicier than breasts because they cook slower and retain moisture better. The skin also crisps to perfection while the meat remains tender. Plus, the bone adds natural flavor during cooking—something you won’t get with boneless cuts. For best results, always use skin-on thighs!
Can I substitute chicken breasts in this recipe?
Yes, but expect less crispy skin and potentially drier meat. Use 2.5 lbs boneless, skinless breasts instead of thighs, and reduce cooking time to 15-20 minutes after searing. For extra moisture, add ¼ cup chicken broth to the pan while cooking. The texture won’t be identical, but it’ll still work for sandwiches!
How do I get the crispy top on sandwich meat?
The secret is the final butter broil step! After shredding, return the chicken to the pot with 2 tbsp butter and cook on medium heat for 2-3 minutes. Then transfer to a baking sheet and broil for 1-2 minutes until golden. This creates that perfect crispy crust that holds together in sandwiches.
What’s the best way to store leftover chicken sandwich meat?
Store in an airtight container with a layer of foil pressed directly on top to preserve crispiness. Keeps 3-4 days in the fridge or 3 months in the freezer. To reheat, microwave for 30 seconds or broil for 2-3 minutes to restore crispiness. Pro tip: Freeze in single-serving portions for easy sandwich assembly later!
Can I make this chicken sandwich meat in a slow cooker?
Sear the thighs first, then transfer to a slow cooker with all ingredients (except butter). Cook on low for 4-5 hours or high for 2-3 hours. Finish with the butter broil step as directed. The slow cooker method is perfect for hands-off prep—just don’t skip the initial sear for that crispy texture!