
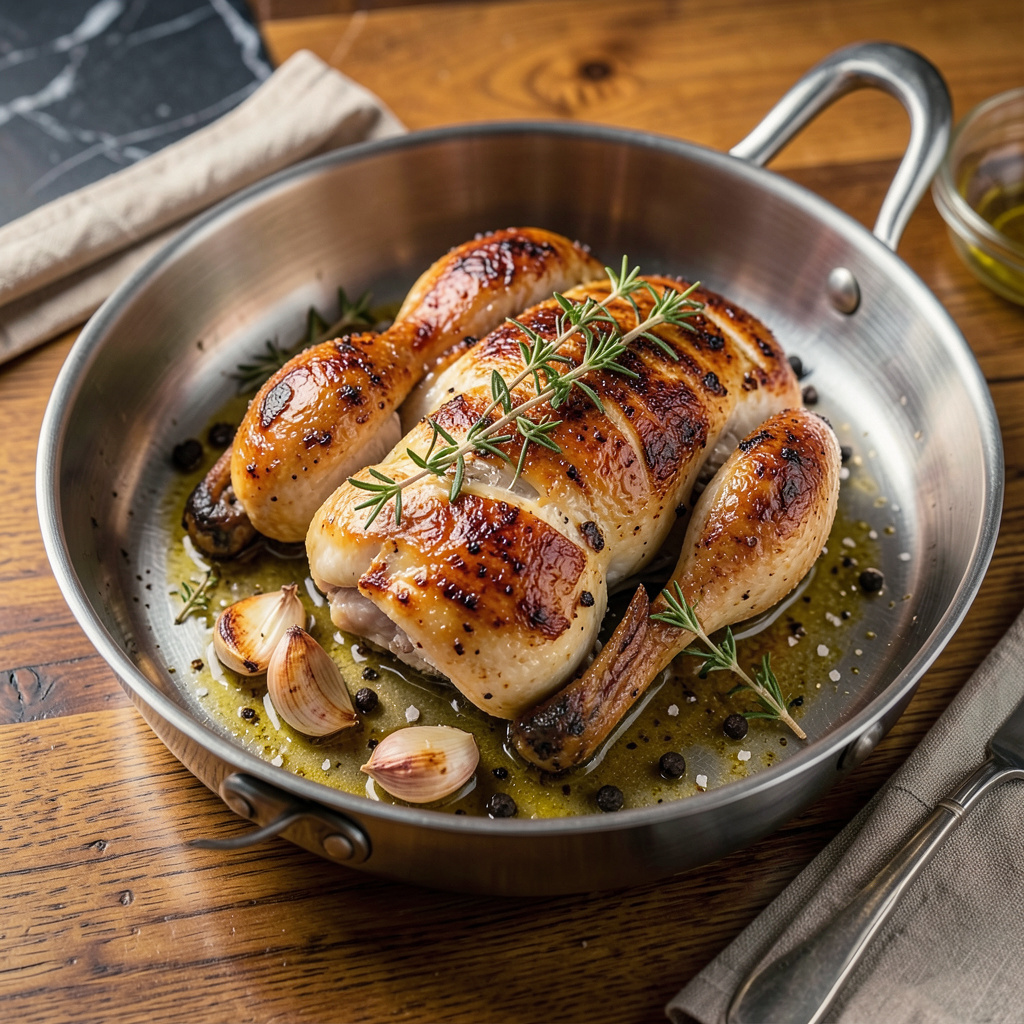
Let me tell you something—cooking chicken in stainless steel isn’t just possible, it’s the secret to getting that golden crispy skin you dream about. I’ve been using this method for years in professional kitchens, and once you nail the technique, you’ll never go back to non-stick. There’s a reason chefs swear by stainless steel: it gives you that perfect sear and even browning that other pans just can’t match.
The key is all in the prep and heat control. I dry my chicken thoroughly (paper towels are your friend), get the pan screaming hot, and use just enough oil to create that magical Maillard reaction. That’s the science behind why your chicken turns out with that beautiful golden crust instead of steaming in its own juices. And here’s the thing—when you do it right, the chicken practically lifts itself off the pan when it’s done.
What you end up with is juicy meat with crispy skin that shatters when you cut into it, plus all those flavorful browned bits in the pan that become the foundation for incredible pan sauces. I finish mine with a quick deglaze of white wine and butter—trust me, you’ll want to sop up every last drop with some crusty bread.
This method works for thighs, breasts, or even whole chickens cut into pieces. Once you try it, you’ll understand why stainless steel is the only way to cook chicken that actually tastes like it came from a restaurant kitchen. Ready to get that perfect sear?
📚 In This Guide
- What You’ll Need
- Instructions
- Tips and Common Mistakes
What Youll Need
- ● Chicken: 1–2 lbs (450–900g) of bone-in, skin-on thighs or breasts (pat very dry for crispiness!)
- ● Stainless steel pan: 10–12″ heavy-bottomed (like blank” rel=”noopener”>All-Clad or blank” rel=”noopener”>Cuisinart) for even heat
- ● Oil: 1–2 tbsp high-smoke-point oil (avocado, grapeseed, or refined coconut oil)
- ○ Seasonings: 1 tsp salt, ½ tsp black pepper, plus optional garlic powder, paprika, or herbs
- ● Tongs or spatula: Metal or heat-resistant silicone for flipping
- ● Meat thermometer: Instant-read (for perfect 165°F internal temp)
- ● Paper towels: 2–3 sheets to pat chicken dry and blot excess oil
- ○ Optional: 1 tbsp butter + fresh herbs (thyme/rosemary) for basting
- ○ Optional: Lemon wedges or minced garlic for extra flavor
Instructions for Cooking Chicken in Stainless Steel Pan
Here’s the foolproof method I use to get perfectly crispy skin and juicy meat every single time.
Prep the Chicken for Maximum Crispiness
Start by patting your chicken pieces completely dry with paper towels. I mean REALLY dry—any moisture on the skin will steam instead of crisp. Pay special attention to the skin side and any crevices where water might hide. This step is absolutely crucial for that golden-brown finish we’re after.
Next, season both sides aggressively with salt and pepper. I like to use about 1 teaspoon of salt per pound of chicken—don’t be shy! The seasoning should be visible on the surface. Let the chicken sit at room temperature for 15-20 minutes before cooking. This takes the chill off and helps the meat cook more evenly.
Heat the Pan Properly (This Makes All the Difference)
Place your stainless steel pan over medium-high heat and let it get screaming hot. You’ll know it’s ready when you can hold your hand about 3 inches above the pan and feel intense heat radiating (about 2-3 minutes for most stovetops). This high heat creates that beautiful Maillard reaction we want for crispy skin.
Add just enough oil to lightly coat the bottom of the pan—about 1-2 tablespoons—and swirl to distribute. When the oil starts to shimmer and you see faint wisps of smoke, you’re ready to cook. Here’s the thing—if the oil isn’t hot enough when you add the chicken, it’ll absorb into the skin instead of creating that perfect crust.
Cook the Chicken Using the Two-Stage Method
Lay the chicken pieces in the pan skin-side down, starting with the thickest pieces first. You should hear an immediate sizzle—if you don’t, your pan wasn’t hot enough. Don’t touch it for the first 3-4 minutes! Let that skin develop a golden crust. You’ll see the edges start to turn opaque and rise up from the pan—that’s your visual cue it’s working.
After the initial sear, reduce the heat to medium and continue cooking for another 8-10 minutes, occasionally spooning the hot oil over the chicken to baste it. Flip only when the skin releases easily from the pan—if it sticks, it needs more time. Cook the other side for 5-6 minutes until the internal temperature reaches 165°F.
Rest and Serve for Perfect Juiciness
Transfer the chicken to a wire rack set over a plate (not directly on the plate—this would make the skin soggy). Let it rest for 5-10 minutes before serving. I know it’s tempting to dig in right away, but this resting period allows the juices to redistribute throughout the meat instead of running out onto your cutting board.
You’ll know you’ve nailed it when the skin is deep golden brown and audibly crispy when cut, while the meat remains tender and juicy. The resting time also gives you a chance to make a quick pan sauce with all those flavorful browned bits left in the pan—just deglaze with a splash of chicken stock or white wine!
Tips and Common Mistakes for Perfectly Crispy Chicken
These game-changing insights will transform your chicken from good to restaurant-quality every single time.
Drying Technique: I can’t stress enough how critical Step 1’s drying process is! Use three layers of paper towels and press firmly—you should hear the moisture being absorbed. Here’s what nobody tells you: even slightly damp skin will create steam pockets that prevent crispiness. For extra insurance, let the uncovered chicken sit in the fridge for 30 minutes after patting dry to further evaporate surface moisture.
Heat Control: In Step 2, that 2-3 minute pan heating time is non-negotiable. Here’s my pro trick: sprinkle a few drops of water in the pan—if they dance and evaporate instantly, you’re ready. If they just sit and bubble, wait another minute. The oil should be just shy of its smoke point when you add the chicken; you’ll see tiny ripples across the surface when it’s perfect.
The Flip Test: During the 3-4 minute initial sear in Step 3, resist the urge to peek! But here’s how to know it’s ready to flip without lifting: gently tilt the pan—if the chicken slides easily when tilted, the crust has formed. If it sticks, give it another 30 seconds. This visual confirmation prevents the heartbreak of torn skin.
Resting Wisdom: That 5-10 minute rest in Step 4 isn’t just about juices—it’s when the skin reaches its peak crispiness! As the chicken rests, moisture continues evaporating from the skin surface, making it even crunchier. Place it on that wire rack near your stove’s pilot light or in a turned-off warm oven to maintain temperature while resting.
Pro Tips for Cooking Chicken In Stainless Steel Pan
- These game-changing insights will transform your chicken from good to restaurant-quality every single time.
- Drying Technique: I can’t stress enough how critical Step 1’s drying process is! Use three layers of paper towels and…
- Heat Control: In Step 2, that 2-3 minute pan heating time is non-negotiable. Here’s my pro trick: sprinkle a few drop…
Frequently Asked Questions
Why does my chicken stick to the stainless steel pan even after preheating?
Sticking usually happens if the pan isn’t hot enough or the chicken skin isn’t dry. Pat the chicken thoroughly with paper towels before cooking, and preheat the pan on medium-high for 2–3 minutes until a drop of water sizzles and evaporates instantly. Also, avoid moving the chicken too soon—let it sear undisturbed for 3–4 minutes to form a crust.
How long should I cook chicken breast (or thighs) in a stainless steel pan?
Boneless chicken breasts take 5–7 minutes per side on medium heat (until 165°F internally). Bone-in thighs need 6–8 minutes per side (175°F for crispy skin). Use a meat thermometer for accuracy—overcooking dries out chicken! Pro tip: Let it rest 5 minutes before slicing.
Can I use oil substitutes like butter or ghee for cooking chicken in stainless steel?
Yes! Butter adds rich flavor but burns faster—use a 50/50 mix with oil (like avocado or grapeseed) to raise the smoke point. Ghee works great for high-heat searing (smoke point ~485°F). Avoid extra-virgin olive oil for high heat; save it for finishing.
Why is my chicken skin not crispy, even after cooking?
Three common culprits: moisture (pat skin dry!), low heat (sear on medium-high), or crowding (cook in batches). For extra crispiness, press the chicken gently with a spatula during cooking to ensure even contact. Finish with a splash of oil in the last 2 minutes for a glossy crust!
What’s the best way to clean a stainless steel pan after cooking chicken?
Let the pan cool slightly, then soak in warm, soapy water for 10–15 minutes to loosen stuck bits. Use a non-abrasive scrubber (like a nylon brush) and baking soda paste for tough residues. Avoid steel wool—it scratches! For stuck-on fond, deglaze with water or broth while the pan is still warm.
Mastering cooking chicken in a stainless steel pan is all about patience, heat control, and technique. With the right prep—like drying the chicken and preheating the pan—you’ll achieve perfectly crispy skin and juicy meat every time, without the stick. 🍗✨
Now that you’ve got the know-how, it’s time to put it into practice! Start with a simple recipe, like pan-seared chicken thighs or a classic breast, and experiment with herbs or marinades. Ready to level up? Try one-pan chicken dinners for an easy, flavorful meal!