
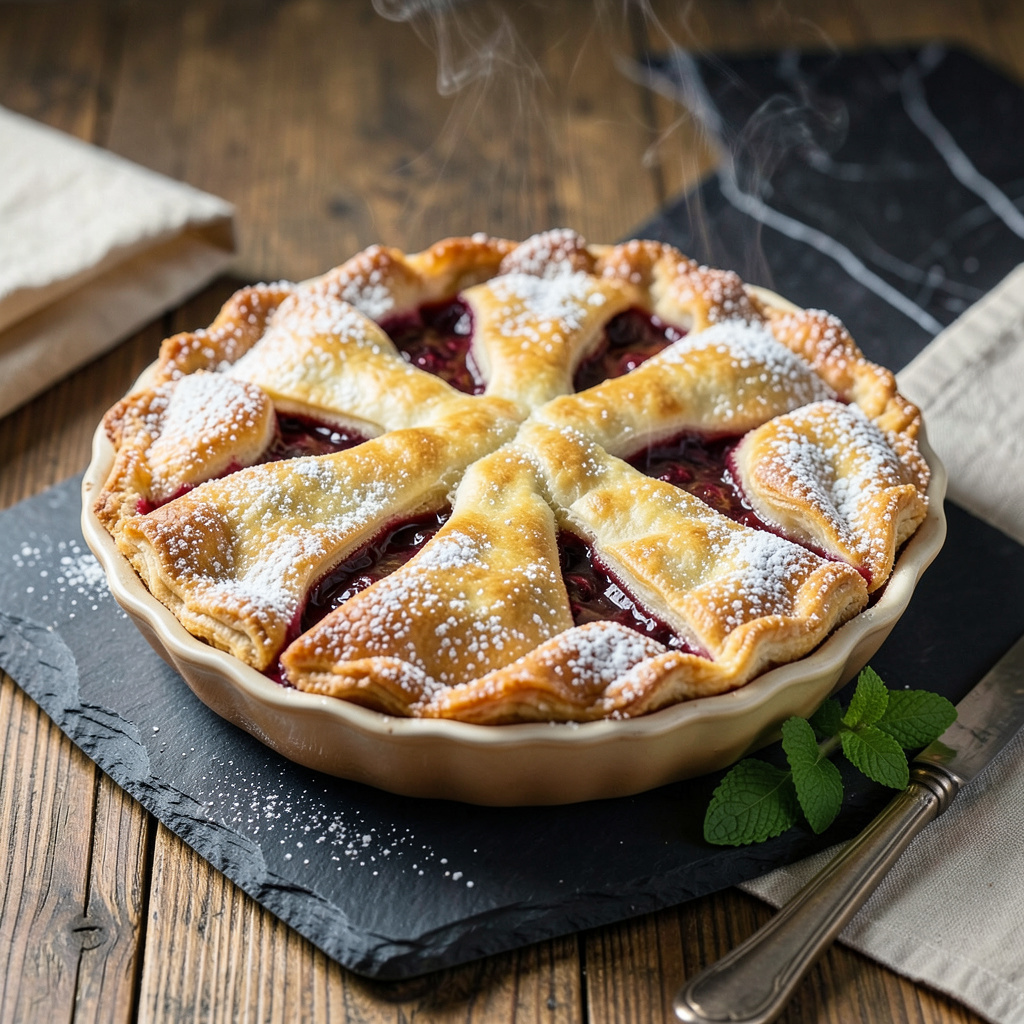
I’ll be real with you—baking a pie straight from frozen can feel like rolling the dice. Will the crust burn before the filling heats through? Will the bottom stay soggy? After testing more frozen pies than I care to admit (including one memorable Thanksgiving disaster), I’ve cracked the code for perfectly golden crust and fully cooked filling every single time.
Here’s the thing—most people make two critical mistakes: either not preheating the oven long enough or skipping the egg wash. I’ve found that starting with a 425°F oven for the first 15 minutes creates that initial blast of heat needed to set the crust before the filling has time to thaw and make everything soggy. The egg wash isn’t just for looks; it forms a protective barrier that helps prevent moisture from seeping in.
The real magic happens when you know exactly when to tent with foil. Too soon and you’ll steam the crust; too late and you risk burning. My foolproof method involves checking at the 30-minute mark—when the edges are just starting to brown but the center still needs time. This timing ensures you get that coveted deep golden color without overcooking.
Whether it’s a fruit pie that needs bubbling juices or a custard that should just barely jiggle, I’ll walk you through the visual cues that matter. No more guessing if it’s done or worrying about that dreaded soggy bottom. This method works for store-bought or homemade frozen pies—just follow the temperature guide and timing adjustments I’ve perfected through (literally) hundreds of test batches.
📚 In This Guide
- What You’ll Need
- Instructions
- Tips and Common Mistakes
What Youll Need
- ● Frozen pie: 1 pre-made frozen pie (9-inch standard size; check label for baking instructions).
- ● Baking sheet: 1 heavy-duty, rimmed sheet (prevents spills and promotes even heat).
- ● Aluminum foil or pie shield: 1 sheet (to protect edges from over-browning).
- ○ Oven thermometer: Optional but recommended (ensures accurate temperature).
- ● Pastry brush: 1 small brush (for egg wash or butter glaze).
- ○ Egg wash: Optional – 1 egg + 1 tbsp water (for a shiny crust).
- ○ Coarse sugar: Optional – 1-2 tsp (for a sparkly, crunchy finish).
- ● Cooling rack: 1 wire rack (prevents soggy bottoms post-bake).
- ● Kitchen timer: Or smartphone (to track baking time precisely).
- ● Oven mitts: Heat-resistant pair (safety first!).
Instructions
Here’s how to transform your frozen pie into a golden, flaky masterpiece without any guesswork.
Preheat Your Oven Properly
Start by positioning your oven rack in the lower third of the oven—this ensures the bottom crust gets enough heat to crisp up. Preheat to 425°F for at least 20 minutes before baking. I always use an oven thermometer to verify the temperature because many ovens run hot or cold, and precise heat is crucial for even baking.
While the oven heats, remove your frozen pie from the freezer but don’t unwrap it yet. Let it sit at room temperature for 15-20 minutes—just enough to take the chill off but not so long that the crust begins to thaw. This prevents temperature shock when it hits the hot oven, which can lead to soggy bottoms or cracked tops.
Prepare the Pie for Even Baking
Unwrap the pie and place it on a baking sheet lined with parchment paper. This makes removal easier and prevents any potential drips from making a mess. If your pie has a top crust, use a sharp knife to cut 3-4 small slits in the center—this allows steam to escape and prevents the filling from bubbling over.
For extra insurance against a soggy bottom, I like to brush the bottom crust lightly with a beaten egg white before baking. This creates a protective barrier between the crust and filling. If your pie doesn’t have a top crust (like a pumpkin or custard pie), cover the edges with aluminum foil or a pie shield to prevent over-browning during the longer bake time.
Bake with Strategic Temperature Adjustments
Place the pie in the preheated oven and bake at 425°F for 20 minutes. This initial high heat gives the crust a head start on browning and helps set the structure. After 20 minutes, reduce the temperature to 375°F and continue baking. The lower temperature allows the filling to heat through gently without burning the crust.
Bake for an additional 30-40 minutes for fruit pies or 40-50 minutes for custard/cream pies. You’ll know it’s done when the crust is deep golden brown and the filling is bubbling vigorously through the vents (for fruit pies) or just set with a slight jiggle in the center (for custard pies). If the edges brown too quickly, tent them with foil.
Cool Properly for Clean Slices
Remove the pie from the oven and transfer it to a wire rack. Let it cool for at least 2 hours before slicing—this is the hardest part, I know, but it’s crucial. Cutting too soon causes the filling to run out and the crust to lose its crispness. The cooling time allows the filling to set properly and the crust to firm up.
For fruit pies, you can serve them slightly warm (after the 2-hour rest), but custard pies taste best completely cooled and even benefit from 4 hours of chilling in the refrigerator. The waiting pays off when you get that perfect slice that holds its shape on the plate, with a flaky crust that shatters beautifully under your fork.
Tips and Common Mistakes
Getting that perfect golden crust from a frozen pie takes more than just following the steps—it’s about understanding why each detail matters. Here’s what I’ve learned from years of baking pies that come out flawless every time.
Temperature Strategy: The 15-20 minutes at room temperature before baking isn’t just about thawing—it’s about preventing what I call “oven shock.” When a completely frozen pie hits that 425°F oven, the sudden temperature change can cause the crust to steam instead of crisp. I’ve found that this short rest period allows the crust to warm gradually, which means it will start browning immediately when it hits the oven rather than absorbing moisture. Don’t rush this step, but don’t let it go longer either—you want the pie still cold in the center when it starts baking.
Crust Protection: In Step 2, when you’re preparing the pie, that egg white wash on the bottom crust is my secret weapon against soggy bottoms. The protein in the egg white creates a thin barrier that prevents fruit juices or custard from seeping into the crust during baking. I use about 1 tablespoon of lightly beaten egg white and brush it very thinly—you shouldn’t see pools of egg white, just a light sheen. For extra insurance with very juicy fruit pies, you can also sprinkle 1 teaspoon of quick-cooking tapioca or cornstarch over the filling before adding the top crust.
Baking Precision: The temperature drop from 425°F to 375°F after the first 20 minutes isn’t arbitrary—it’s crucial for even baking. That initial blast of high heat sets the crust structure and starts the browning process, while the lower temperature allows the filling to heat through without burning the crust. I always set a timer for exactly 20 minutes and check the crust color at that point. It should be just starting to turn golden. If your oven runs hot (as many do), you might need to reduce to 375°F a few minutes early to prevent over-browning.
Cooling Discipline: I know waiting 2 hours to slice into that beautiful pie feels like torture, but this is where most people ruin all their hard work. The filling needs this time to set properly—especially for fruit pies where the juices need to thicken. For custard pies, the 4 hours of chilling isn’t just about temperature, it’s about texture. The custard continues to firm up as it cools, and skipping this step means you’ll have a filling that’s more like soup than silky custard. I like to make pies in the morning so they have plenty of time to cool before dinner.
Pro Tips for Cooking Pie From Frozen
- Getting that perfect golden crust from a frozen pie takes more than just following the steps—it’s about understanding…
- Temperature Strategy: The 15-20 minutes at room temperature before baking isn’t just about thawing—it’s about prevent…
- Crust Protection: In Step 2, when you’re preparing the pie, that egg white wash on the bottom crust is my secret weap…
Frequently Asked Questions
Got questions about baking a pie straight from the freezer? You’re not alone! Here are the most common concerns—and quick answers—to help you nail that flaky, golden crust every time.
Can I bake a frozen pie without thawing it first?
Absolutely! Most frozen pies (especially fruit or cream varieties) are designed to go directly from freezer to oven. Just add 10–20 extra minutes to the baking time. Check the package for specifics—some custard or meringue pies may need partial thawing for even cooking.
How do I prevent a soggy bottom crust?
The secret? Heat and airflow. Preheat your oven fully (400°F+), place the pie on the lower rack, and use a baking sheet or pizza stone underneath. For fruit pies, sprinkle a thin layer of cornstarch or flour on the frozen filling before baking to absorb excess moisture.
My pie’s edges are browning too fast—what should I do?
Foil is your friend! Loosely tent the crust edges with aluminum foil (or use a pie shield) after 20–30 minutes. If the center isn’t done but the edges are dark, lower the oven temp by 25°F and extend baking time in 5-minute increments.
Can I use a glass or metal pan for a frozen pie?
Metal pans (especially dark-colored) are ideal—they conduct heat faster, helping the crust crisp. Glass works but may require 5–10 extra minutes. Avoid ceramic or stoneware unless the pie instructions specify; they can cause uneven baking from frozen.
What if my frozen pie doesn’t have baking instructions?
No panic! For a standard 9-inch pie, bake at 400°F for 20 minutes, then reduce to 350°F for 30–45 minutes (until bubbly and golden). Insert a knife into the center—if it’s hot to the touch, it’s done. For custard pies, aim for a slight jiggle in the center (it’ll set as it cools).
Baking a pie straight from the freezer doesn’t have to be intimidating—now you’ve got the secrets to a flaky, golden crust and a perfectly cooked filling every time! 🥧✨ Whether it’s a fruit-filled classic or a savory masterpiece, patience and the right technique make all the difference. Next time you’re craving homemade pie, skip the thawing stress and try one of these methods with confidence.
Ready to put your skills to the test? Pick your favorite frozen pie, preheat that oven, and get baking—your taste buds (and dinner guests!) will thank you. Which pie will you try first? 😊