
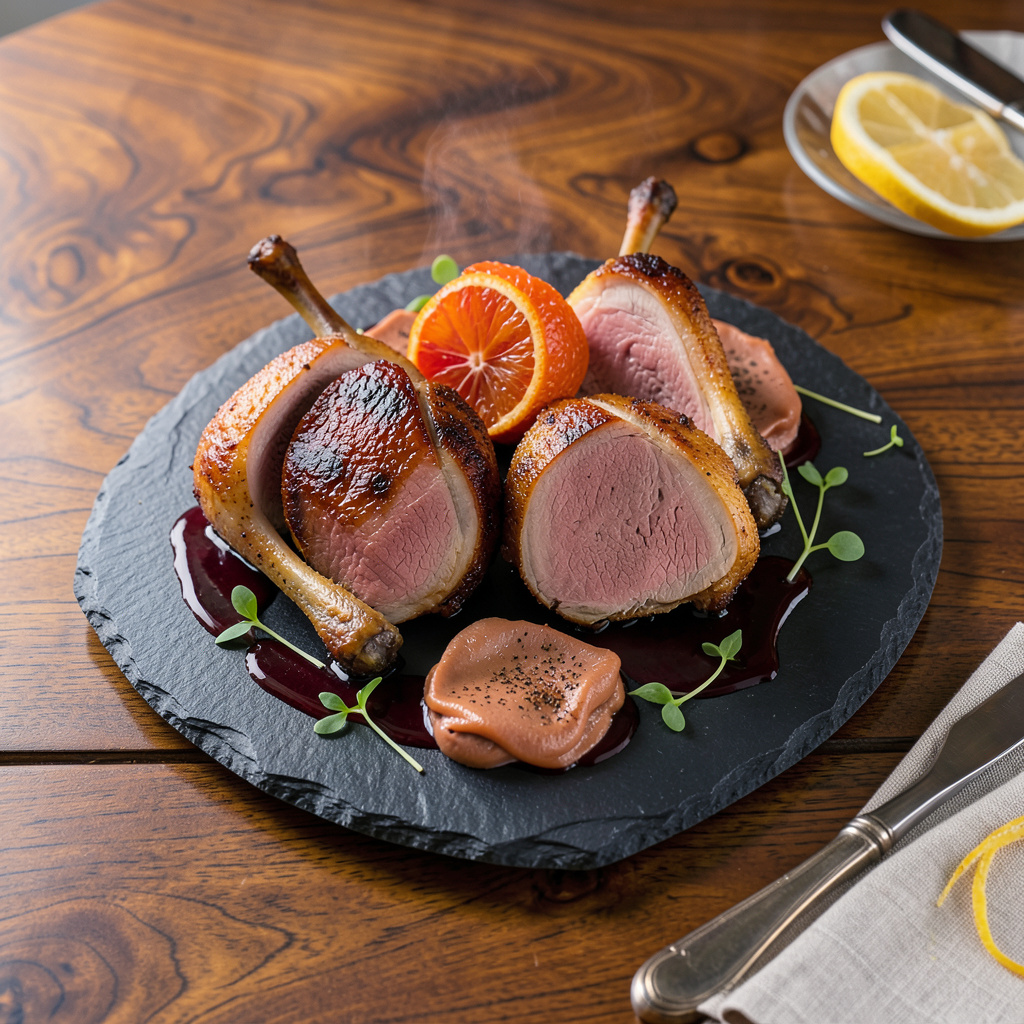
Perfectly cooked duck requires precision—achieving crispy skin while keeping the meat juicy is an art I’ve refined over years of working with poultry. This recipe delivers restaurant-quality results by focusing on proper scoring, controlled heat, and strategic resting. The key lies in balancing fat rendering and moisture retention, ensuring every bite offers both texture and succulence.
I developed this method after countless trials in professional kitchens, where duck’s rich flavor demanded respect. The technique begins with scoring the skin to allow fat to render evenly, followed by a gradual cook that starts skin-side down. This approach guarantees golden, crackling skin without overcooking the delicate meat beneath. It’s a foolproof way to elevate duck from intimidating to impressive.
What sets this dish apart is its versatility—serve the sliced duck fanned over a bed of wild rice, pair it with a tart cherry reduction, or incorporate it into stir-fries for a modern twist. The presentation possibilities are endless, but the result remains constant: tender, flavorful meat with skin that shatters at the touch of a fork.
Whether you’re preparing a special occasion meal or expanding your weeknight repertoire, this recipe transforms duck into an accessible luxury. The techniques here apply to breasts, legs, or whole birds, making it a foundation for countless variations. Let’s begin with the essentials.
📚 In This Guide
- What You’ll Need
- Instructions
- Tips and Common Mistakes
What Youll Need
- ● 1 whole duck (4–5 lbs) – Look for fresh or thawed, skin-on
- ● 2 tbsp kosher salt – For dry-brining (or 1.5 tbsp table salt)
- ● 1 tbsp black pepper – Freshly ground for best flavor
- ○ 1 tbsp five-spice powder (optional) – Adds aromatic depth
- ● 1 lemon or orange – Zested and juiced (for brightness)
- ○ 2 tbsp honey or maple syrup (optional) – For glaze
- ● 1 bunch fresh herbs (thyme, rosemary, or cilantro) – For stuffing
- ● 1 cup water or stock – To deglaze the pan
- ● Sharp chef’s knife or cleaver – For clean cuts
- ● Cutting board – Large and sturdy
- ● Roasting pan + rack – Elevates duck for even crisping
- ● Meat thermometer – Target 165°F (74°C) internal temp
- ● Paper towels – Pats skin dry for extra crispiness
- ○ Basting brush (optional) – For glaze application
- ● Aluminum foil – To rest duck post-roasting
Instructions
Mastering the butchery and preparation of duck ensures both crisp skin and succulent meat through precise technique.
Break Down the Whole Duck
Place the duck breast-side up on a stable cutting board. Using a sharp boning knife, begin by removing the legs: pull each leg away from the body to expose the joint, then cut through the skin and joint to separate. This exposes the thigh bone for cleaner removal.
Next, remove the wings by cutting through the wing joint where it meets the body. For the breast, make a deep cut along the breastbone, then use your knife to carefully separate the meat from the ribcage by sliding the blade along the bones. You should end up with two whole breast halves with skin intact.
Score the Skin for Optimal Rendering
Lay each duck breast skin-side up and use a sharp chef’s knife to make parallel cuts through the skin and fat, stopping just before the meat. Space these cuts about ¼-inch apart in a crosshatch pattern. This scoring accomplishes two critical things: it allows the fat to render evenly during cooking, and it prevents the skin from curling as it cooks.
Be careful not to cut into the meat itself—this would cause the breast to dry out during cooking. The skin should remain attached to the meat but be deeply scored to maximize surface area for crisping. Pat the scored skin completely dry with paper towels before cooking.
Cook Using the Fat-Rendering Technique
Place the duck breasts skin-side down in a cold heavy skillet (cast iron works best). Turn the heat to medium-low and allow the fat to render slowly for 12-15 minutes. This gradual process ensures the skin becomes deeply golden and crisp without burning, while the fat renders completely from the skin.
You’ll notice the skin transforming from translucent to golden brown, and the fat pooling in the pan. Pour off excess fat periodically to prevent the duck from frying in its own fat. Only flip the breasts once the skin is uniformly deep mahogany and crisp to the touch.
Finish to Perfect Doneness
Flip the breasts and cook for just 2-3 minutes on the meat side—duck breast is best served medium-rare. The internal temperature should reach 130-135°F when measured at the thickest part. Remove from the pan and let rest for 10 minutes before slicing; this allows the juices to redistribute throughout the meat.
During resting, the internal temperature will rise another 5-10 degrees, bringing it to the ideal 135-140°F for serving. The skin will remain crisp if you rest the duck on a wire rack rather than a plate, allowing air circulation underneath.
Slice and Serve With Precision
Using a sharp slicing knife, cut the duck breasts against the grain into ¼-inch thick slices. The grain runs lengthwise along the breast, so your knife should move perpendicular to this direction. This cross-grain slicing shortens the muscle fibers, ensuring each bite is tender.
Arrange the slices on a warm plate, fanning them slightly to showcase the contrast between the crisp skin and rosy meat. Serve immediately with a simple pan sauce made from the rendered duck fat, or with complementary sides like tart cherry compote or roasted root vegetables to balance the richness.
Tips and Common Mistakes
Precision separates good duck from extraordinary—here’s how to execute each step with professional finesse.
Knife Technique in Step 1: When separating the breast from the ribcage, use the full length of your boning knife in smooth, controlled strokes. The blade should glide along the bones rather than cutting through them. I find angling the knife slightly upward as I work along the carcass prevents accidental punctures in the skin—critical for maintaining moisture during cooking.
Scoring Perfection in Step 2: The ¼-inch spacing for crosshatch cuts isn’t arbitrary—it creates the ideal surface area for fat rendering while preventing the skin from contracting too much. Use a ruler to mark your first few cuts if needed; inconsistent scoring leads to uneven crispness. After scoring, press the skin flat with your palm to ensure all cuts open fully before cooking.
Fat Management in Step 3: During the 12-15 minute rendering phase at medium-low, pour off fat every 3-4 minutes. Leaving too much fat in the pan lowers the effective cooking temperature, resulting in rubbery rather than crisp skin. The fat should pool but never rise more than ¼-inch up the sides of the breast. A heatproof bulb baster makes this process cleaner than tilting the pan.
Resting Protocol in Step 4: The 10-minute rest isn’t just about temperature carryover—it’s when the collagen in the meat relaxes. Place the breasts on a wire rack set over a paper towel-lined plate to catch drips while allowing airflow on all sides. If the skin loses crispness during resting, a 30-second sear in the residual fat just before slicing revitalizes it without overcooking the meat.
Pro Tips for Cut Duck
- Precision separates good duck from extraordinary—here’s how to execute each step with professional finesse.
- Knife Technique in Step 1: When separating the breast from the ribcage, use the full length of your boning knife in s…
- Scoring Perfection in Step 2: The ¼-inch spacing for crosshatch cuts isn’t arbitrary—it creates the ideal surface are…
Frequently Asked Questions
How long should I marinate duck before cutting it?
For best flavor, marinate duck for at least 4 hours (overnight for deeper taste). If short on time, 1–2 hours works, but skip acidic marinades (like vinegar) if under 4 hours—they can toughen the meat.
What’s the easiest way to cut duck without tearing the skin?
Use a sharp chef’s knife and chill the duck 30 minutes before cutting to firm the fat. Slice through joints (like leg/breast) first, then use smooth, single strokes. Avoid sawing motions!
Can I substitute chicken for duck in this recipe?
Yes, but adjust cooking time! Chicken cooks faster (20–25 mins at 375°F vs. duck’s 45–60 mins). For crispy skin, pat chicken very dry and score the skin. Flavor will differ—duck is richer, so add a splash of soy sauce or hoisin.
Why is my duck skin not crispy after cutting?
Common culprits: excess moisture (pat dry thoroughly), low heat (sear at medium-high), or crowding the pan. Try rendering fat first at low heat, then crisp at 375°F. Pro tip: Rest duck uncovered 10 mins before serving!
What’s the best way to store leftover cut duck?
Cool completely, then store in an airtight container (up to 3 days in fridge or 3 months frozen). Reheat in a dry skillet (no oil) over medium to revive crispiness—microwaving makes it soggy.
Mastering cut duck opens the door to a world of crispy, flavorful possibilities—whether you’re hosting a dinner party or treating yourself to a restaurant-worthy meal at home. 🍽️ With the right technique, you’ll achieve that perfect balance of golden skin and tender, juicy meat every time.
Ready to impress? Grab a whole duck, sharpen your knife, and dive in! For extra flair, pair your dish with a tangy hoisin glaze or a fresh herb salad. Your next culinary adventure starts now—happy cooking!