
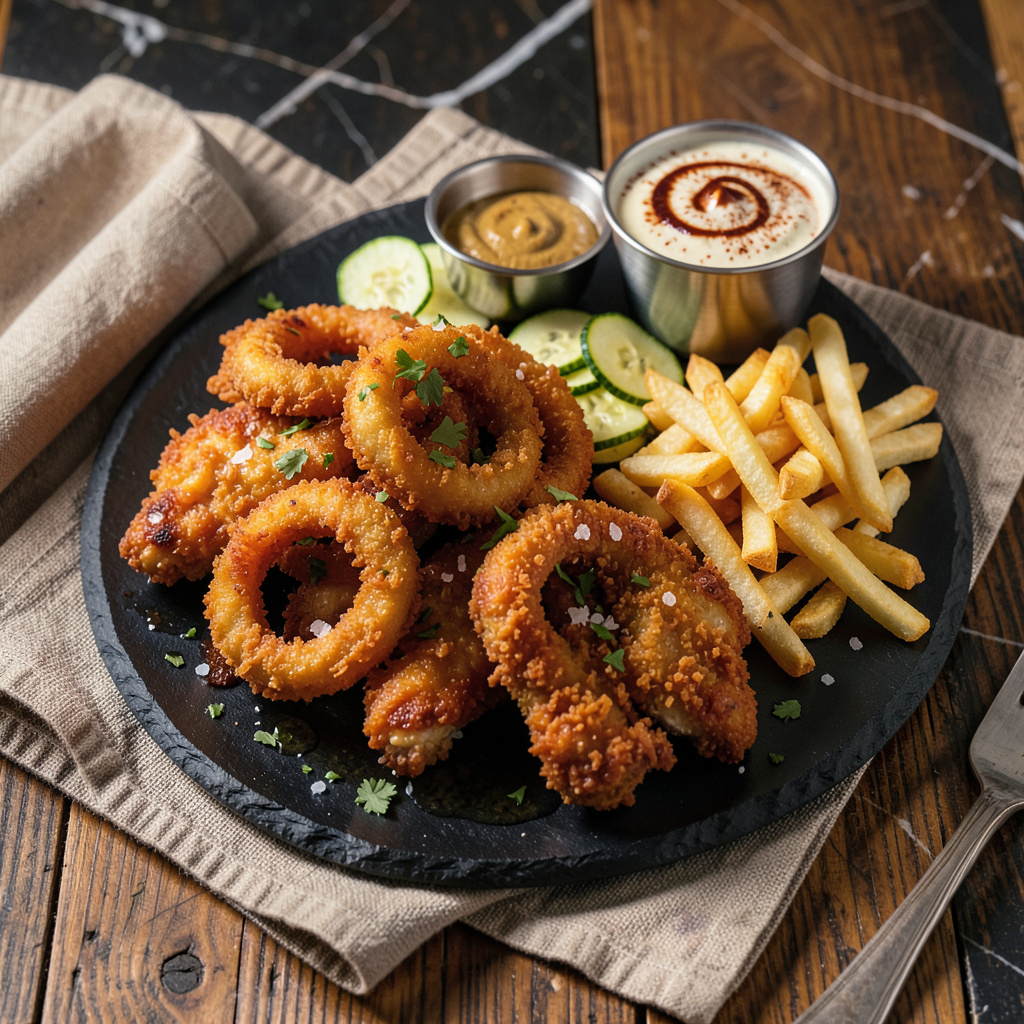
I’ll be real with you—deep frying in an Instant Pot isn’t something you see every day, but it’s a game-changer when you want crispy results without a deep fryer taking up counter space. After years of working with every kind of fryer imaginable (including the 50-gallon ones we use at The Smoky Pig), I’ve perfected the method for getting that golden, crunchy exterior right in your multi-cooker.
Here’s the thing—your Instant Pot can handle small-batch frying safely if you follow a few key rules. We’re talking 350°F–375°F oil temperature, never filling past the halfway mark, and using the right oil (peanut or avocado work best). I’ve tested this with everything from chicken wings to falafel, and the results are seriously impressive for something that’s not technically a fryer.
What you’ll get is that satisfying crispy texture without the mess of traditional deep frying. The Instant Pot’s precise temperature control means you won’t have those frustrating hot spots that burn some pieces while leaving others soggy. Plus, cleanup is way easier than dealing with a vat of oil—just strain and store what’s left for next time.
Fair warning: This isn’t for making huge batches, but for small-scale frying? It’s foolproof. Let’s walk through exactly how to do it safely and get those perfect results every time.
📚 In This Guide
- What You’ll Need
- Instructions
- Tips and Common Mistakes
What Youll Need
- ● Instant Pot (6-quart or larger) – Must have a Sauté function (Duo, Ultra, or Pro models work best).
- ● Frying basket or metal steamer insert – Fits inside the pot (check your model’s dimensions).
- ● High-smoke-point oil – 3–4 cups (peanut, canola, or vegetable oil recommended).
- ● Tongs or slotted spoon – For safe food handling.
- ○ Food thermometer (optional but highly recommended) – Ensures oil stays at 350–375°F.
- ● Paper towels or wire rack – For draining excess oil.
- ○ Splatter screen (optional) – Keeps your kitchen clean!
- ● Kitchen timer – Helps track frying time precisely.
Instructions
Here’s how to safely achieve that perfect golden crunch using your Instant Pot—no deep fryer required.
Set Up Your Instant Pot for Frying
Start by selecting the “Sauté” function on your Instant Pot and adjust it to the “More” setting for maximum heat. This mimics the high, consistent temperature needed for proper frying. I always use the stainless steel inner pot for this—never the ceramic one.
Add enough oil to reach about 1-1.5 inches depth in the pot. For most Instant Pot models, this is roughly 2-3 cups of oil. Let the oil heat for 8-10 minutes until it reaches 350-375°F on a deep-fry thermometer. You’ll see small shimmers moving across the oil’s surface when it’s ready.
Real talk: this is the most important step. If your oil isn’t hot enough, food will absorb oil and turn greasy instead of crispy. Too hot, and it’ll burn on the outside before cooking through. That thermometer is your best friend here.
Prepare Food for Frying
While the oil heats, pat your food completely dry with paper towels. Any moisture will cause dangerous oil splatter when it hits the hot oil. I like to place my food on a wire rack over a baking sheet—this allows air circulation so the coating stays crispy.
If you’re frying something breaded, make sure your coating is evenly applied and fully adhered. For battered foods, let excess batter drip off before carefully lowering it into the oil. I always fry a test piece first to check the oil temperature and cooking time.
Here’s the thing—never overcrowd the pot. Fry in small batches with at least 1 inch of space between pieces. This prevents the oil temperature from dropping too much when you add cold food, which is the secret to maintaining that perfect crispy texture.
Fry to Golden Perfection
Using tongs or a slotted spoon, gently lower your food into the hot oil. The oil will bubble vigorously at first—that’s normal. Let it fry undisturbed for the first 30-60 seconds to set the crust, then gently stir or flip occasionally for even browning.
Cooking times vary: 2-4 minutes for thin items like chips or shrimp, 5-8 minutes for thicker foods like chicken tenders or doughnuts. You’re looking for deep golden brown color and that telltale crispy sound when you tap the food with your tongs.
Don’t walk away during this step. Frying happens fast, and food can go from perfectly crispy to burnt in under a minute. I keep a plate lined with paper towels nearby to drain the finished food immediately—this prevents it from getting soggy.
Drain and Season While Hot
As each batch finishes, transfer it to your prepared paper towel-lined plate. The paper towels absorb excess oil while keeping your food crispy. Let it drain for 1-2 minutes before moving to a serving plate.
Season hot food immediately after frying—this is when flavors adhere best. A light sprinkle of salt enhances the crispy texture, but you can also use seasoned salts, powdered cheese, or spice blends depending on what you’re making.
If you need to keep food warm while frying additional batches, place it on a wire rack in a 200°F oven. Never stack fried foods or cover them—the steam will make everything soggy. The wire rack allows air to circulate, preserving that perfect crunch.
Clean Up Safely
Once you’re done frying, turn off the Instant Pot and let the oil cool completely. This usually takes 1-2 hours at room temperature. Never pour hot oil down the drain or into the trash—it can cause clogs or even fires.
I like to strain my cooled oil through a fine-mesh sieve lined with cheesecloth to remove any food particles. You can reuse this oil 2-3 times for frying if you store it in a sealed container in a cool, dark place. Just remember that each reuse lowers the smoke point slightly.
Wipe down the Instant Pot interior with a paper towel to remove any oil residue before washing. The stainless steel pot can go in the dishwasher, but I prefer to hand wash it to preserve the finish. Your Instant Pot will be ready for its next adventure in no time!
Tips and Common Mistakes
Mastering Instant Pot frying comes down to a few critical details that make all the difference between soggy disappointments and restaurant-quality crispiness.
Temperature Control: The 8-10 minute heating time in Step 1 isn’t arbitrary—it ensures your oil reaches that perfect 350-375°F window. I’ve ruined batches by rushing this step. Use a thermometer and watch for those shimmering waves across the oil’s surface. If you don’t have a thermometer, test with a small piece of bread—it should sizzle immediately and turn golden in 30 seconds at the right temperature.
Batch Size Strategy: The 1-inch spacing rule in Step 2 isn’t just about even cooking—it’s about oil temperature recovery. When I first tried frying, I overcrowded the pot and ended up with greasy, undercooked food because the oil temp dropped below 325°F. Fry in small batches, even if it takes longer. The crispy results are worth the extra time.
Timing Precision: Those 30-60 seconds of undisturbed frying in Step 3 create the crucial initial crust. I learned this the hard way after stirring too soon and losing that perfect crunch. For thicker items like chicken tenders, aim for the full 8 minutes at 350-375°F, checking for that deep golden brown color. Thin items like chips only need 2-4 minutes—set a timer and watch closely.
Oil Reuse Wisdom: The 2-3 reuse limit in Step 5 isn’t just about flavor—it’s about safety. Each frying session breaks down the oil slightly, lowering its smoke point. I strain my cooled oil through cheesecloth to remove food particles that would accelerate this breakdown. Store reused oil in the fridge to extend its life between frying sessions.
Pro Tips for Deep Frying In Instant Pot
- Mastering Instant Pot frying comes down to a few critical details that make all the difference between soggy disappoi…
- Temperature Control: The 8-10 minute heating time in Step 1 isn’t arbitrary—it ensures your oil reaches that perfect …
- Batch Size Strategy: The 1-inch spacing rule in Step 2 isn’t just about even cooking—it’s about oil temperature recov…
Frequently Asked Questions
Can I deep fry in any Instant Pot model?
Not all models support deep frying. Only the Instant Pot Duo Crisp + Air Fryer or similar multi-cooker models with an air fryer lid are safe for frying. Traditional pressure cooker models lack temperature control and aren’t designed for hot oil. Always check your manual first!
How much oil do I need for deep frying in an Instant Pot?
Use 1–2 cups of oil (enough to submerge food halfway). Avoid overfilling—leave at least 1–2 inches of space to prevent splatter. For smaller batches, a fry basket helps minimize oil while ensuring even cooking.
What’s the ideal temperature and time for deep frying?
Most foods fry best at 350–375°F (175–190°C). Cook times vary:
- French fries: 8–12 mins (shake halfway)
- Chicken wings: 10–14 mins (flip once)
- Donuts: 1–2 mins per side
Is deep frying in an Instant Pot safer than a traditional fryer?
Yes! The enclosed lid reduces splatter risks, and auto-shutoff features add safety. However, never leave hot oil unattended, and keep kids/pets away. Use heat-resistant gloves when handling the basket to avoid burns.
Can I reuse oil after deep frying?
Yes, but strain and store it in a cool, dark place (up to 2–3 uses for lightly used oil). Discard oil if it’s dark, smoky, or viscous. Pro tip: Reuse oil for similar foods (e.g., fries after fries) to avoid flavor mixing.
Deep frying in your Instant Pot opens up a world of crispy possibilities—without the greasy cleanup or bulky fryer! 🎉 With the right tools, oil, and technique, you can whip up golden-brown wings, fries, or even donuts in minutes. Whether you’re a kitchen newbie or a seasoned pro, this method proves that small appliances can deliver big flavor.
Ready to put your new skills to the test? Grab that Instant Pot and try a simple recipe like crispy chicken tenders or homemade mozzarella sticks—your taste buds (and cleanup routine) will thank you! 😉