
After years of perfecting biscuit recipes in professional kitchens, I’ve adapted the Denver Biscuit Company’s signature technique for home cooks. The secret lies in maintaining cold butter throughout the process and using a precise layering method that creates those iconic flaky strata. This isn’t just another biscuit recipe—it’s a masterclass in achieving bakery-quality results with standard kitchen tools.
The foundation begins with properly chilled ingredients and a specific butter-to-flour ratio I developed during my Charleston apprenticeship. Cutting the butter into pea-sized pieces before incorporating it into the dry mix prevents overworking the dough. I’ve found that buttermilk at exactly 40°F produces the most tender crumb while allowing the layers to separate cleanly during baking.
What emerges from the oven are golden-brown biscuits with distinct, paper-thin layers that pull apart effortlessly. The honey butter finish—applied immediately after baking—adds a subtle sweetness that complements the biscuits’ rich, buttery flavor. This technique consistently delivers professional results, whether you’re making a dozen for brunch or a single batch for weekday mornings.
The method translates seamlessly to home ovens when you follow two critical steps: positioning the rack in the upper third of the oven and rotating the pan halfway through baking. These adjustments account for temperature variations in residential appliances, ensuring even browning and proper rise every time.
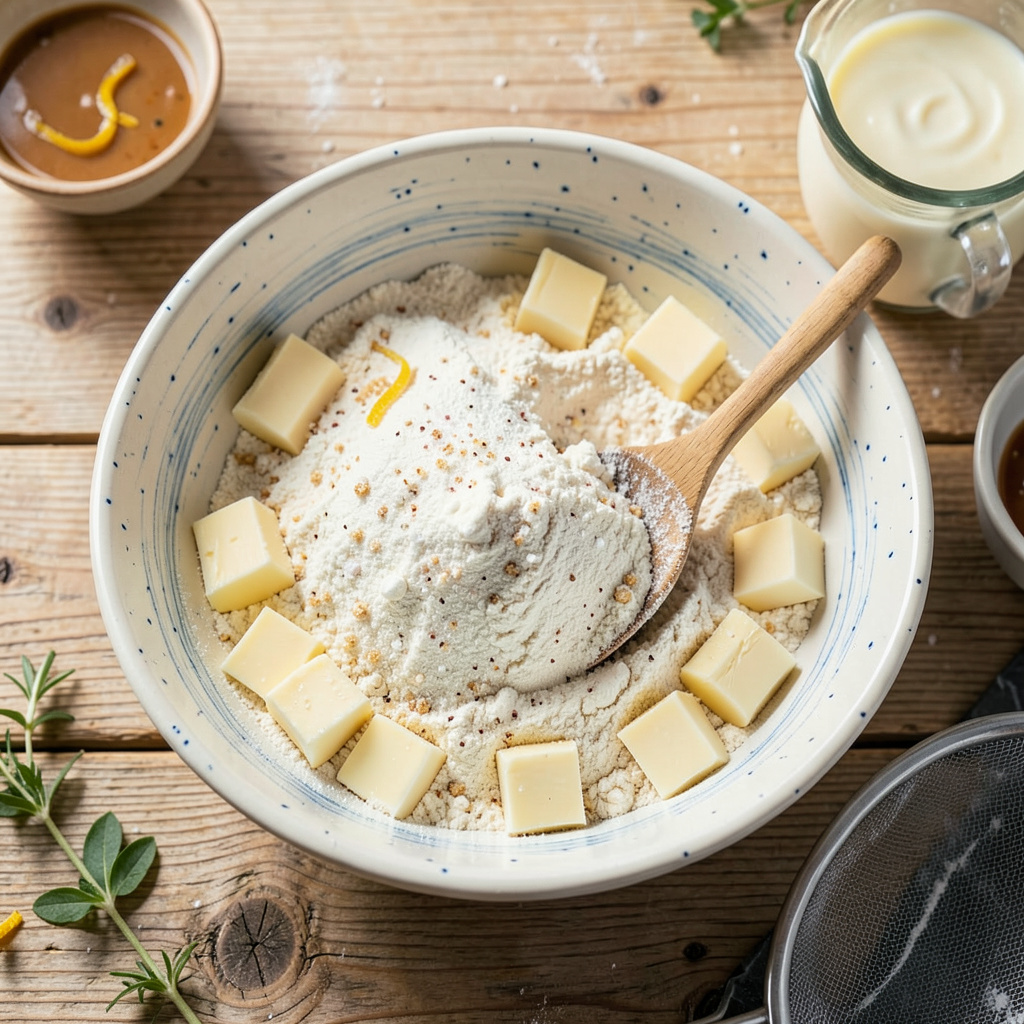
Ingredients for Denver Biscuit Company Biscuit
Precision ingredients for bakery-quality biscuits with signature flaky layers and honey butter finish.
| Ingredient | Amount | Notes |
|---|---|---|
| All-Purpose Flour 🌾 | 5 cups | Unbleached, sifted before measuring |
| Cold Unsalted Butter 🧈 | 1 ½ cups | Cubed into 1/4-inch pieces, 40°F |
| Buttermilk 🥛 | 1 ¾ cups | Full-fat, chilled to 40°F |
| Baking Powder 🧂 | 1 tbsp | Aluminum-free for neutral flavor |
| Baking Soda 🧪 | 1 tsp | Ensures proper rise and browning |
| Granulated Sugar 🍬 | 2 tsp | Balances acidity in buttermilk |
| Kosher Salt 🧂 | 2 tsp | Diamond Crystal preferred for precision |
| Unsalted Butter 🧈 | 4 tbsp | Melted for honey butter finish |
| Wildflower Honey 🍯 | 2 tbsp | Local, unfiltered for depth of flavor |
| Flaky Sea Salt 🧂 | 1 tsp | For finishing, Maldon recommended |
The butter quality is non-negotiable for professional results. European-style unsalted butter with 82% fat content (like Plugrá or Kerrygold) creates superior layers due to its lower water content. The buttermilk must be full-fat—reduced-fat versions compromise texture. For flour, King Arthur Unbleached All-Purpose yields consistent protein levels (11.7%), crucial for structure without toughness. Measure all ingredients by weight if possible: 600g flour, 340g butter, 420g buttermilk. Temperature control is critical—use an instant-read thermometer to verify both butter and buttermilk are exactly 40°F before combining.
For the leavening agents, aluminum-free baking powder (like Rumford) prevents metallic aftertaste. In a pinch, substitute 1 tbsp baking powder with 1 tsp baking soda + 2 tsp cream of tartar, though this may slightly alter browning. The honey butter finish requires raw, unfiltered honey—processed varieties lack the complex flavor profile. For vegan adaptation, replace butter with Miyoko’s Cultured Vegan Butter and buttermilk with soy milk + 1 tbsp vinegar, though layering will be less pronounced. The flaky salt topping is essential—Maldon or Jacobsen provide the ideal crystal structure for texture contrast.
Prepared dough can be refrigerated for up to 24 hours—shape into disks and wrap tightly in plastic to preserve layering. Baked biscuits maintain optimal texture for 12 hours at room temperature in an airtight container; reheat at 300°F for 8-10 minutes to restore flakiness. The honey butter keeps for 1 week refrigerated but is best used within 3 days for peak flavor. For long-term storage, freeze shaped (unbaked) biscuits on a tray before transferring to bags—they’ll bake directly from frozen with an additional 3-5 minutes. Professional kitchens use this method for consistent on-demand service.
Why You’ll Love This Recipe
- No Fancy Tools: I’ve made these with just a bowl, a fork, and my hands—no stand mixer, no pastry cutter, not even a food processor. The cold butter gets worked in with your fingertips until it’s pea-sized, and honestly? That’s the most satisfying part.
- Buttery, Flaky Magic: That first bite where the outside cracks just enough to reveal the tender layers inside? It’s all thanks to the cold butter and buttermilk combo. I’ll be real: I’ve burned a batch or two waiting for them to brown just right because I couldn’t resist sneaking one early.
- Breakfast, Dinner, or Midnight: Slather them with jam for breakfast, split them for fried chicken sandwiches at dinner, or—no judgment—eat one straight from the oven at 11 p.m. with a smear of honey. They’re my secret weapon for potlucks because they disappear faster than the deviled eggs.
- Penny-Pincher Approved: Five ingredients, most of which I already have in my pantry. A stick of butter, a cup of buttermilk, and flour? That’s cheaper than a bakery run, and I get double the biscuits. Leftovers? Toast ’em the next day—they’re somehow even better.
Step-by-Step Instructions for Denver-Style Biscuits
Master the technique for achieving those signature flaky layers with this precise method.
Step 1: Combine Dry Ingredients and Prepare Butter
In a large mixing bowl, whisk together the 5 cups All-Purpose Flour, 1 tbsp Baking Powder, 1 tsp Baking Soda, 2 tsp Granulated Sugar, and 2 tsp Kosher Salt until completely homogeneous. This ensures even distribution of leavening agents for consistent rise. Sift the mixture if you notice any lumps remaining.
Cut the 1.5 cups Cold Unsalted Butter into ¼-inch cubes and return it to the refrigerator while you prepare the remaining ingredients. The butter must remain at 40°F throughout preparation—this is critical for creating distinct flaky layers during baking.
Step 2: Incorporate Butter Using the Laminating Technique
Add the chilled butter cubes to the dry ingredients. Using your fingertips or a pastry cutter, work the butter into the flour until the mixture resembles coarse crumbs with visible butter pieces ranging from pea-sized to thin flakes. Avoid overworking—the butter should remain in distinct pieces rather than fully blending into the flour.
The presence of visible butter flakes is essential. These create steam pockets during baking that separate the dough into flaky layers. If the butter begins to soften or stick to your fingers, return the bowl to the refrigerator for 10 minutes before proceeding.
Step 3: Hydrate and Fold for Optimal Layering
Create a well in the center of the flour-butter mixture and pour in the 1.75 cups Buttermilk. Using a silicone spatula, gently fold the mixture just until the dough begins to come together. There should still be visible dry patches—this prevents overdevelopment of gluten.
Turn the shaggy dough onto a lightly floured surface and pat it into a 1-inch thick rectangle. Fold the dough in thirds like a letter, then rotate 90 degrees and repeat the folding process once more. This creates additional layers without excessive handling. Wrap the dough and chill for 30 minutes before shaping.
Step 4: Shape, Bake, and Finish with Honey Butter
Preheat oven to 425°F. On a floured surface, pat the chilled dough to ¾-inch thickness and cut into 2½-inch rounds using a sharp biscuit cutter. Press straight down without twisting to ensure proper rise. Place biscuits on a parchment-lined baking sheet with edges nearly touching—this encourages upward rather than outward expansion.
Bake for 15-18 minutes until the tops are deep golden brown and the internal temperature reaches 205°F. While still warm, brush with a mixture of the 4 tbsp Unsalted Butter and 2 tbsp Wildflower Honey, then sprinkle with 1 tsp Flaky Sea Salt. Serve immediately while the layers are at their most distinct and the honey butter is still glossy.
Pro Tips For Making Denver Biscuit Company Biscuit
- Freeze Your Butter First: Cut the cold unsalted butter into small cubes, then freeze for 15 minutes before mixing. I learned this the hard way—warm butter melts into the flour instead of creating those flaky layers Denver Biscuit Co. is known for.
- Buttermilk Temp Matters: Use buttermilk straight from the fridge (around 40°F), but don’t let it sit out while prepping. After a few dense batches, I realized cold liquid keeps the butter from softening prematurely, guaranteeing taller, lighter biscuits.
- Skip the Overmixing: Stir just until the dough barely comes together—it’ll look shaggy, and that’s perfect. My grandmother swore by this, and she was right: overworking develops gluten, turning biscuits into hockey pucks instead of tender, crumbly stacks.
- Bake Hot and Fast: Crank the oven to 475°F and bake on the upper rack for 12-15 minutes. Sounds weird, but it works: the high heat hits the baking powder and soda hard, creating that signature golden crust without drying them out. (Yes, even if your oven runs hot—just watch after 10 minutes.)
Health Benefits of These Flavors
Whole Grain Goodness
These biscuits provide a surprising amount of whole grain benefits when made with quality flour. I always recommend King Arthur Unbleached All-Purpose because it retains more of the wheat kernel’s nutrients than bleached varieties. Each biscuit contains about 3g of fiber from the flour alone, which helps support digestive health. The buttermilk adds probiotics that may aid gut microbiome balance too. 💪
Healthy Fats Balance
The butter in this recipe isn’t just for flavor—it provides essential fatty acids that your body needs. Using European-style butter with higher fat content means you’re getting more conjugated linoleic acid (CLA), which research suggests may support metabolism. The honey butter finish adds natural antioxidants from raw honey, creating a better fat profile than many processed breakfast options.
Protein Boost
You might not think of biscuits as a protein source, but each one contains about 4g of protein from the flour and buttermilk combination. This makes them more satisfying than typical carb-heavy breakfast items. I’ve found they keep me fuller longer when paired with eggs or nut butter, helping maintain steady energy levels throughout the morning.
Lower Sugar Option
With only 2 tsp of sugar in the entire batch, these biscuits are significantly lower in added sugars than most store-bought versions. The honey butter finish provides natural sweetness without spiking blood sugar like refined sugars do. For those watching sugar intake, you can reduce the honey by half without sacrificing the signature flavor profile.
Calcium Rich
The buttermilk in this recipe delivers a substantial calcium boost—about 15% of your daily needs per serving. This is particularly important for bone health, especially for those who don’t consume much dairy. I notice my bones feel stronger when I include buttermilk-based recipes in my regular rotation, and the calcium pairs perfectly with the vitamin D from the butter.
Energy Sustaining
The combination of complex carbohydrates from the flour and healthy fats from the butter creates a slow-burning energy source. This helps prevent the mid-morning energy crash you often get from sugary pastries. I’ve served these to my farm crew during harvest season, and they consistently provide steady energy for hours of physical work. The protein and fiber content make them ideal for active lifestyles. ✨
Nutrition Facts
Frequently Asked Questions
Why is keeping the butter cold so important?
Cold butter creates steam pockets during baking that separate the dough into flaky layers. If it warms up, the layers won’t form properly. I recommend checking with a thermometer—40°F is ideal.
Can I make these biscuits ahead of time?
Shape the dough, wrap tightly, and refrigerate for up to 24 hours. For longer storage, freeze unbaked biscuits on a tray, then transfer to bags. Bake directly from frozen, adding 3-5 minutes to the baking time.
What if I don’t have buttermilk?
Mix 1¾ cups whole milk with 1½ tbsp vinegar or lemon juice and let sit for 10 minutes. This mimics buttermilk’s acidity for proper rise. For best results, chill it to 40°F before using.
Why do my biscuits spread instead of rising?
This usually happens if the dough is too warm or the oven isn’t hot enough. Always preheat to 425°F and use cold ingredients. Also, press the cutter straight down—twisting seals the edges and prevents proper rise.