
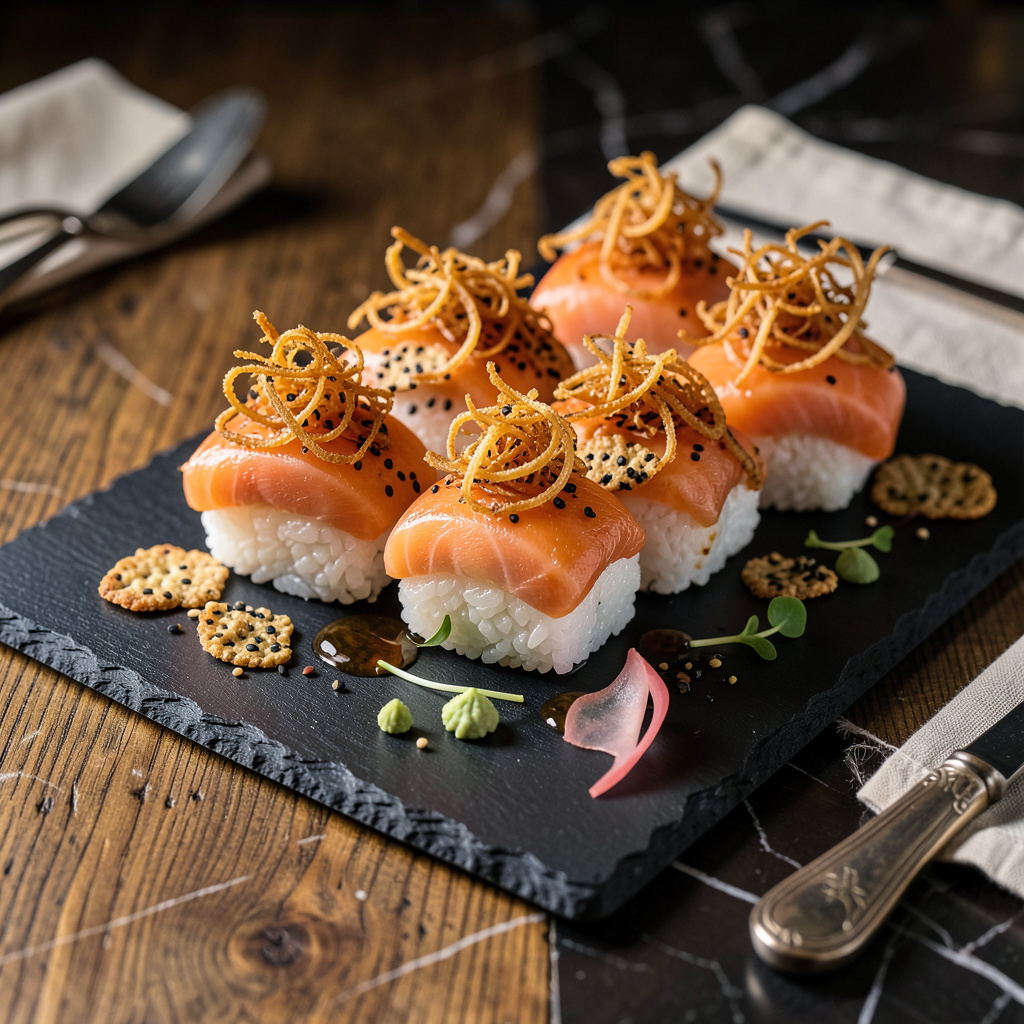
Let me tell you, adding fried onions to sushi is one of those “why didn’t I think of this sooner?” moments. That golden, crispy crunch takes your sushi from good to unforgettable. I first tried this combo at a tiny sushi bar in Charleston, and it changed how I think about sushi toppings forever.
This isn’t your typical sushi recipe. We’re talking perfectly seasoned rice, fresh fish (or marinated tofu if you prefer), and those magical fried onions that add texture and sweetness. The onions get fried until they’re shatteringly crisp, then sprinkled on top right before serving. That contrast of hot, crispy onions with cool, tender fish? Absolute perfection.
What really makes this special is how the fried onions transform the experience. They add a savory depth that complements the freshness of the fish, while giving every bite that satisfying crunch. I’ve tested this with everything from classic salmon nigiri to spicy tuna rolls, and it works every time.
You’ll want to serve this immediately while the onions are still crispy. Pair it with soy sauce, wasabi, and pickled ginger for the full experience. Trust me, once you try sushi with this crispy topping, you’ll never want it any other way.
📚 In This Guide
- What You’ll Need
- Instructions
- Tips and Common Mistakes
What Youll Need
- ● Sushi rolls or nigiri – 6–8 pieces (freshly made or store-bought, your choice! 🍣)
- ● Yellow or white onions – 1 large (thinly sliced, ~2 cups when separated into rings)
- ● Neutral oil – 1½ cups (vegetable, canola, or peanut oil for frying; avoid olive oil)
- ● All-purpose flour – ½ cup (for light, crispy coating)
- ○ Cornstarch – 2 tbsp (optional, for extra crunch ✨)
- ● Ice-cold water – ⅓ cup (for batter)
- ● Salt – ½ tsp (plus extra for seasoning)
- ● Deep fryer or heavy pot (3–4 qt capacity, with high sides for safety)
- ● Slotted spoon or spider strainer (to remove onions from oil)
- ● Paper towels (for draining excess oil)
- ● Mixing bowls – 2 medium (one for batter, one for flour)
- ○ Thermometer (optional but helpful) – to monitor oil temp (ideal: 350–375°F)
- ● Sushi plate or serving tray (for that Instagram-worthy presentation! 📸)
- ● Pre-made sushi (or ingredients to assemble your own)
- ● Basic knife skills (for thin, even onion slices)
- ● Ventilated kitchen or splatter guard (frying can get messy!)
Instructions
Here’s how to create that perfect crispy topping that will take your sushi to the next level.
Select and Prepare Your Onions
Start by choosing the right onions—yellow or white onions work best for this technique. You’ll want to slice them as thinly as possible, about 1/16-inch thick, which is thinner than you might expect. I find using a mandoline slicer gives the most consistent results, but a very sharp chef’s knife works too if you’re careful.
The thinner the slices, the crispier your final product will be. After slicing, separate the onion rings and place them in a large bowl. This is also the perfect time to pat them dry with paper towels—removing excess moisture helps them crisp up faster and more evenly in the oil.
Create the Perfect Frying Setup
Pour 2-3 inches of neutral oil (like vegetable or canola) into a heavy-bottomed pot or Dutch oven. The depth is important—too shallow and the onions won’t cook evenly, too deep and you’ll waste oil. Heat the oil over medium-high heat until it reaches 350°F on a deep-fry thermometer.
While the oil heats, I like to set up my frying station: line a plate with paper towels for draining, have tongs or a slotted spoon ready, and keep the bowl of onions nearby. The key here is working in small batches—adding too many onions at once will lower the oil temperature too much and result in soggy onions instead of crispy ones.
Fry the Onions to Golden Perfection
Carefully add a handful of onion slices to the hot oil—they should sizzle immediately. Stir them gently with a slotted spoon to prevent sticking. You’ll notice they’ll first become translucent, then start turning light golden. This process takes about 3-5 minutes per batch.
Watch closely for that perfect golden brown color—it happens quickly once the onions start browning. Remove them just as they reach that ideal shade and transfer to the paper towel-lined plate. They’ll continue to crisp up as they cool. I always taste one from the first batch to check for doneness—it should be crispy but not burnt.
Drain and Season the Fried Onions
After frying all batches, let the onions drain on the paper towels for 2-3 minutes. This step removes excess oil while maintaining their crispiness. While still warm, I like to sprinkle them lightly with salt—this enhances their flavor and helps them stay crisp longer.
Once completely cooled, transfer the onions to an airtight container if you’re not using them immediately. They’ll keep their crispiness for up to 3 days at room temperature. The real magic happens when you sprinkle these golden strands over your sushi—the contrast of textures is what makes this topping so special.
Apply to Sushi for Maximum Impact
When ready to serve, sprinkle the fried onions over your prepared sushi just before eating. The warmth from freshly made sushi will slightly soften the onions, creating that perfect balance of textures. I like to add them right as I’m plating—this ensures they stay as crispy as possible until that first bite.
For the best presentation, use your fingers to sprinkle them evenly over the sushi. The golden color against the rice and fish creates a beautiful visual contrast. Each bite should give you that satisfying crunch followed by the delicate flavors of your sushi—it’s that perfect combination that keeps people coming back for more.
Tips and Common Mistakes
Getting that perfect crispy texture for your sushi topping requires attention to detail—here’s what I’ve learned from making this dozens of times.
Slicing Technique: In Step 1, that 1/16-inch thickness is absolutely critical. I can’t stress enough how much difference this makes—thicker slices won’t crisp properly, while thinner ones can burn. If you don’t have a mandoline, freeze your onions for 15 minutes first to make them easier to slice paper-thin with a knife. The extra effort pays off in that perfect crunch.
Oil Temperature Control: Maintaining exactly 350°F during frying (as mentioned in Step 2) is the secret to even cooking. I always use a thermometer—guessing leads to disappointment. If your oil temperature drops when adding onions, remove the pot from heat briefly to let it recover. This prevents soggy results and ensures that 3-5 minute frying window stays accurate.
Draining and Seasoning: Those 2-3 minutes of draining in Step 4 aren’t just for removing oil—they’re crucial for texture. Don’t rush this step or your onions will lose crispness. I like to sprinkle salt while they’re still warm on the paper towels, then gently toss them to distribute evenly. This helps them stay crisp for the full 3 days of storage.
Application Timing: As mentioned in Step 5, adding the onions right before serving makes all the difference. The warmth from fresh sushi slightly softens them for that perfect texture contrast. If you’re prepping ahead, store the onions separately and sprinkle them on just before plating—they’ll stay crispier longer this way.
Pro Tips for Fried Onion On Sushi
- Getting that perfect crispy texture for your sushi topping requires attention to detail—here’s what I’ve learned from…
- Slicing Technique: In Step 1, that 1/16-inch thickness is absolutely critical. I can’t stress enough how much differe…
- Oil Temperature Control: Maintaining exactly 350°F during frying (as mentioned in Step 2) is the secret to even cooki…
Frequently Asked Questions
Can I add fried onions to any type of sushi?
Fried onions work great on maki rolls, temaki (hand rolls), or even as a topping for poke bowls and sushi burritos. For delicate nigiri, use them sparingly—they can overpower the fish. Stick to heartier rolls like spicy tuna or tempura shrimp for the best crunch!
When should I add fried onions to sushi—before or after rolling?
Always add them after rolling! Sprinkle fried onions on top just before serving to keep them crispy. If added inside, they’ll absorb moisture from the rice or fillings and lose their crunch. For sushi bowls, toss them in last for maximum texture.
What’s a good substitute if I don’t have fried onions?
Try tempura flakes (for a similar crunch), toasted sesame seeds, or crushed fried shallots. For a quicker fix, lightly toast dried onion flakes in oil for 30 seconds—they won’t be as crispy but add great flavor!
How do I keep fried onions crispy on sushi for longer?
Store them in an airtight container at room temp (moisture is the enemy!). Add them to sushi right before eating, and avoid refrigerating assembled sushi with the topping. Pro tip: Pat the sushi roll lightly with a paper towel to remove excess moisture before topping!
Why did my fried onions turn soggy on sushi?
Sogginess usually happens if: 1) the onions weren’t fully dried after frying, 2) they sat on warm rice too long, or 3) the sushi was covered (trapping steam). Fix it by frying at a higher temp (375°F+) for extra crispiness and draining them on a wire rack, not paper towels.
Who knew a simple fried onion topping could take your sushi game to the next level? 🍣✨ From adding irresistible crunch to balancing rich flavors, this crispy twist proves that small details make big differences. Whether you’re a sushi newbie or a seasoned roller, experimenting with textures is the secret to standout bites.
Ready to try it yourself? Grab some onions, fire up the oil, and get crisping—your taste buds (and dinner guests) will thank you! For more creative sushi toppings, check out our guide on unexpected ingredients to elevate your rolls.