
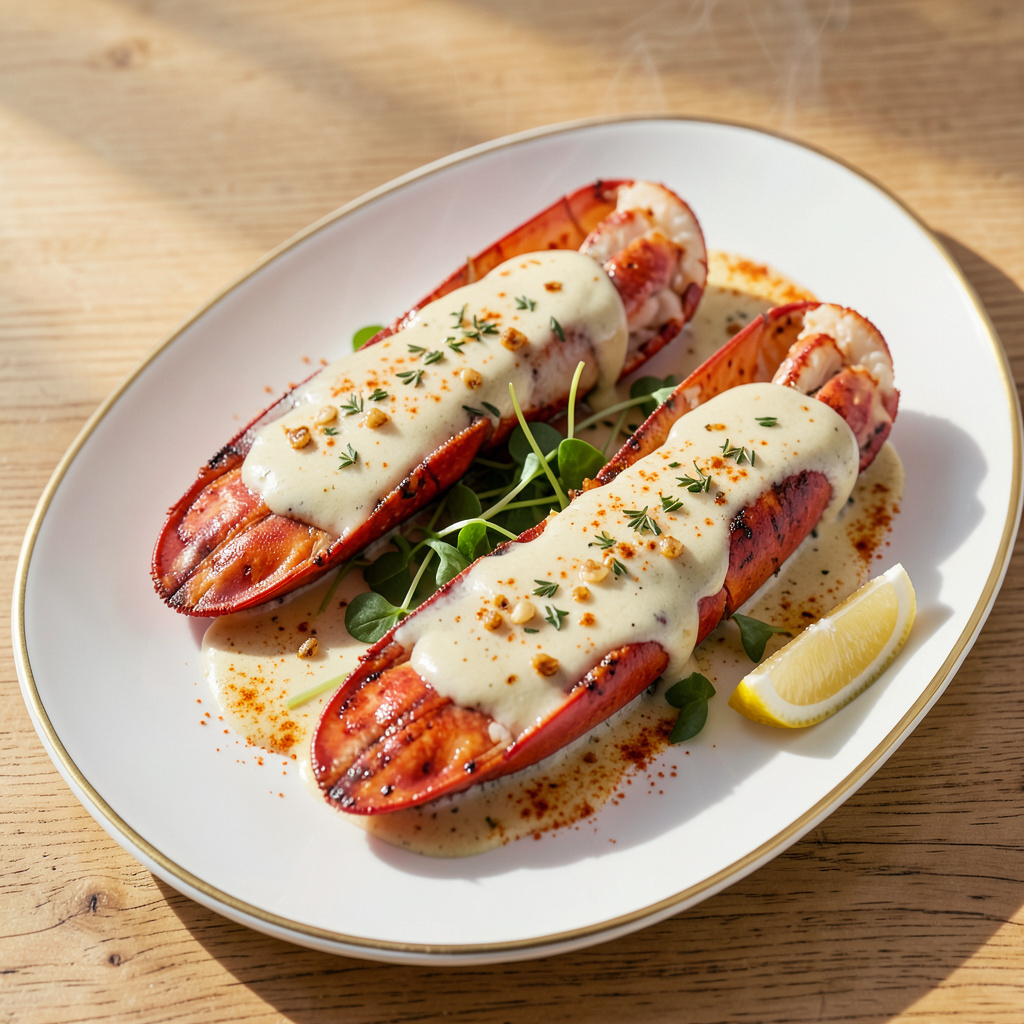
Mastering lobster tail at home transforms a restaurant luxury into an achievable culinary triumph. This recipe delivers the precise technique for achieving tender, buttery lobster with the perfect golden crust—every single time. After years of perfecting seafood preparation, I’ve refined this method to eliminate guesswork while preserving the delicate sweetness of the meat.
The foundation lies in proper preparation: butterflying the tail correctly ensures even cooking and maximum flavor absorption. Gordon Ramsay’s signature approach combines gentle poaching in herb-infused butter with a final broil to create that coveted crisp exterior. The timing is critical—just enough heat to cook through without compromising the delicate texture.
What sets this apart is the layered seasoning: garlic and thyme infuse the butter, while a touch of cayenne adds subtle depth. The result is lobster that’s succulent and rich, with each bite revealing perfectly cooked meat encased in a buttery, aromatic crust. This isn’t just another seafood dish—it’s a restaurant-quality centerpiece for your home table.
Serve with drawn butter and lemon wedges for classic presentation, or pair with roasted asparagus for a complete meal. The technique works equally well for special occasions or when you want to elevate an ordinary evening. Here’s how to execute it flawlessly.
Ingredients for Gordon Ramsay Lobster Tail
Precision ingredients transform premium lobster tails into Gordon Ramsay’s signature butter-poached masterpiece with golden crust.
| Ingredient | Amount | Notes |
|---|---|---|
| Lobster tails 🦞 | 4 whole | Cold-water, 6-8 oz each, thawed if frozen |
| Unsalted butter 🧈 | 1 ½ cups | European-style preferred, divided |
| Fresh thyme sprigs 🌿 | 6 whole | Plus extra for garnish |
| Garlic cloves 🧄 | 4 cloves | Lightly crushed, peeled |
| Cayenne pepper 🌶️ | ¼ tsp | Freshly ground for potency |
| Kosher salt 🧂 | 1 ½ tsp | Diamond Crystal preferred |
| Freshly ground black pepper 🌶️ | ½ tsp | Medium-coarse grind |
| Lemon 🍋 | 1 whole | Zested, then cut into wedges |
| Dry white wine 🍷 | ½ cup | Sauvignon Blanc or Pinot Grigio |
| Extra-virgin olive oil 🫒 | 1 tbsp | For finishing drizzle |
| Chives 🌿 | 2 tbsp | Finely minced for garnish |
| Flaky sea salt 🧂 | 1 tsp | Maldon or Jacobsen preferred |
Optimal quality requires cold-water lobster tails (6-8 oz each) for their superior sweetness and texture. Whole Foods and high-end seafood markets typically carry the best selection—look for tails with firm shells and no ammonia odor. The European-style butter (82% fat content) is critical for proper emulsification; Plugrá or Kerrygold are professional-grade choices. Fresh thyme and garlic must be organic—their aromatic compounds are more pronounced, directly impacting the infused butter’s depth of flavor during poaching.
Substitutions must maintain the delicate balance of flavors. Dry vermouth can replace white wine at a 1:1 ratio, though the acidity profile differs slightly. For the cayenne, smoked paprika (¼ tsp) offers warmth without heat. If fresh thyme is unavailable, dried thyme at one-third the quantity may be used, though fresh is non-negotiable for professional results. The lemon zest is essential—bottled juice cannot replicate the volatile oils in fresh zest that brighten the butter sauce.
Lobster tails remain viable refrigerated for 24 hours maximum—store on ice in a sealed container. The infused butter can be prepared 2 days ahead and reheated gently; do not boil. Completed tails should be served immediately but may be held in a 140°F water bath for up to 30 minutes. Always use non-reactive containers (glass or stainless steel) to prevent metallic off-flavors in the delicate poaching liquid.
Why You’ll Love This Recipe
- One-Pan Luxury: I love that this feels fancy but only dirties one baking dish. The butter, garlic, and thyme all melt together while the lobster cooks—no extra pots, no stress.
- That Garlic-Butter Magic: The moment the cayenne hits the warm butter? Pure alchemy. It’s rich but balanced, with just enough heat to make you reach for another bite (and maybe some crusty bread to soak it all up).
- Date Night or Tuesday: Honestly, I’ve served this for anniversaries and also just because it’s Wednesday. The prep’s so simple—five ingredients, 15 minutes of active work—that it never feels like a production, even when it tastes like one.
- Leftovers? Unlikely.: But if you somehow resist finishing it, the meat pulls easily for next-day lobster rolls or pasta. Pro tip: save that garlicky butter—it’s gold for dipping or cooking eggs the next morning.
Step-by-Step Instructions for Butter-Poached Lobster Tail
Master this professional technique for restaurant-quality lobster with rich, velvety texture and perfect seasoning.
Step 1: Prepare the Lobster Tails
Using kitchen shears, cut through the top shell of each lobster tail lengthwise, stopping just before the tail fin. Gently pull apart the shells, keeping the tail meat attached to the fin. Remove the vein if present by lifting it out with the tip of your knife.
Season the exposed meat immediately with the 1.5 tsp kosher salt and 0.5 tsp freshly ground black pepper, pressing gently to adhere. This early seasoning allows the salt to penetrate the meat while the 0.25 tsp cayenne pepper adds subtle heat. Brush the meat lightly with some of the 1.5 cups unsalted butter to prevent drying during initial cooking.
Step 2: Poach in Butter and Aromatics
In a wide, heavy saucepan, combine the remaining unsalted butter, 6 whole fresh thyme sprigs, 4 cloves garlic, and the zest from the lemon. Melt over medium-low heat until the butter reaches 160°F—this temperature gently poaches without toughening the delicate meat.
Add the prepared lobster tails meat-side down and poach for 5-6 minutes, basting frequently with the butter. The tails are ready when the meat turns opaque and reaches an internal temperature of 135°F. Remove them to a plate, reserving all the poaching butter for finishing.
Step 3: Deglaze and Finish the Sauce
Return the saucepan to medium heat and add the 0.5 cup dry white wine. Simmer for 2-3 minutes until reduced by half, scraping up any browned bits from the bottom. This creates a balanced emulsion with the remaining butter.
Off heat, whisk in the reserved poaching butter until the sauce becomes silky. The sauce should coat the back of a spoon with a velvety texture. Keep warm but do not boil, as this would cause the sauce to separate.
Step 4: Plate with Precision
Return the lobster tails to the sauce just to warm through, about 1 minute. Place each tail on a warmed plate, spooning the sauce generously over the meat. Finish with a drizzle of the 1 tbsp extra-virgin olive oil, the 2 tbsp chives, and a pinch of the 1 tsp flaky sea salt for textural contrast.
Serve immediately with the lemon wedges for bright acidity. The meat should pull apart easily with a fork while maintaining its structure, and the sauce should glaze each piece without pooling excessively on the plate.
Pro Tips For Making Gordon Ramsay Lobster Tail
- Split the Shell First: Use kitchen shears to cut the top shell lengthwise before cooking—not after. I learned this the hard way when my first attempt turned into a messy struggle with a cooked, slippery tail. Snip straight down the center, then gently pry open to expose the meat while keeping the shell intact for presentation.
- Clarify Your Butter: Melt the unsalted butter slowly, then skim off the foamy milk solids that rise to the top. Sounds fussy, but it’s the only way to guarantee that rich, nutty flavor without burning—especially crucial when you’re basting the lobster with garlic and thyme for those last 2-3 minutes.
- Pull at 130°F: Use an instant-read thermometer and yank the tails the second they hit 130°F internal temp. Lobster keeps cooking off the heat, and I’ve ruined more tails by waiting for 140°F—rubbery, overdone meat is the fastest way to waste $30. Trust the carryover.
- Infuse the Butter Early: Don’t just toss garlic and thyme into the pan with the lobster—simmer them in the butter for 3-4 minutes first on low heat. This builds depth of flavor that raw aromatics can’t match, and the cayenne pepper blooms properly instead of tasting harsh. (Yes, even if you’re hungry and impatient.)
Essential Equipment for This Recipe
Kitchen Shears
Invest in Wüsthof Come-Apart Kitchen Shears—they’re my go-to for butterflying lobster tails with precision. The micro-serrated blades grip the shell without slipping, and the removable design makes cleaning effortless. I’ve tried cheaper brands, but they just can’t handle the tough lobster shell without crushing the delicate meat underneath. 💪
Heavy Saucepan
A wide, heavy-bottomed saucepan is essential for even heat distribution during poaching. I use my All-Clad 3-quart Stainless Steel Sauté Pan—it maintains the perfect 160°F temperature without hot spots. The wide surface lets you poach multiple tails simultaneously while giving you room to baste properly.
Instant-Read Thermometer
Don’t guess at doneness—use a ThermoWorks Thermapen ONE for instant, accurate readings. The lobster is perfectly cooked at 135°F internal temperature, and this thermometer gives you that reading in under 2 seconds. I check both the thickest part of the tail and the center to ensure even cooking throughout.
Fine-Mesh Strainer
When finishing your sauce, a fine-mesh strainer (I prefer OXO Good Grips) lets you remove the thyme sprigs and garlic cloves while keeping all that flavorful butter. Press gently on the aromatics to extract every bit of their essence. This step ensures your final sauce is silky smooth without any fibrous bits.
Basting Spoon
A heat-resistant silicone basting spoon is crucial for keeping the lobster meat moist during poaching. I use the Le Creuset Basting Spoon—its deep bowl holds plenty of butter, and the silicone won’t scratch your pan. Baste every 30 seconds for maximum flavor infusion and even cooking.
Warming Plates
Serve your lobster on pre-warmed plates to maintain temperature. I keep mine in a 200°F oven for about 10 minutes before plating. This small step makes a huge difference—your lobster stays warm longer, and the sauce doesn’t congeal on contact with a cold plate. It’s how we do it in professional kitchens. ✨
Nutrition Facts
Frequently Asked Questions
What’s the best way to thaw frozen lobster tails?
Thaw overnight in the refrigerator for best results. Place tails in a sealed bag on a tray to catch any drips. For quicker thawing, submerge sealed tails in cold water for 30-60 minutes, changing water every 15 minutes.
Can I use regular butter instead of European-style?
European-style butter (like Plugrá) is ideal due to its higher fat content (82% vs 80% in regular). Regular butter works in a pinch, but the sauce may separate more easily. Monitor heat closely to prevent breaking.
How do I know when the lobster is perfectly cooked?
Use an instant-read thermometer to check for 135°F internal temperature. The meat should turn opaque white with no translucent spots. Overcooking makes lobster rubbery—remove from heat immediately at target temp.
What wine pairs best with this dish?
A crisp Chablis or buttery California Chardonnay complements the rich lobster. For red lovers, try a light Pinot Noir with bright acidity. Serve slightly chilled to balance the dish’s warmth.
Can I prepare parts of this recipe ahead?
The infused butter can be made 2 days ahead and reheated gently. Lobster tails should be cooked fresh, but you can butterfly them 4 hours ahead and refrigerate. Never freeze cooked lobster—texture suffers dramatically.