
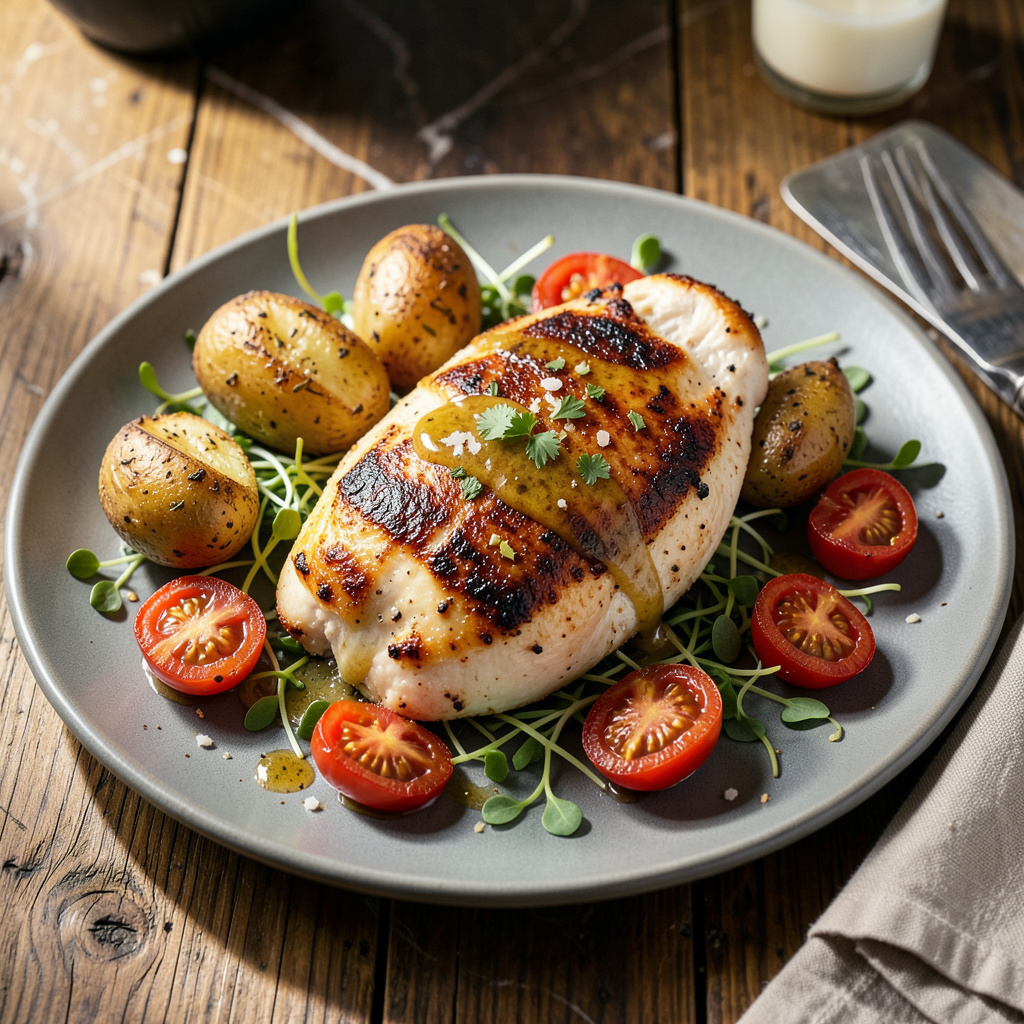
I’ll be real with you—I used to think toaster ovens were just for reheating leftovers until I discovered how perfectly they cook chicken breast. After burning through more dry, rubbery attempts than I care to admit, I finally cracked the code for juicy results every time. The secret? Treating your toaster oven like a mini convection oven and nailing the timing.
Here’s the thing—most people overcook chicken breast because they’re scared of undercooking it. But with this method, you’ll hit that 165°F sweet spot without drying it out. I’m talking tender, moist meat with golden edges, all done in 20 minutes flat. No fancy equipment needed, just your trusty toaster oven and a meat thermometer (non-negotiable, folks).
The game-changer is preheating properly and using the right rack position—too high and the top burns before the inside cooks, too low and you lose that crispy exterior. I’ve tested this with breasts from 6 to 12 ounces, so whether you’re cooking for one or meal prepping for the week, this works. And that resting time? Don’t skip it—it’s what keeps all those juices locked in.
Serve it sliced over salads, stuffed in sandwiches, or alongside roasted veggies. This method’s so reliable, I’ve stopped using my full-size oven for chicken breast entirely. Between you and me, once you try this, you’ll never go back to the stovetop.
📚 In This Guide
- What You’ll Need
- Instructions
- Tips and Common Mistakes
What Youll Need
- ● 1–2 boneless, skinless chicken breasts (6–8 oz each, ~½–¾” thick for even cooking) 🍗
- ● 1 tbsp olive oil or melted butter (for brushing; avocado oil works too!)
- ● ½ tsp salt (or to taste—kosher or sea salt preferred)
- ● ¼ tsp black pepper (freshly ground for best flavor)
- ○ ½ tsp garlic powder or paprika (optional, for extra flavor)
- ● Toaster oven (with bake and broil functions; 1200W+ recommended)
- ● Small baking sheet or toaster oven tray (must fit inside your model)
- ● Aluminum foil or parchment paper (for easy cleanup)
- ● Meat thermometer (highly recommended for perfect doneness—aim for 165°F)
- ● Pastry brush or spoon (to coat chicken with oil)
- ● Tongs or fork (for flipping—avoid piercing the meat!)
- ● Lemon wedges or fresh herbs (rosemary, thyme) for garnish
- ● BBQ sauce or honey mustard (for glazing post-cook)
- ● Cooking spray (if skipping oil for lower calories)
Instructions
Here’s the simple method I use to get perfectly juicy chicken breasts every time—no dry results here.
Prep the Chicken for Even Cooking
Start by patting the chicken breasts completely dry with paper towels. This is crucial because moisture on the surface will steam the chicken instead of allowing it to brown. I like to place them on a clean cutting board and press firmly with paper towels until no dampness remains.
Next, pound the chicken breasts to an even ¾-inch thickness using a meat mallet or rolling pin. Place each breast between two sheets of plastic wrap to prevent splattering. This ensures they cook evenly and prevents the thinner ends from drying out while waiting for the thicker parts to finish.
Season both sides generously with salt and pepper. I always use freshly ground black pepper for better flavor. Let the seasoned chicken sit at room temperature for 10 minutes while you preheat the toaster oven—this helps the seasoning penetrate slightly and ensures more even cooking.
Preheat and Set Up Your Toaster Oven
Position the oven rack in the middle of your toaster oven—this gives you even heat circulation without burning the top. Preheat to 375°F using the bake function. Most toaster ovens take about 5-7 minutes to reach temperature, so this is the perfect time to prep your baking sheet.
Line a toaster oven baking tray with aluminum foil for easy cleanup, then place a wire rack on top. The rack elevates the chicken, allowing hot air to circulate underneath for even browning. Lightly coat the rack with cooking spray or brush with olive oil to prevent sticking.
Here’s the thing—most people skip the rack and end up with soggy bottoms. The elevation makes all the difference in texture, giving you that nice sear on both sides without any steaming effect from the tray.
Cook Using the Two-Stage Method
Place the prepared chicken breasts on the rack, leaving at least 1 inch of space between them so they cook evenly. Bake at 375°F for 12 minutes. You’ll notice the edges starting to turn opaque and the surface becoming slightly firm to the touch.
After the initial 12 minutes, increase the temperature to 425°F and cook for an additional 6-8 minutes. This two-stage method gives you perfectly cooked chicken—the first stage gently cooks through, while the higher heat at the end creates that beautiful golden-brown exterior without drying out the interior.
You’ll know it’s done when the internal temperature reaches 165°F (use an instant-read thermometer inserted into the thickest part) and the juices run clear when pierced with a knife. The chicken should feel firm but still slightly springy when pressed.
Rest and Serve for Maximum Juiciness
Transfer the chicken to a clean cutting board or plate and tent loosely with foil. Let it rest for 5-7 minutes before slicing or serving. I know it’s tempting to cut into it right away, but this resting period allows the juices to redistribute throughout the meat instead of running out onto your cutting board.
You’ll notice the chicken continues to cook slightly during this rest—this is called carryover cooking. The internal temperature will rise about 5 degrees, which is why we pull it out at 160-162°F for perfect doneness. Slice against the grain for the most tender texture.
Serve immediately while still warm. The chicken should be moist and juicy throughout, with a lightly crisped exterior. If you’ve followed these steps, you’ll have restaurant-quality results with minimal effort—no more dry, rubbery chicken breasts!
Tips and Common Mistakes
Let me share what I’ve learned from cooking hundreds of chicken breasts—these small details make all the difference between dry, rubbery meat and perfectly juicy results.
The Prep Secret: Don’t skip pounding the chicken to that ¾-inch thickness mentioned in Step 1. I used to think this was unnecessary until I realized it’s the key to even cooking. Thicker parts take longer to cook, so by making everything uniform, you prevent the thinner edges from drying out while waiting for the center to finish. Use a meat mallet or even a heavy skillet if you don’t have one—just be sure to cover the chicken with plastic wrap first to prevent tearing.
Heat Control: The two-stage cooking method in Step 3 (starting at 375°F for 12 minutes, then increasing to 425°F for 6-8 minutes) is crucial. The initial lower temperature gently cooks the chicken through, while the higher heat at the end creates that beautiful golden crust without overcooking the interior. I’ve found this method works perfectly in toaster ovens, which can sometimes have hot spots.
Resting Matters: Those 5-7 minutes of resting time in Step 4 aren’t just a suggestion—they’re essential. When you cut into chicken immediately after cooking, all those delicious juices run out onto your cutting board instead of staying in the meat. I always tent the chicken loosely with foil during this time to keep it warm while the juices redistribute. You’ll notice the internal temperature actually rises about 5 degrees during this rest, which is why we pull it out at 160-162°F for perfect doneness.
Equipment Tip: The wire rack mentioned in Step 2 might seem like an extra step, but it’s worth it. Most people skip this and end up with soggy bottoms because the chicken steams in its own juices on the tray. The rack allows hot air to circulate underneath, giving you that nice sear on both sides. If you don’t have a wire rack, you can use the grill rack that comes with many toaster ovens—just be sure to oil it well to prevent sticking.
Pro Tips for Cook Chicken Breast In A Toaster Oven
- Let me share what I’ve learned from cooking hundreds of chicken breasts—these small details make all the difference b…
- The Prep Secret: Don’t skip pounding the chicken to that ¾-inch thickness mentioned in Step 1. I used to think this w…
- Heat Control: The two-stage cooking method in Step 3 (starting at 375°F for 12 minutes, then increasing to 425°F for …
Frequently Asked Questions
Can I cook frozen chicken breast in a toaster oven?
Yes, but it’ll take 50-70% longer than thawed chicken. Preheat to 375°F, add 5-10 minutes per side, and always check the internal temp hits 165°F. For best texture, thaw overnight in the fridge first—frozen chicken tends to dry out more easily.
How do I keep chicken breast from drying out in a toaster oven?
Brining (soak in saltwater for 30 mins) or marinating helps! Also, don’t overcook—pull it at 160°F (it’ll rise to 165°F while resting). Basting with olive oil or butter halfway through adds moisture. Try covering loosely with foil if your toaster oven runs hot.
What’s the best toaster oven temperature for chicken breast?
Stick to 375–400°F for even cooking. Lower temps (350°F) work but take longer; higher temps (425°F+) risk drying out the edges. Use a meat thermometer—color isn’t a reliable doneness indicator!
Can I use parchment paper or aluminum foil in the toaster oven?
Yes, but avoid letting foil touch the heating elements (fire risk!). Parchment is safer and prevents sticking. For easy cleanup, line the tray with foil under the chicken, leaving edges uncovered for airflow.
What are good seasoning ideas for toaster-oven chicken breast?
Keep it simple: salt, pepper, garlic powder, and paprika never fail. For bold flavors, try lemon-herb, Cajun, or honey-mustard glazes. Pro tip: Pat the chicken very dry before seasoning so spices stick better!
Cooking juicy, flavorful chicken breast in a toaster oven is easier than you think! With the right prep, timing, and a few pro tips, you’ll get perfectly tender results every time—no fancy equipment needed. 🍗✨ Whether you’re meal prepping or whipping up a quick dinner, this method saves time without sacrificing taste.
Ready to level up? Try experimenting with different marinades or seasonings next—like lemon-herb or spicy BBQ—for even more delicious variations. Happy cooking!