
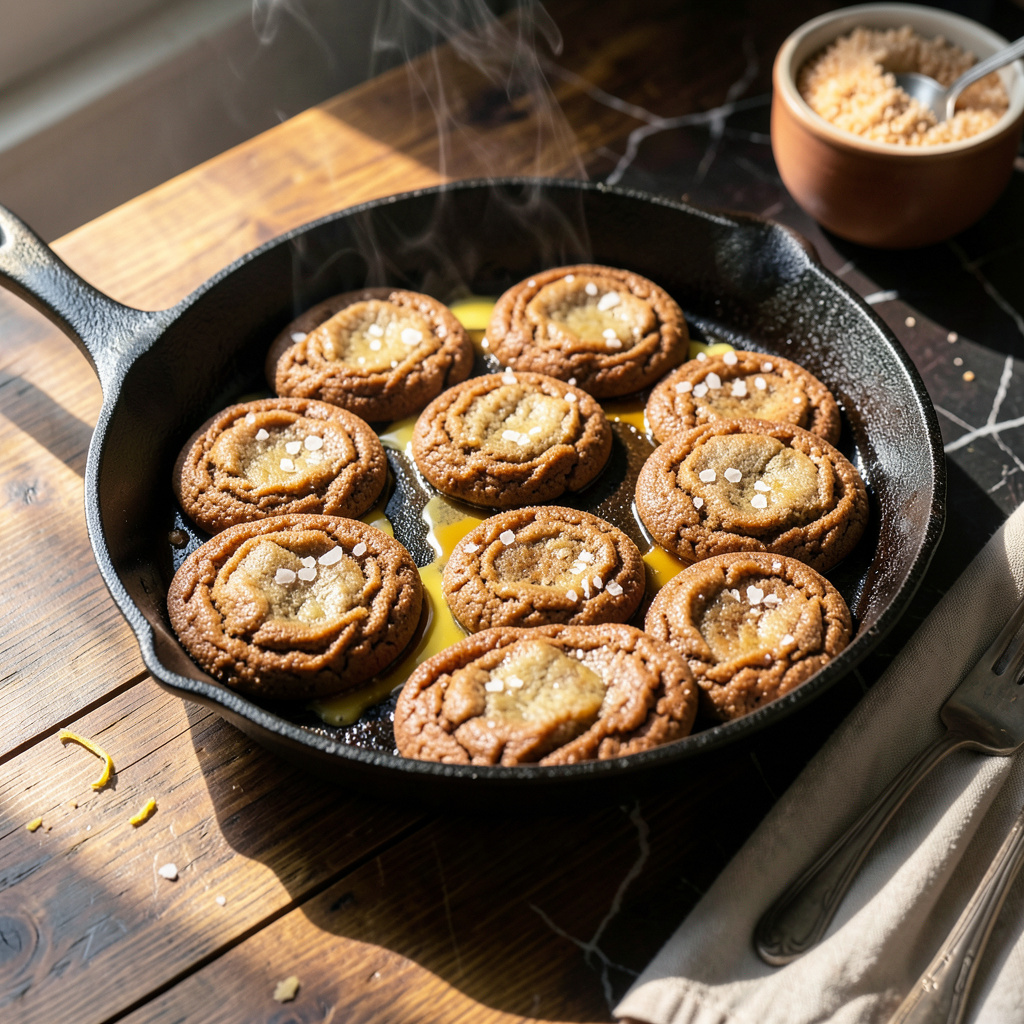
I’ll be real with you—cooking cookies on the stovetop was one of those happy accidents that changed my dessert game forever. No oven, no waiting for it to preheat, just a skillet and about 10 minutes standing between you and warm, chewy cookies. This method delivers that fresh-baked taste without the fuss, perfect for when cravings hit hard and fast.
The trick is treating your skillet like a griddle, controlling the heat just right so the dough cooks through without burning. I use my trusty cast iron (the one I’ve had since culinary school) because it distributes heat evenly, creating cookies with crispy edges and soft centers. You’ll watch them transform from raw dough to golden treats right before your eyes—no peeking through an oven window required.
What you get is something between a cookie and a pancake—thicker than you’d expect, with caramelized edges and a texture that’s somehow both cakey and chewy. The first time I made these, my kids thought I’d invented some magical new dessert. Little did they know it was just smart technique meeting good old-fashioned cookie dough.
Best part? This works with any cookie dough—chocolate chip, oatmeal raisin, even those fancy brown butter varieties. Just drop spoonfuls onto a buttered pan and let the stovetop do its thing. Dinner’s dessert problem, solved in minutes flat.
📚 In This Guide
- What You’ll Need
- Instructions
- Tips and Common Mistakes
What Youll Need
- ● Ingredients: 1 cup (2 sticks) unsalted butter, softened
- ● ¾ cup granulated sugar
- ● ¾ cup packed brown sugar
- ● 2 large eggs, room temperature
- ● 1 tsp vanilla extract
- ● 2 ¼ cups all-purpose flour
- ● 1 tsp baking soda
- ● ½ tsp salt
- ● 2 cups chocolate chips (or nuts/dried fruit)
- ● Tools: 10-inch non-stick skillet (or cast iron) with lid
- ● Mixing bowls (medium and large)
- ● Wooden spoon or spatula
- ● Measuring cups/spoons
- ○ Whisk (optional, for smoother batter)
- ○ Ice cream scoop (optional, for even cookies)
- ● Prerequisites: Preheat skillet on low-medium heat (test with a sprinkle of water—it should sizzle gently).
- ● Grease skillet lightly with butter or cooking spray.
Step-by-Step Instructions for Cooking Cookies on the Stove
This method delivers warm, chewy cookies with crispy edges—all from a single skillet.
Prepare Your Skillet and Ingredients
Choose a heavy-bottomed skillet (I prefer cast iron) that’s about 10 inches in diameter. Place it over low heat to warm gradually while you gather your ingredients. The even heat distribution of cast iron prevents hot spots that could burn your cookies.
Measure all your ingredients before starting—this is called “mise en place” and it’s especially important for stovetop cookies since the process moves quickly. You’ll want your butter softened but not melted, and your eggs at room temperature for even mixing.
Make the Cookie Dough in the Skillet
In your warmed skillet, melt ½ cup of butter over low heat, swirling occasionally until just melted. Remove from heat immediately and stir in ½ cup of brown sugar and ¼ cup of white sugar until smooth. The residual heat will help dissolve the sugars completely.
Let the mixture cool for 2 minutes (it should be warm but not hot to the touch), then whisk in 1 egg and 1 teaspoon of vanilla extract until fully combined. Add 1 cup of flour, ½ teaspoon of baking soda, and ¼ teaspoon of salt, stirring just until no dry spots remain. Fold in ½ cup of chocolate chips or your preferred mix-ins.
Cook the Cookie Evenly
Return the skillet to low heat and spread the dough into an even layer using a spatula. Cover with a lid and cook for 8-10 minutes. You’ll see the edges start to set first—that’s your signal to check for doneness.
The cookie is ready when the top appears set but still slightly soft in the center (like a brownie). For perfect results, I rotate the skillet 180 degrees halfway through cooking to ensure even browning. Don’t be tempted to peek too often—each time you lift the lid, you lose valuable heat.
Finish and Serve
Remove the skillet from heat and let the cookie rest for 5 minutes. This brief rest allows the center to firm up slightly while staying gooey. Slide a spatula around the edges to loosen, then carefully transfer to a cutting board.
Cut into wedges while still warm for that classic skillet cookie experience. The edges will be crispy, the center soft and chewy, and the chocolate perfectly melty. Serve directly from the skillet with a scoop of ice cream for an extra-special treat, or enjoy as-is with a glass of cold milk.
Tips and Common Mistakes
Mastering stovetop cookies takes a few key insights—here’s what I’ve learned from making dozens of batches.
Heat Management: The low heat setting in Step 3 is crucial for even cooking. If your stove runs hot, you might need to adjust slightly below medium. I always test my skillet’s heat by holding my hand 3 inches above it—it should feel warm but not uncomfortable. This prevents burning while ensuring the cookie cooks through evenly in those 8-10 minutes.
The 2-Minute Cooling Window: Don’t rush Step 2 when cooling the butter-sugar mixture. Those 2 minutes are essential to prevent cooking the egg when you add it. I set a timer and stir occasionally to help it cool faster. The mixture should feel warm to the touch but not hot—like a comfortable bath temperature.
Lid Discipline: Resist the urge to peek during the 8-10 minute cooking time in Step 3. Every time you lift the lid, you lose about 25°F of heat, which can add 1-2 minutes to your cooking time. I mark the halfway point on my timer (4-5 minutes) as a reminder to rotate the skillet 180 degrees without lifting the lid completely.
Resting Period: The 5-minute rest in Step 4 isn’t just for show—it allows the cookie to finish setting up. If you cut too soon, you’ll lose that perfect balance of crispy edges and gooey center. I use this time to warm my serving plates or scoop ice cream, so everything’s ready when the cookie is.
Pro Tips for Cook Cookies On The Stove
- Mastering stovetop cookies takes a few key insights—here’s what I’ve learned from making dozens of batches.
- Heat Management: The low heat setting in Step 3 is crucial for even cooking. If your stove runs hot, you might need t…
- The 2-Minute Cooling Window: Don’t rush Step 2 when cooling the butter-sugar mixture. Those 2 minutes are essential t…
Frequently Asked Questions
Got questions about stovetop cookies? You’re not alone! Here are the most common ones—answered in a snap.
Can I use any cookie dough for stovetop cooking?
Most drop cookie doughs (like chocolate chip or oatmeal) work great! Avoid stiff doughs (e.g., sugar cookies) unless softened with extra butter. Pre-made refrigerated dough is a quick win—just flatten slightly for even cooking.
How do I know when stovetop cookies are done?
Look for golden-brown edges (2–3 minutes per side on medium-low heat). The center should be slightly soft—it’ll firm up as it cools. Overcooking = crispy (not chewy!), so peek early!
What’s the best pan for stovetop cookies?
A nonstick skillet or well-seasoned cast iron works best for even browning. Avoid thin pans—they burn dough fast. Pro tip: Use a lid for 30 seconds to melt toppings (like chocolate chips!) without overcooking.
Why did my cookies burn on the outside but stay raw inside?
Too-high heat is the usual culprit! Keep it at medium-low and press dough into an even thickness (½-inch max). If your stove runs hot, try a heat diffuser or lower the temp slightly.
Can I make stovetop cookies without butter?
Yes! Swap butter for coconut oil (1:1 ratio) or neutral oil (add 1 tbsp extra flour for structure). Vegan? Use flax eggs + plant-based butter. Texture may vary slightly, but they’ll still taste delicious!
Who knew your stovetop could whip up warm, gooey cookies this easily? 🍪 Now that you’ve mastered the basics—from picking the right pan to nailing that perfect golden edge—you’re ready to experiment! Try swapping in dark chocolate chunks, sprinkling sea salt, or even adding a scoop of ice cream for an over-the-top dessert.
Next up: grab a spatula and get baking! Your first batch of stovetop cookies is just minutes away. Tag us in your creations—we can’t wait to see (and taste!) your delicious results. 😉