
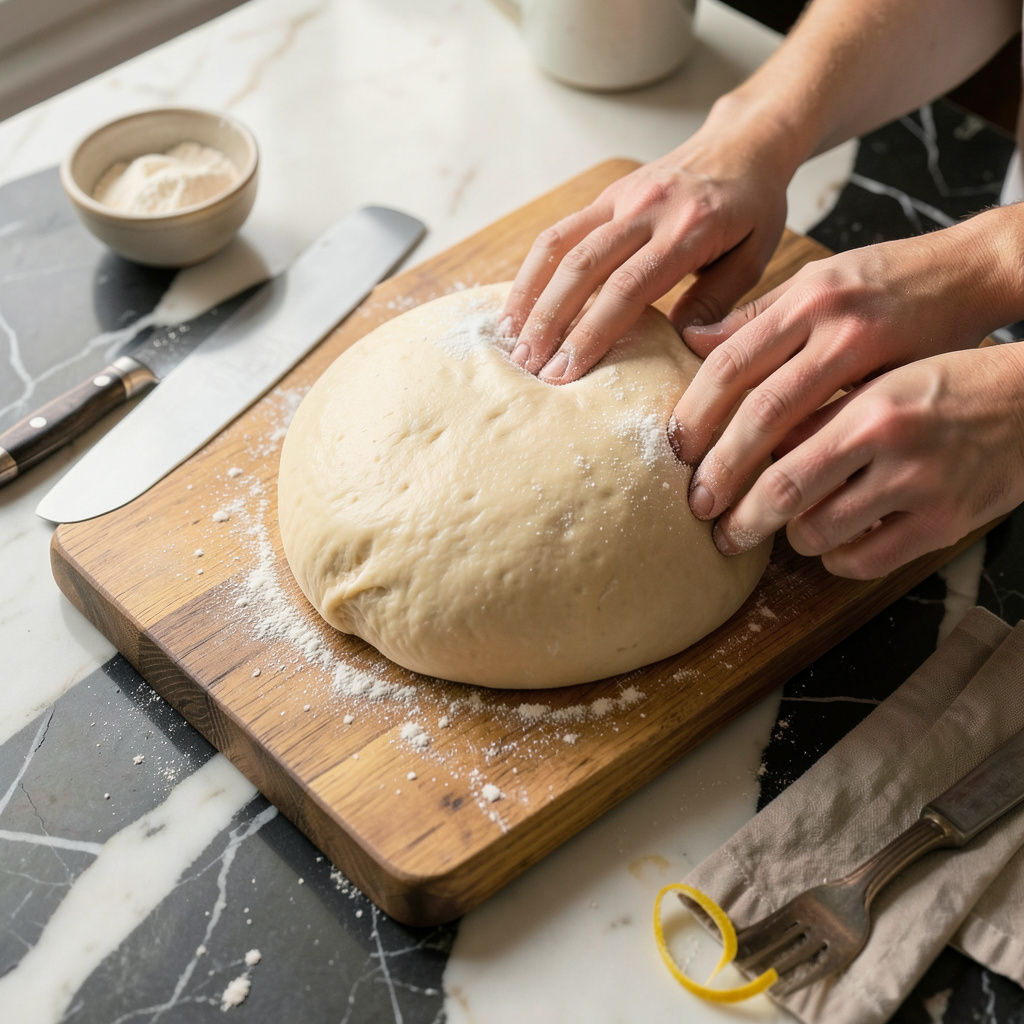
I’ll be real with you: deflating dough is one of those baking steps that seems simple but can make or break your final result. After years of teaching bread-making classes, I’ve seen how this single technique transforms dense, heavy loaves into perfectly light, airy bakes. It’s not about punching aggressively—it’s about gently releasing gas bubbles at exactly the right moment.
The key is timing. You want to deflate after the first rise when the dough has roughly doubled in size and springs back slowly when poked. I use my fingertips (not fists) to press down evenly, feeling for those telltale gas pockets. This step redistributes yeast and nutrients, setting up your dough for that crucial second rise where real flavor develops.
What you’re left with is dough that’s primed for shaping—smooth, elastic, and full of potential. Skip this step or do it wrong, and you’ll end up with bread that’s either too dense or has giant air pockets. I’ve ruined more loaves by over-deflating than I care to admit, which is why I now teach this as the most important moment in bread baking.
This technique works for everything from sandwich bread to cinnamon rolls. Master it once, and you’ll never bake a brick again. Here’s exactly how to do it right.
📚 In This Guide
- What You’ll Need
- Instructions
- Tips and Common Mistakes
What Youll Need
- ● Dough: Your prepared yeast-based dough (bread, pizza, brioche, etc.)—ensure it has completed its first rise (typically doubled in size).
- ● Clean work surface: A smooth, lightly floured countertop or large cutting board (at least 18×24 inches for easy handling).
- ○ Bench scraper or dough cutter: For precise shaping and lifting (optional but highly recommended).
- ● Rolling pin: If your recipe requires rolling out the dough post-deflation (e.g., for pizza or pastries).
- ● Flour (all-purpose or bread flour): 2–3 tbsp for dusting—prevents sticking without over-drying the dough.
- ● Plastic wrap or damp towel: To cover the dough if resting between steps (keeps it from forming a crust).
- ○ Kitchen scale (optional): For weighing dough portions if your recipe demands precision (e.g., ±1g accuracy).
- ○ Bowl of water (optional): A small bowl with warm water to dip fingers in—helps prevent dough from sticking to your hands.
- ● Timer: To track resting periods (if your recipe includes a second rise).
Step-by-Step Instructions for Deflating Dough
Here’s the simple technique that ensures your baked goods turn out light, even, and perfectly textured every time.
Prepare Your Work Surface and Tools
Start by clearing a clean, dry work surface—at least 18 inches wide so you have room to work. I like to use a smooth countertop or large cutting board. Lightly dust the surface with flour if you’re working with sticky dough, but don’t overdo it. Too much flour can dry out your dough and affect the final texture.
Gather your tools: a plastic dough scraper works best for this process, but a metal bench scraper will do in a pinch. Have a small bowl of flour nearby just in case, but remember—you’re trying to preserve the dough’s moisture, not add more flour. The goal here is gentle handling, not additional ingredients.
Transfer the Dough and Initial Press
Turn your risen dough out onto the prepared surface. You’ll notice it’s puffy and full of air—this is exactly what you want at this stage. Using your fingertips, gently press down on the dough to begin releasing the gas bubbles. Start at the center and work your way outward in a circular motion.
Don’t punch aggressively—think of this as a firm but gentle massage. You’re aiming to release about half the air from the dough, not completely flatten it. The dough should deflate noticeably but still maintain some structure. If it springs back immediately when you press, it needs more time to relax before shaping.
Fold and Rotate for Even Texture
Here’s the technique that makes all the difference: fold the dough in half, then give it a quarter turn. Press gently again, then repeat the fold and turn. Do this 3-4 times total—you’ll feel the dough becoming smoother and more elastic with each rotation.
This folding process does two important things: it redistributes the yeast and gas bubbles evenly throughout the dough, and it strengthens the gluten structure for better texture. The dough should feel more cohesive after this step, with a uniform consistency. If you notice any particularly large air bubbles, you can gently press them out with your fingertips.
Shape According to Your Recipe
Now that your dough is properly deflated and relaxed, you’re ready to shape it for its final rise. For loaf pans, gently roll the dough into a log shape, tucking the edges under to create surface tension. For rolls or buns, divide the dough and shape each piece into a smooth ball.
The key here is to maintain the structure you’ve created while being gentle enough not to overwork the dough. You should see a smooth surface with no visible air bubbles. If the dough resists shaping or springs back, let it rest for 5-10 minutes before trying again—this gives the gluten time to relax.
Final Check Before Proofing
Before moving to the final proof, do a quick quality check. The deflated dough should feel slightly tacky but not sticky, with a smooth, elastic surface. Press gently with your fingertip—it should spring back slowly, leaving a slight indentation.
If the dough feels too dense, you may have over-deflated it. If it’s still too airy, give it another gentle press and fold. Remember, the goal isn’t to remove all air—just to create an even texture that will rise uniformly in the oven. Now your dough is perfectly prepped for its final rise and will bake up with that ideal light, airy crumb.
Tips and Common Mistakes for Perfect Dough Deflation
Mastering this technique transforms your baking from good to exceptional. Here’s what I’ve learned through years of trial and error.
The Pressure Technique: In Step 2, when you’re releasing air from the risen dough, think of pressing like you’re testing a ripe peach—not squashing it. Your fingertips should apply even pressure in that circular motion until you’ve released about half the air, just as described. I’ve found that starting at the center and working outward prevents creating new air pockets at the edges. The dough should visibly relax but still hold its shape when you’re done.
Folding Precision: During Step 3’s fold-and-turn process, make each quarter turn deliberate. After the first fold, press gently before turning—this helps redistribute those gas bubbles more evenly. I count each rotation aloud to ensure I hit that 3-4 times total. You’ll actually feel the dough’s texture change with each turn, becoming smoother and more elastic. If you notice any stubborn large bubbles, don’t force them out—just gently press them toward the edges during your next fold.
Resting Strategy: When shaping in Step 4, if your dough resists or springs back, don’t fight it. That 5-10 minute rest period is your secret weapon. I set a timer for exactly 7 minutes—long enough for the gluten to relax but not so long that the dough starts rising again. Cover it with a clean kitchen towel during this rest to prevent surface drying. You’ll be amazed how much more cooperative the dough becomes after this brief pause.
Final Texture Check: For Step 5’s quality assessment, here’s what to look for beyond the fingertip test: the dough’s surface should have a slight sheen, indicating proper gluten development. When you lift it, it should stretch slightly without tearing. If it feels too dense, you’ve likely over-deflated—give it one more gentle fold sequence. Remember, we’re aiming for even texture, not complete air removal.
Pro Tips for Deflate Dough
- Mastering this technique transforms your baking from good to exceptional. Here’s what I’ve learned through years of t…
- The Pressure Technique: In Step 2, when you’re releasing air from the risen dough, think of pressing like you’re test…
- Folding Precision: During Step 3’s fold-and-turn process, make each quarter turn deliberate. After the first fold, pr…
Frequently Asked Questions
Got questions about deflating dough? You’re not alone! Here are the most common concerns—and quick answers—to help you bake with confidence.
How long should I let dough rest after deflating?
After deflating (or “punching down”), let the dough rest for 10–15 minutes before shaping. This relaxes the gluten, making it easier to work with and preventing tough textures. For a second rise, allow 30–60 minutes (or until doubled).
Can I skip deflating dough? What happens if I don’t?
Skipping this step risks uneven texture, large air pockets, or collapsed bakes. Overproofed dough may taste yeasty or dense. Deflating redistributes gases for a consistent crumb—especially critical for sandwich bread, cinnamon rolls, or pizza crust.
What’s the best way to deflate dough without overhandling?
Use a gentle press-and-fold motion with your fingertips (not fists!) or a dough scraper to avoid tearing. Turn the dough as you go to release gas evenly. Stop once it’s ½ its original size—no need to flatten completely.
This means the gluten is too tight. Let it rest 5–10 minutes at room temp to relax, then try again. If it’s cold (e.g., from the fridge), warm it slightly with your hands or a short 10-second microwave burst (bowl-covered!).
Are there alternatives to punching down dough by hand?
Yes! For sticky doughs, use a stand mixer with a dough hook on low for 30–60 seconds. Or, press it gently with a rolling pin (light strokes only!). Some bakers swear by the “fold-and-turn” method for delicate pastries like brioche.
Deflating dough doesn’t have to be intimidating—now you’ve got the tools to banish dense, heavy bakes for good! 🎉 Whether you’re punching down yeast dough or gently releasing trapped air in pie crusts, the secret lies in timing, technique, and a little patience. Remember, even pros started somewhere, and every perfectly fluffy loaf or tender pastry began with mastering this simple step.
Ready to put your skills to the test? Pick a recipe—maybe that sourdough you’ve been eyeing or a classic cinnamon roll batch—and practice your deflating confidence. Happy baking, and enjoy the light, airy results! 🍞✨