
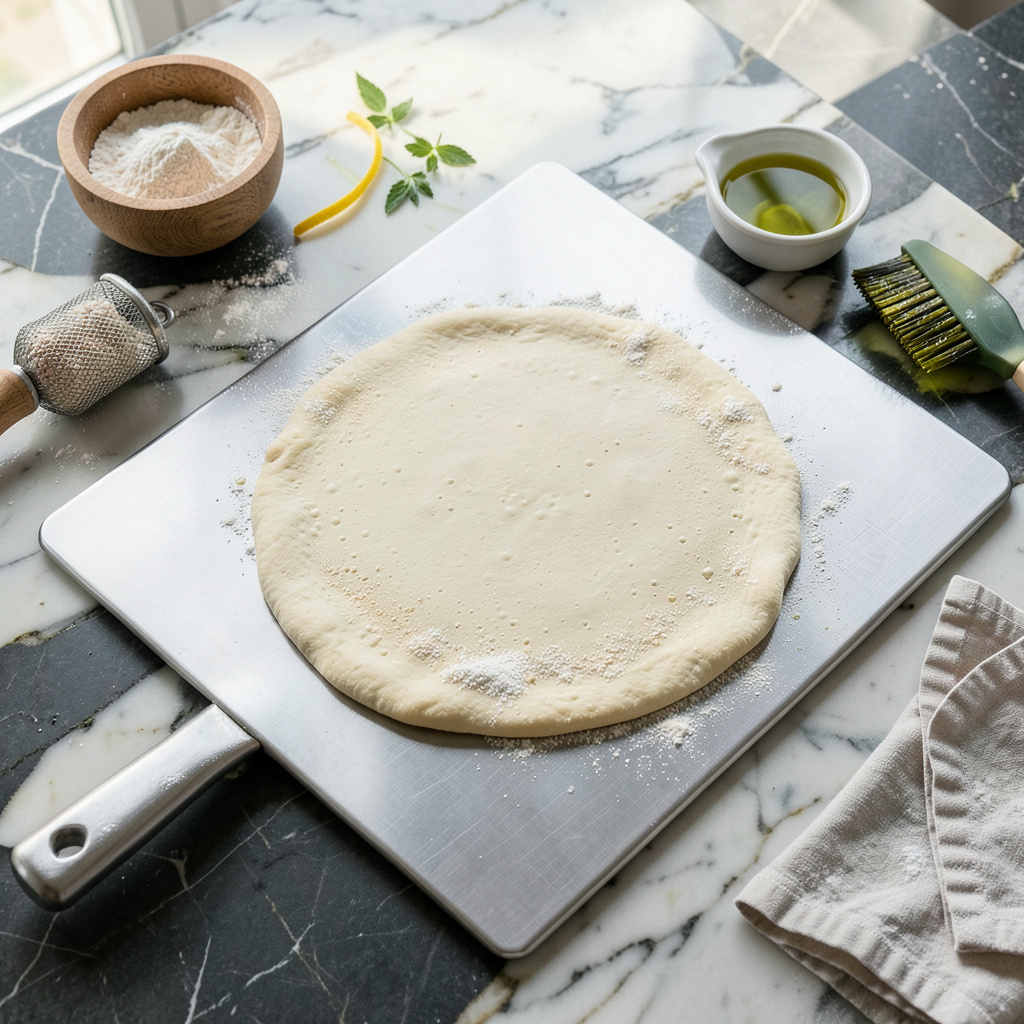
Nothing ruins pizza night faster than dough sticking to your metal peel and turning into a misshapen blob in the oven. After years of trial and error (and more than a few failed pies), I’ve perfected the foolproof method for perfect transfers every time. The key isn’t just flour—it’s understanding why dough sticks in the first place.
Most sticking happens because of excess moisture and improper surface prep. High-hydration dough, humid kitchens, or even slightly damp peels create that frustrating glue-like effect. I learned this the hard way during my first attempt at Neapolitan-style pizza—let’s just say it looked more like modern art than dinner.
The solution combines three simple elements: proper peel preparation, strategic dusting (semolina works better than flour), and confident handling. When done right, your dough will slide off effortlessly, maintaining its shape and giving you that professional pizzeria result at home. No more torn crusts or frantic scraping.
Here’s the thing—this technique works for any pizza style, whether you’re making New York thin crust or chewy Neapolitan. Once you master these steps, you’ll wonder why you ever struggled with sticking dough. Let me walk you through exactly how to make it happen.
📚 In This Guide
- What You’ll Need
- Instructions
- Tips and Common Mistakes
What Youll Need
- ● Metal pizza peel (12–16 inches wide, preferably perforated for better airflow 🍕).
- ● Semolina flour or fine cornmeal (½–1 cup, for dusting—coarser than all-purpose flour).
- ● All-purpose flour or “00” flour (small bowl, for extra dusting if needed).
- ● Pizza dough (1 ball, ~250–300g, room temperature for easier stretching).
- ○ Olive oil or cooking spray (optional, for light peel coating).
- ○ Bench scraper or dough cutter (optional, to lift stuck dough gently).
- ○ Parchment paper (1 sheet, optional backup for tricky transfers).
- ● Clean kitchen towel (1, to wipe peel between uses).
Step-by-Step Instructions for Preventing Pizza Dough From Sticking
Here’s the professional method I use every time—no more frustrating dough disasters.
Prepare Your Metal Peel with Semolina or Cornmeal
Start by thoroughly cleaning your metal peel to remove any residual flour or debris from previous uses. I recommend using a stiff brush to scrub the surface, then wiping it down with a damp cloth. This ensures you’re working with a perfectly clean slate, which is crucial for preventing sticking.
Once dry, dust the peel generously with either semolina or cornmeal—these coarse grains create microscopic barriers between the dough and metal. I prefer semolina for its slightly larger granules, which provide better traction. Use about 2 tablespoons spread evenly across the surface, extending slightly beyond where you’ll place the dough.
Shape and Transfer the Dough with Confidence
Shape your pizza dough on a lightly floured surface, working quickly to prevent the gluten from relaxing too much. When the dough reaches your desired size (typically 12-14 inches for a standard peel), give it a final dusting of flour on the underside before attempting the transfer.
Here’s the professional technique: Slide your hands palm-up under the dough, then quickly flip it onto the prepared peel. If you feel any resistance, lift and adjust immediately—don’t try to force it. The dough should move freely on the semolina bed. If it sticks at all, you haven’t used enough coarse grain.
Perform the Final Pre-Launch Check
Before sliding the pizza into the oven, give the peel a gentle shake back and forth. The dough should glide easily across the semolina layer. If it resists movement, you’ll need to address this before baking. I keep a small bowl of extra semolina nearby to sprinkle under any sticky spots.
Pay special attention to the edges—these are often the first areas to stick. Lift the dough slightly at the front edge and add a pinch more semolina if needed. The entire pizza should be completely mobile on the peel before you attempt the launch. This test prevents 90% of sticking disasters.
Execute the Perfect Oven Transfer
When launching the pizza, use a quick, confident jerking motion rather than a slow push. The sudden movement helps overcome any residual friction. Position the peel at a 10-15 degree angle to the oven floor, with the front edge just touching the baking surface.
In one smooth motion, pull the peel back toward you while simultaneously giving it a slight downward tilt. The pizza should slide off cleanly. If you feel resistance, stop immediately—don’t force it. Pull the pizza back, add more semolina, and try again. Forced transfers almost always result in misshapen pizzas or torn dough.
Maintain Your Peel for Future Success
After removing your pizza, let the peel cool slightly before cleaning. Never soak a metal peel in water—this can cause warping and ruin the seasoning. Instead, use a stiff brush to remove any burned flour or cheese residues while the peel is still warm.
For long-term maintenance, I recommend occasionally seasoning your peel like a cast iron pan. Apply a thin layer of food-safe oil and bake it in a 400°F oven for 30 minutes. This creates a natural non-stick patina that improves with each use. Store your peel in a dry place to prevent rusting between uses.
Tips and Common Mistakes for Perfect Pizza Transfers
Mastering the peel takes practice, but these professional insights will save you from common sticking disasters.
The Grain Game: In Step 1, don’t underestimate the importance of using exactly 2 tablespoons of semolina or cornmeal. I’ve found that semolina’s slightly larger granules create better airflow between dough and peel, preventing steam buildup that causes sticking. Spread it evenly beyond where you’ll place the dough—this extra margin prevents edge sticking during transfer.
Angle of Attack: When executing Step 4’s transfer, that 10-15 degree angle is critical. Too steep and the pizza will fold; too shallow and it won’t release. Practice the motion with an untopped dough first to build muscle memory. The quick jerking motion should be confident but controlled—think of it as a smooth acceleration rather than a violent shake.
Pre-Launch Protocol: The shake test in Step 3 isn’t just a suggestion—it’s your final quality check. If the dough doesn’t glide effortlessly, you’ve missed something. I keep a small bowl of extra semolina right next to my oven for quick adjustments. Pay special attention to the front edge where most sticking occurs during launch.
Peel Maintenance: The 400°F seasoning process in Step 5 creates a patina that improves with each use. I season my peel after every 5-6 uses, or whenever I notice dough starting to resist movement. Use a high-smoke-point oil like flaxseed for the most durable finish. Never use soap—just scrub with a stiff brush while warm.
Pro Tips for Keep Pizza Dough From Sticking To Metal Peel
- Mastering the peel takes practice, but these professional insights will save you from common sticking disasters.
- The Grain Game: In Step 1, don’t underestimate the importance of using exactly 2 tablespoons of semolina or cornmeal….
- Angle of Attack: When executing Step 4’s transfer, that 10-15 degree angle is critical. Too steep and the pizza will …
Frequently Asked Questions
Can I use flour alone to prevent sticking, or do I really need semolina or cornmeal?
While flour can work, it burns faster and lacks texture. Semolina or cornmeal create a coarser barrier that slides better and adds a nice crunch. For best results, dust your peel with a 50/50 mix of flour and semolina—it’s the pizza pro’s secret!
How long should I let the dough sit on the peel before baking?
Aim for no more than 5–10 minutes. If it sits too long, moisture from toppings or dough can seep through, causing sticking. Work quickly: stretch, top, and transfer! Pro tip: Prep toppings in advance to speed up the process.
What’s the best alternative if I don’t have a metal peel?
No peel? No problem! Use a parchment paper sheet (cut to size) or a well-floured wooden board. Slide the pizza + parchment onto the stone, then peel the paper off mid-bake. Wooden peels are also naturally less sticky than metal!
My dough still sticks—what am I doing wrong?
Common culprits: too much sauce (add it after transferring), wet toppings (pat dry veggies/meat), or insufficient dusting. Shake the peel gently before sliding—if it resists, lift and re-dust. Never force it!
How do I clean a metal peel after sticky dough messes?
Scrape off debris with a bench scraper, then wash with hot, soapy water and a stiff brush. Avoid soaking—it can warp the metal. Dry immediately to prevent rust. For stubborn bits, sprinkle with coarse salt and scrub.
With the right prep—semolina, flour, or parchment—and a little practice, you’ll say goodbye to sticky pizza dough disasters for good! 🎉 Whether you’re a weekend chef or a pizza perfectionist, these simple tricks ensure smooth transfers every time. Now that you’ve mastered the peel, why not experiment with a new recipe or host a pizza night to show off your skills? Happy baking—your crispy, golden crust awaits! 🍕