
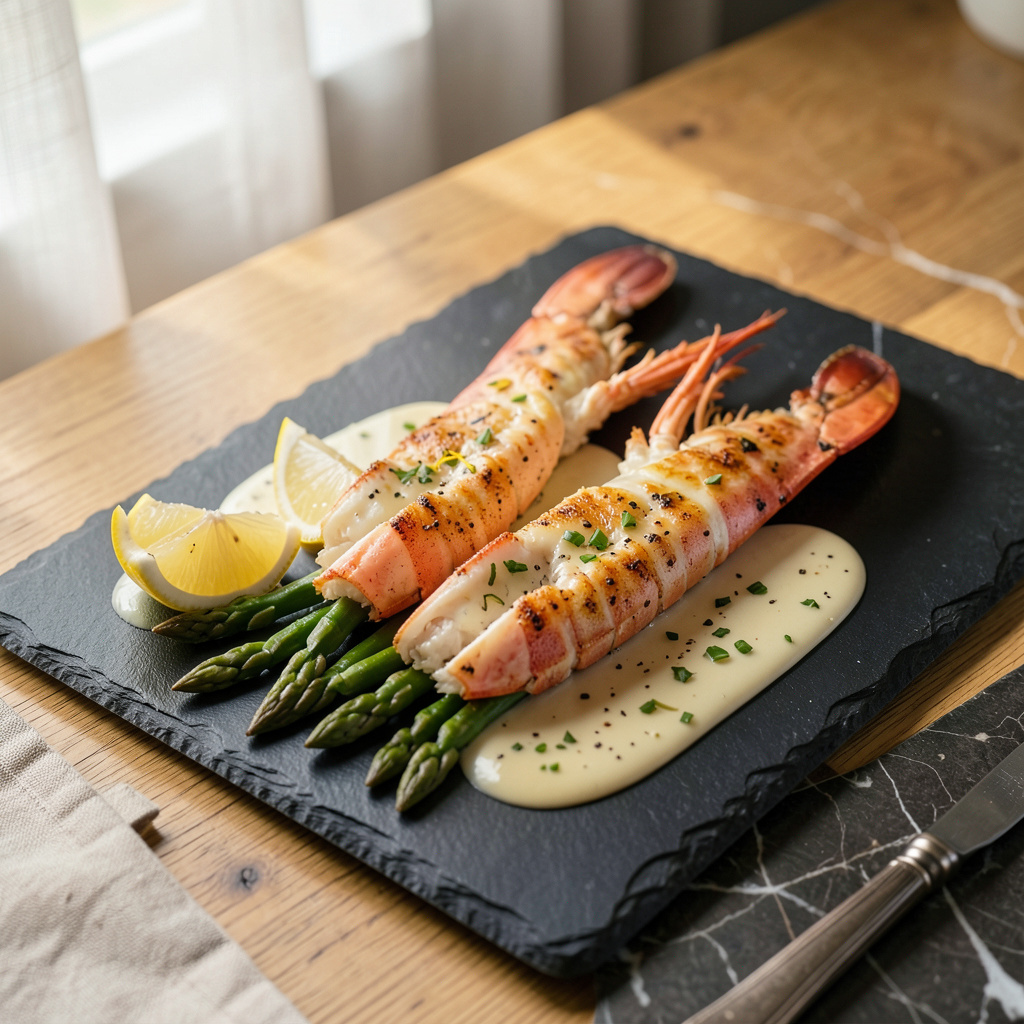
I’ll be real with you—pan-frying lobster tails at home is way easier than most people think. After years of working with premium proteins, I’ve found that lobster tails practically cook themselves if you nail two things: temperature control and timing. No fancy equipment needed, just a heavy skillet and about 10 minutes of your time.
Here’s where it gets interesting—the key is butterflying the tails properly before they hit the pan. This exposes more surface area to the heat, ensuring even cooking and that signature tender texture. I use kitchen shears to cut through the shell (carefully!) and then gently pull the meat up through the opening. A quick seasoning with salt and pepper is all you need—lobster this fresh doesn’t need much help.
The magic happens when you add that butter. As it melts and foams in the hot pan, it bastes the lobster continuously, creating rich flavor while keeping the meat impossibly moist. You’ll know it’s done when the flesh turns opaque and reaches 140°F—usually in about 5-6 minutes total. The aroma alone will have everyone gathering around the stove.
Serve these immediately with lemon wedges and extra melted butter for dipping. For a complete meal, pair with simple sides like roasted asparagus or a crisp green salad. The best part? This technique works just as well for special occasions as it does for a fancy Tuesday night dinner.
📚 In This Guide
- What You’ll Need
- Instructions
- Tips and Common Mistakes
What Youll Need
- ● Lobster tails: 2–4 tails (6–8 oz each, fresh or thawed if frozen)
- ● Butter: 4–6 tbsp (unsalted, for richer flavor)
- ● Olive oil or clarified butter: 1–2 tbsp (to prevent butter from burning)
- ○ Garlic: 2–3 cloves (minced, optional but highly recommended)
- ● Fresh herbs: 1–2 tbsp (parsley, thyme, or chives, chopped)
- ● Lemon: 1 (sliced for garnish + 1 tbsp juice)
- ● Salt & pepper: To taste (sea salt or kosher salt works best)
- ○ Paprika or cayenne: ½ tsp (optional, for a subtle kick)
- ● Heavy-bottomed skillet (stainless steel or cast iron, 10–12 inches)
- ● Tongs or a spatula (for flipping tails gently)
- ● Sharp kitchen shears or lobster crackers (to split the shell)
- ● Paper towels (to pat tails dry)
- ○ Meat thermometer (optional but helpful for perfect doneness)
- ● Basting spoon (to drizzle that buttery goodness!)
Instructions
Here’s how to achieve restaurant-quality lobster tails at home—quick, easy, and foolproof.
Prepare the Lobster Tails
Start by thawing your lobster tails if they’re frozen. I recommend placing them in the refrigerator overnight for best results. If you’re in a hurry, submerge the sealed tails in cold water for 30-60 minutes until completely thawed. Never use warm water, as this can start cooking the delicate meat.
Once thawed, use kitchen shears to cut through the top shell lengthwise, stopping at the base of the tail fin. Gently pull apart the shell and lift the meat out, keeping it attached at the base. Place the meat on top of the shell—this presentation makes for an impressive serving while protecting the meat during cooking.
Season and Set Up for Cooking
Pat the lobster meat dry with paper towels—this ensures proper browning. Season both sides generously with salt and pepper. I like to add a pinch of paprika for subtle color and flavor, but this is optional. The key here is to season just before cooking to prevent the salt from drawing out moisture.
Heat a large skillet over medium-high heat until hot. Add enough butter to coat the bottom of the pan—about 2 tablespoons per 4 tails. You want the butter to foam but not burn. While the butter heats, have your serving plates ready—lobster cooks quickly and is best served immediately.
Cook the Lobster Tails
Place the lobster tails meat-side down in the hot butter. Cook for 2-3 minutes until the underside turns opaque and starts to develop a golden color. Don’t move them around—let them sear undisturbed for that perfect crust.
Carefully flip the tails using tongs and baste them with the melted butter. Cook for another 2-3 minutes until the meat is completely opaque and reaches an internal temperature of 140°F. The meat should feel firm to the touch but still tender. If your tails are particularly large, you might need an extra minute or two.
Finish and Serve Immediately
Transfer the cooked lobster tails to your serving plates. Spoon any remaining butter from the pan over the top for extra flavor. I like to finish with a squeeze of fresh lemon juice and a sprinkle of chopped parsley for brightness and color.
Serve immediately while hot. The meat should be tender and succulent, with a slightly crisp exterior from the butter basting. Pair with drawn butter for dipping, crusty bread to soak up the juices, and a simple green salad to balance the richness. Remember, lobster continues to cook slightly after removing from heat, so timing is everything!
Tips and Common Mistakes
Mastering pan-fried lobster tails is all about precision and timing—here’s what I’ve learned from years of perfecting this luxurious dish.
Thawing Technique: The 30-60 minute cold water thaw in Step 1 is crucial for even cooking. I’ve found that placing the sealed tails in a bowl of cold water with a plate on top to keep them submerged works best. Change the water every 15 minutes if you’re pushing the full 60 minutes—this maintains the cold temperature that prevents partial cooking. Never rush this with warm water, as it will start cooking the delicate meat from the outside in, leading to uneven doneness.
Heat Control: When working with medium-high heat in Step 3, watch your butter carefully. It should foam actively but never turn brown—that’s the point where it starts to burn and develop bitter flavors. If your butter begins browning too quickly, reduce the heat slightly and give the pan 30 seconds to adjust. The perfect butter should remain a pale golden color throughout cooking, which is what gives the lobster that rich, nutty flavor.
Timing Secret: Those 2-3 minutes per side in Step 3 go faster than you think. Here’s what to watch for: during the first 2-3 minutes (meat-side down), the edges will turn from translucent to opaque and start developing that golden crust. When you flip, the second 2-3 minutes should bring the internal temperature to exactly 140°F. I use an instant-read thermometer inserted sideways into the thickest part of the tail—it’s the only way to be certain without overcooking.
Presentation Tip: The method in Step 1 of keeping the meat attached to the shell isn’t just for looks—it actually protects the delicate meat during cooking. When plating, I like to angle the tails slightly upward on the plate, with the shell side down. This shows off the beautiful golden sear while making it easier for guests to access the meat. A quick garnish of lemon wedges and parsley makes it restaurant-worthy.
Pro Tips for Pan Fry Lobster Tails
- Mastering pan-fried lobster tails is all about precision and timing—here’s what I’ve learned from years of perfecting…
- Thawing Technique: The 30-60 minute cold water thaw in Step 1 is crucial for even cooking. I’ve found that placing th…
- Heat Control: When working with medium-high heat in Step 3, watch your butter carefully. It should foam actively but …
Frequently Asked Questions
Got questions about pan-frying lobster tails? You’re not alone! Here are the most common queries—answered quickly so you can get back to cooking that perfect, buttery bite.
How long should I pan-fry lobster tails?
Aim for 1 minute per ounce over medium-high heat. For standard 6-8 oz tails, that’s 3-4 minutes per side until the shell turns bright red and the meat is opaque. Overcooking makes lobster rubbery—so keep it quick!
Can I use frozen lobster tails, or do they need to thaw first?
Always thaw first! Submerge sealed tails in cold water for 30-60 minutes, or thaw overnight in the fridge. Cooking frozen tails leads to uneven doneness and a watery texture. Patience pays off!
What’s the best oil or butter for pan-frying lobster?
A 50/50 mix of butter and neutral oil (like avocado or grapeseed) works best. Butter adds flavor, while oil prevents burning. Clarified butter (ghee) is another great option for a richer taste without scorching.
How do I know if my lobster tail is cooked through?
Check for these signs:
- Shell turns vibrant red.
- Meat is opaque white (no translucency).
- Internal temp hits 140°F (use a meat thermometer for precision).
What’s a good alternative if I don’t have a heavy skillet?
No cast iron? No problem! Use a stainless steel or carbon steel pan (avoid nonstick—it can’t handle high heat). For extra crispiness, finish under the broiler for 1-2 minutes. Just watch closely to avoid overcooking!
Pan-frying lobster tails is simpler than you think—just a few steps stand between you and a restaurant-quality, buttery masterpiece! 🦞 With the right prep, heat control, and a touch of patience, you’ll serve up tender, flavorful lobster that wows every time. Whether it’s a special occasion or a weeknight treat, this method delivers big flavor without the fuss.
Ready to take it further? Pair your lobster with a crisp white wine or a zesty lemon-garlic butter dip, and don’t forget to snap a pic for the gram! 📸 For more seafood secrets, check out our guide on grilling lobster tails—your next culinary adventure awaits!