
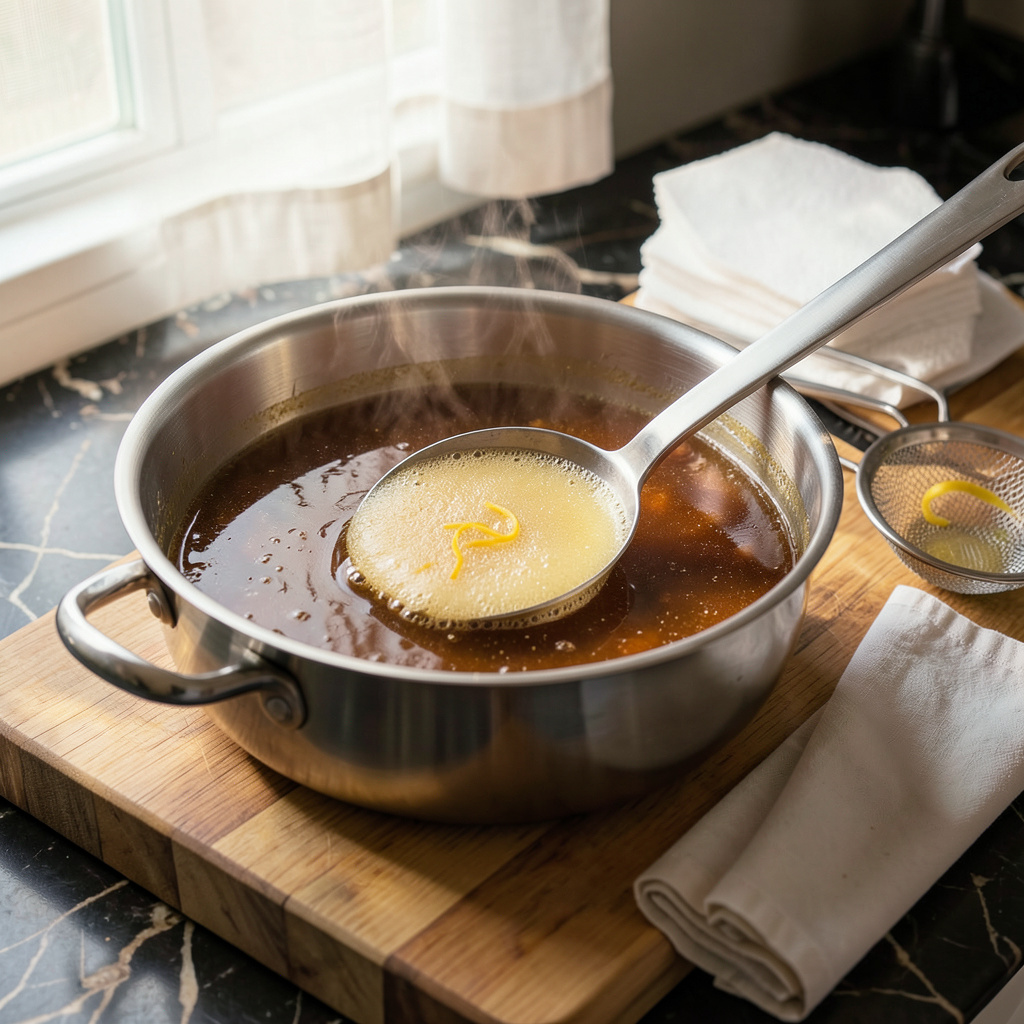
I’ve been cooking professionally for over 15 years, and let me tell you—you don’t need fancy gadgets to get restaurant-quality results. When I first started working in kitchens, we never had fat separators lying around. Instead, we relied on simple techniques that work just as well at home. These methods are what I still use today when I’m making everything from rich pork stock to perfectly clarified consommé.
The truth is, separating fat from liquids is all about understanding basic kitchen science. Whether you’re dealing with hot broth straight off the stove or cold drippings from yesterday’s roast, there’s always a way to get that clean, fat-free liquid you need. I’ve used these tricks in professional kitchens and at home when I’m making my famous crackling roast potatoes or silky gravies that never taste greasy.
What most people don’t realize is that fat separation isn’t just about presentation—it’s about flavor and texture. That layer of fat might look harmless, but it can make your soups taste heavy or prevent your sauces from reducing properly. After years of working with pork (we go through 2,000 pounds weekly at my restaurant), I’ve perfected ways to remove fat while keeping all the rich, meaty flavor you want.
Here’s the thing—these techniques aren’t just for professional cooks. They’re simple enough for anyone to master, and they’ll change how you approach everything from making stock to saving those precious meat drippings for your next meal. No special equipment, no complicated steps—just smart kitchen know-how that actually works.
📚 In This Guide
- What You’ll Need
- Instructions
- Tips and Common Mistakes
What Youll Need
- ● Cooked broth, stock, or meat drippings – At least 2 cups (or more if separating larger batches). Chill for 1–2 hours in the fridge first for best results. 🍲
- ● Glass or metal bowl – A wide, shallow container (like a Pyrex dish or stainless steel mixing bowl) speeds up fat solidification.
- ○ Spoon or ladle – A slotted spoon or large metal spoon for skimming; a turkey baster (optional) for precision.
- ○ Fine-mesh strainer or cheesecloth – For filtering small fat particles (optional but helpful for ultra-clear results).
- ○ Ice cubes or ice pack – 5–6 cubes (optional) to accelerate fat hardening in the “ice bath hack.” ❄️
- ● Clear glass jar or measuring cup – For storing separated liquid (e.g., a 16-oz mason jar).
- ○ Paper towels or coffee filters – To blot excess fat from the spoon between scoops (optional).
- ● Patience! – Fat separation takes 30–60 minutes in the fridge or 10–15 minutes with ice. ⏳
Instructions
Here are three simple methods that work every time—no special tools required.
Use a Spoon or Ladle for Skimming
Let your broth, stock, or cooking liquid cool for 10-15 minutes after removing it from heat. This brief rest allows the fat to rise to the surface, making it easier to remove. You’ll notice a clear layer of fat forming at the top—this is your target.
Gently tilt the pot or bowl to one side, which helps pool the fat in one corner. Take a large spoon or ladle and skim the fat off the surface, moving from the deepest part of the pool outward. I like to use a shallow spoon for better control. Work slowly to avoid disturbing the liquid below.
If you’re dealing with a large quantity, you might need to repeat this process a few times as more fat rises. For best results, skim in one direction rather than stirring or swirling, which can break up the fat layer and make it harder to remove completely.
Try the Ice Cube Trick for Solidified Fat
This method works particularly well for smaller quantities of liquid. Start by chilling your broth or cooking liquid in the refrigerator for 1-2 hours or until the fat solidifies on top. You’ll know it’s ready when you see a white or yellowish layer that’s firm to the touch.
Once chilled, take an ice cube and rub it gently over the surface of the fat. The cold from the ice causes the fat to contract and harden even more, making it easier to lift off. Use a spoon to carefully scrape away the solidified fat, working in sections if needed.
For stubborn bits, you can also slide a butter knife under the fat layer to help lift it away from the liquid. This technique is especially useful for gravies or sauces where you want to preserve as much of the flavorful liquid as possible while removing excess grease.
Absorb Fat with Bread or Paper Towels
For this method, you’ll need either a slice of plain white bread or several paper towels. Tear the bread into small pieces or fold the paper towels into manageable squares. Gently press the bread or paper towel onto the surface of your liquid, where the fat has collected.
The fat will be absorbed almost immediately. Lift away the saturated bread or towel and discard it. Repeat with fresh pieces until you’ve removed all visible fat. I’ve found that bread works particularly well for soups and stews, while paper towels are better for smaller quantities like pan drippings.
Be careful not to press too hard or you might absorb some of your precious liquid along with the fat. The key is to use a light touch and let the fat do the work of adhering to the absorbent material. This method is quick and requires no waiting time, making it ideal when you’re in a hurry.
Tips and Common Mistakes
These simple adjustments will help you get the clearest, cleanest fat separation every time without any special equipment.
The Cooling Factor: That brief 10-15 minute rest in Step 1 isn’t just for convenience—it’s critical. Fat rises to the surface faster when the liquid isn’t actively bubbling, and the temperature difference between the fat and liquid becomes more pronounced. I’ve found that 12 minutes is the sweet spot for most broths and stocks. If you rush this step, you’ll end up with more liquid in your fat and more fat in your liquid.
Tool Selection Matters: For Step 1, a wide, shallow spoon works better than a deep ladle because it gives you more surface area to skim with each pass. I keep a dedicated fat-skimming spoon in my kitchen—it’s just a regular tablespoon with slightly bent edges to help channel the fat. The same goes for Step 3: plain white bread absorbs fat better than whole grain because it’s more porous. Paper towels should be the basic, untextured kind rather than the “ultra-absorbent” varieties which can pull up too much liquid.
Chilling Strategy: When using the ice cube method in Step 2, don’t just toss your container in the fridge and walk away. Place it in the coldest part (usually the back of the bottom shelf) and check after 1 hour. If the fat isn’t fully solidified, give it the full 2 hours. The ice cube trick works best when the fat is firm but not rock-hard—think the consistency of cold butter. Too soft and it won’t lift cleanly; too hard and it might break into pieces when you try to remove it.
Directional Technique: Here’s what nobody tells you about Step 1: always skim in the same direction, working from the deepest part of the fat pool toward the edge. This creates a current that helps gather any stray fat droplets. I move my spoon in smooth, overlapping strokes like I’m painting a wall. If you go back and forth or stir accidentally, you’ll emulsify some of the fat back into the liquid, making your job harder.
Pro Tips for Separate Fat Without A Fat Separator
- These simple adjustments will help you get the clearest, cleanest fat separation every time without any special equip…
- The Cooling Factor: That brief 10-15 minute rest in Step 1 isn’t just for convenience—it’s critical. Fat rises to the…
- Tool Selection Matters: For Step 1, a wide, shallow spoon works better than a deep ladle because it gives you more su…
Frequently Asked Questions
How long does it take for fat to separate naturally in the fridge?
Most broths or drippings separate in 1–4 hours in the fridge, but overnight (8+ hours) guarantees best results. Cold temps solidify fat into a hard layer on top, making it easy to scoop off. For faster separation, use an ice bath (30–60 mins) or freeze briefly (15–20 mins).
Can I use a spoon or ladle instead of a fat separator?
Let the liquid settle for 5–10 minutes so fat rises. Gently tilt the pot and skim the fat with a shallow spoon or ladle. For precision, use a turkey baster to suck up fat from the top. Avoid stirring—it re-mixes everything!
What’s the best alternative if I don’t have time to chill the liquid?
Try the “paper towel trick”: Lay a paper towel over a strainer and pour the liquid through. The towel absorbs fat while letting broth pass. Replace towels as they saturate. Works best for small batches (1–2 cups).
Why does my separated fat still look cloudy or greasy?
Cloudiness means emulsification—tiny fat droplets suspended in liquid. Fix it by:
- Chilling longer (fat hardens more).
- Adding a splash of cold water (helps fat coalesce).
- Avoiding high-heat cooking (prevents over-emulsifying).
Is it safe to reuse the separated fat for cooking?
Yes! Strained animal fats (like bacon grease or poultry fat) can be reused 1–2 times if stored in the fridge (up to 1 month) or freezer (3 months). Reheat gently to avoid burning. Discard if it smells rancid or smoky.
Separating fat without a fat separator is easier than you think! With simple tools like a spoon, ice cubes, or even a turkey baster, you can achieve perfect results every time. 🎯 Whether you’re making gravy, broth, or sauces, these kitchen hacks save time, money, and space—no special gadgets required.
Now that you’ve mastered the basics, put your skills to the test! Try separating fat from your next batch of homemade stock or drippings, and taste the difference. For even more kitchen tips, check out our guide on how to store and reuse rendered fat—because great cooking starts with smart prep! 🍳