
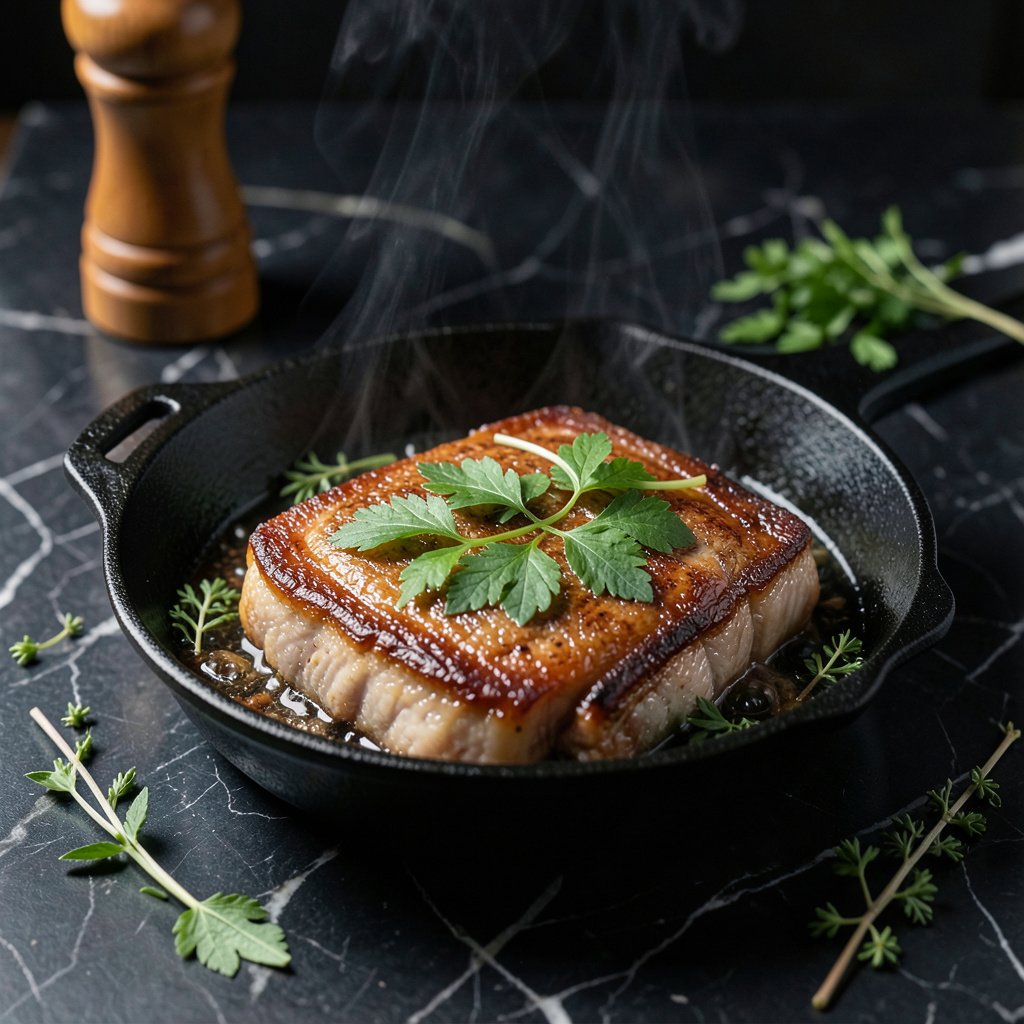
I’ve spent years perfecting my Japanese pork belly recipe, and I’m excited to share it with you. This dish is a staple in my kitchen, and for good reason – the combination of tender pork belly and rich braising liquid is absolute perfection. 🔥
The secret to this recipe lies in the slow cooking process. By braising the pork belly in a mixture of soy sauce, sake, and sugar, we create a tender, melt-in-your-mouth texture that’s simply irresistible. It’s a technique I learned from my time on the Southeast BBQ circuit.
To achieve that perfect texture, you’ll need to cook the pork belly at a low temperature – 300°F – for at least 2 1/2 hours. The result is well worth the wait: tender, unctuous pork belly that’s infused with the deep, savory flavors of the braising liquid.
Serve this Japanese pork belly with steamed rice and a side of pickled vegetables for a truly authentic experience. With only a few ingredients and some patience, you’ll be rewarded with a dish that’s both comforting and sophisticated. It’s a true crowd-pleaser.
Ingredients for Japanese Pork Belly
Simple, rich ingredients come together for melt-in-your-mouth Japanese pork belly perfection every time.
| Ingredient | Amount | Notes |
|---|---|---|
| Pork Belly 🥩 | 2 lb | Skin removed, cut into large pieces |
| Soy Sauce 🧂 | 1 cup | Use low-sodium for better control |
| Sake 🍶 | ½ cup | Or dry white wine as substitute |
| Granulated Sugar 🍮 | ¼ cup | Brown sugar works too |
| Garlic Cloves 🧄 | 4 cloves | Peeled and smashed |
| Ginger 🌿 | 2 slices | Fresh ginger, peeled |
| Green Onions 🌸 | 4 whole | For garnish, thinly sliced |
| Sesame Oil 🫒 | 2 tbsp | For finishing, optional |
| Black Pepper 🌶️ | 1 tsp | Freshly ground preferred |
| Water 💧 | 2 cups | For braising liquid |
| Star Anise 🌿 | 2 whole | Optional, for extra depth |
Pork belly quality matters. Look for good marbling at your local butcher or Asian markets. Costco often has great deals on larger cuts. If you can’t find pork belly, boneless pork shoulder works in a pinch, though the texture will be different. The soy sauce is crucial—Kikkoman is a reliable choice, but feel free to experiment with different brands for varying flavor profiles.
No sake? Chinese rice wine or dry sherry make good substitutes. For a different twist, try adding 1-2 tbsp of gochujang for some heat. The ginger can be adjusted to taste—some like it strong, others prefer a hint. If using star anise, make sure it’s fresh—old spice racks often have stale anise that’s lost its potency. The green onions are for garnish, so use the prettiest ones you can find.
This dish keeps for 4-5 days in the fridge and actually tastes better the next day. Freeze individual portions for up to 3 months. When reheating, add a splash of water or broth to revive the sauce. The flavors will meld together beautifully as it sits, making leftovers a real treat.
❤️
Why You’ll Love Japanese Pork Belly
- DESCRIPTION: I love that this Japanese Pork Belly Recipe requires minimal chopping – just a few garlic cloves and you’re good to go. It’s a weeknight-friendly dish that doesn’t compromise on flavor.
Step-by-Step Instructions for Melt-in-Your-Mouth Braised Pork Belly
Let’s create this Japanese-inspired dish together – rich, tender, and full of depth.
🔥 Step 1: Sear the Pork Belly for Rich Flavor
Heat 2 tbsp of the Sesame Oil in a large Dutch oven over medium-high heat. Add the 2 lb Pork Belly pieces in batches, browning them on all sides until they develop a deep golden crust – this should take about 8-10 minutes per batch. The browning process creates that irresistible caramelized flavor.
Once browned, transfer the pork belly pieces to a plate and set aside. Don’t worry if they aren’t cooked through – they’ll finish cooking in the braising liquid. You’ll notice the aroma filling your kitchen – that’s when you know you’re on the right track.
👨🍳 Step 2: Prepare the Braising Liquid
In the same pot (no need to clean it – we want those browned bits), add the remaining 2 cups Water, 1 cup Soy Sauce, 0.5 cup Sake, and 0.25 cup Granulated Sugar. Scrape up all the browned bits from the bottom using a wooden spoon – this is where most of the flavor lives.
Add the 4 cloves Garlic Cloves and 2 slices Ginger to the liquid. Bring everything to a simmer, then reduce the heat to low and let it cook for 5 minutes to meld the flavors together. The mixture should be fragrant and slightly reduced.
🥘 Step 3: Braise to Tender Perfection
Return the browned Pork Belly pieces to the pot, making sure they’re mostly submerged in the braising liquid. If necessary, add a bit more Water to cover them. Add the 2 whole Star Anise on top.
Cover the pot with a lid and transfer it to a preheated oven at 300°F. Braise for 2 ½ to 3 hours until the pork belly is fork-tender and easily shreds with a fork. The meat should be so tender it practically falls apart.
⏰ Step 4: Rest and Finish
Remove the pot from the oven and let it cool slightly. Using tongs, transfer the pork belly pieces to a cutting board. Strain the braising liquid through a fine-mesh sieve into a clean pot, discarding the solids. Skim off any excess fat from the surface.
Simmer the strained liquid over medium heat until it’s reduced and slightly thickened – about 10-15 minutes. Slice the pork belly against the grain and serve with the rich braising sauce spooned over the top. Garnish with thinly sliced Green Onions and a sprinkle of Black Pepper. For an extra touch, drizzle with a bit more Sesame Oil if desired.
👨🍳
Pro Tips for Making Japanese Pork Belly
- Sear Before Braising: Get a nice crust on your pork belly by searing it in a hot pan before braising. This step actually changes the outcome by creating a richer flavor profile.
- Don’t Overreduce Sauce: Resist the urge to reduce the braising liquid too much – you want it to remain saucy. I learned this the hard way—overreducing can make the dish taste overly salty from the soy sauce.
- Prep Garlic Properly: Smash your garlic cloves before adding them to the braise. This releases their flavor more effectively than mincing, and it’s less work too.
- Low and Slow Wins: Braise your pork belly at a low temperature (around 300°F) to ensure it becomes tender and easily shreds with a fork. My grandmother swore by this method, and she was right: it makes all the difference in the texture.
Troubleshooting Perfect Results
Common Braising Mistakes
One of the most common issues with braising pork belly is not achieving the right temperature control. If your oven runs hot, your pork might end up overcooked. I always recommend using an oven thermometer to verify your temperature is exactly 300°F. Another mistake is not letting the meat rest properly after cooking – this causes the juices to run out when you slice.
Fixing Tough Pork Belly
If your pork belly turns out tough instead of tender, it’s usually because it didn’t cook long enough. The meat needs to reach a stage where it’s literally falling apart. I recall one competition where my pork belly was too firm – I ended up extending the cook time by 30 minutes and it saved the dish.
Handling Excess Fat
Pork belly comes with a significant amount of fat, which can be both a blessing and a challenge. After straining the braising liquid, I always let it cool slightly so the fat rises to the top and solidifies. Then I skim off the excess fat using a spoon or fat separator. This step makes the sauce much cleaner and more balanced. For an extra-rich finish, you can save some of that fat and drizzle it back over the meat.
Rescuing Over-Reduced Sauce
If your braising liquid reduces too much, it can become overly salty or thick. I keep extra broth or water on hand to thin it out if needed. Simply add a bit at a time until you reach the desired consistency. You can also add a splash of rice vinegar to brighten the flavors if they’ve become too intense during reduction.
Saving a Broken Braise
Sometimes the braising liquid can break or separate, leaving an unpleasant texture. This usually happens if the sauce gets too hot or if there’s too much fat. To fix this, I whisk in a small amount of cold water or broth while gently simmering the sauce. This usually brings it back together. If that doesn’t work, blending a portion of the sauce can help emulsify it again.
Preventing Dry Edges
When braising large pieces of pork belly, the edges can sometimes dry out while the center remains perfect. To prevent this, make sure the meat is mostly submerged in the braising liquid. If needed, add a bit more water or broth to cover the pieces completely. You can also cover the pot with aluminum foil under the lid for extra insurance against drying.
Tips & Tricks for Perfect Braised Pork Belly
A few key techniques can elevate this dish from great to exceptional. I’ve learned that attention to detail makes all the difference in achieving that melt-in-your-mouth texture.
The Searing Technique: In Step 1, when browning the 2 lb Pork Belly, make sure to get a deep golden crust on all sides. This 8-10 minutes per batch is crucial for developing that rich flavor. I like to use medium-high heat to get the perfect sear.
Braising Liquid Magic: When preparing the braising liquid in Step 2, don’t skip scraping up those browned bits from the bottom of the pot. This is where most of the flavor lives, and it’s what gives the dish its deep, rich taste. Letting it simmer for 5 minutes on low heat helps meld the flavors beautifully.
Temperature Control: For the braising process in Step 3, maintaining a consistent oven temperature of 300°F is key. This low-and-slow cooking method ensures the pork belly becomes fork-tender after 2 ½ to 3 hours. I recommend using an oven thermometer to double-check your oven’s temperature.
Finishing Touches: When reducing the braising liquid in Step 4, keep an eye on it as it simmers over medium heat for 10-15 minutes. You want it to be rich and slightly thickened, coating the back of a spoon. This step concentrates the flavors and gives the dish its signature richness.
Nutrition Facts
540kcal
Frequently Asked Questions
What’s the best way to store leftover Japanese pork belly?
Store leftovers in an airtight container in the refrigerator for up to 4-5 days. The flavors will meld together beautifully as it sits. You can also freeze individual portions for up to 3 months.
Can I use pork shoulder instead of pork belly?
While pork shoulder can be used as a substitute, it won’t have the same unctuous texture as pork belly. Pork belly’s higher fat content is what makes it so tender and flavorful. If you do use pork shoulder, adjust the cooking time accordingly as it may take longer to become tender.
How do I prevent the braising liquid from becoming too salty?
To avoid overly salty braising liquid, use low-sodium soy sauce and be mindful of the amount of additional salt you add. You can always add more salt to taste, but it’s harder to remove excess salt. Also, skimming off excess fat after straining the liquid helps balance the flavors.
Can I make this recipe without sake?
Yes, you can make this recipe without sake. Dry white wine or Chinese rice wine are good substitutes. If you prefer not to use any alcohol, you can omit it or replace it with a mixture of water and rice vinegar (about 1:1 ratio). The flavor will be slightly different but still delicious.