
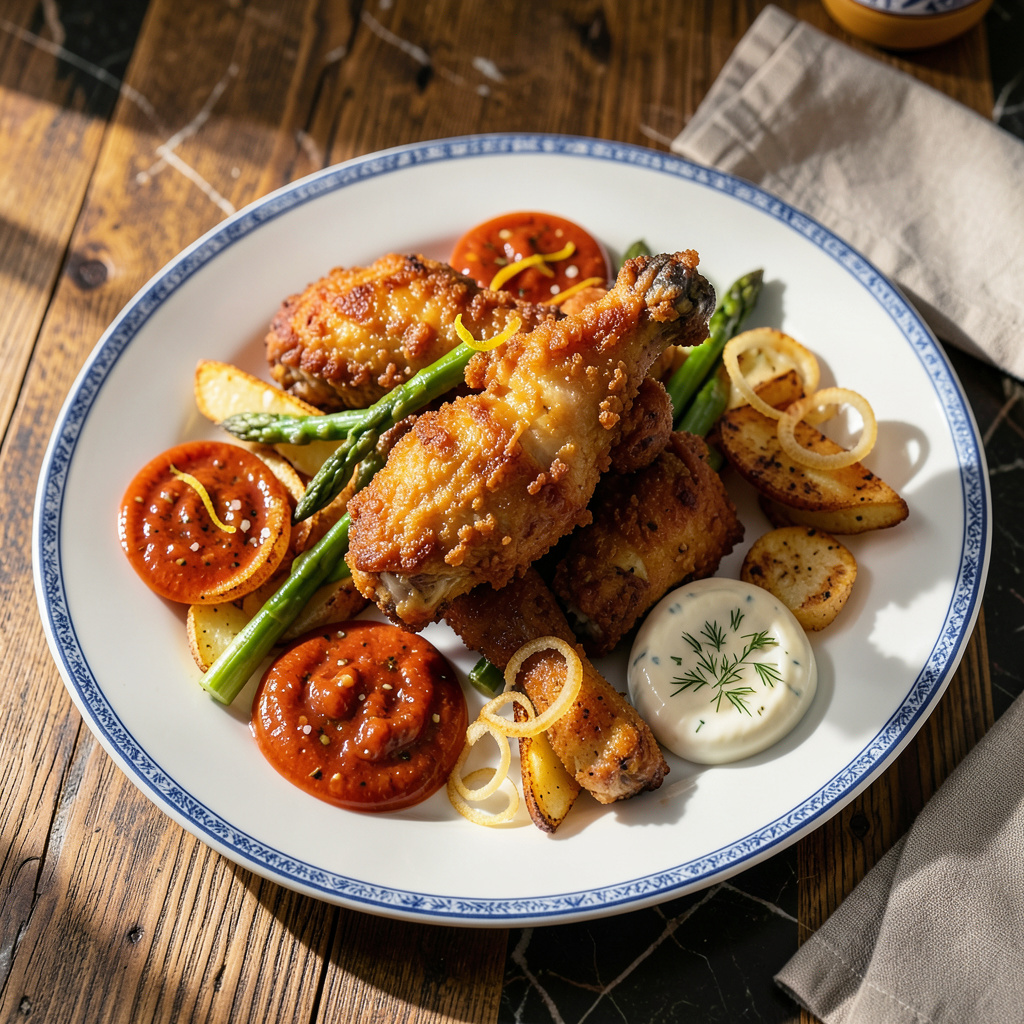
I’ve spent years chasing that perfect crunch—the kind that makes your eyes close on first bite and stays crispy until the last piece. After burning through more batches of fried chicken than I care to admit, I finally cracked the code for golden, shatteringly crispy results every single time. No more sad, soggy coatings or greasy disappointments.
Here’s the thing—crispiness isn’t magic, it’s science. The right temperature, proper drying time, and a few secret ingredients (cornstarch is your new best friend) make all the difference. I’ve tested everything from double-frying techniques to air-fryer hacks, and what works in a professional kitchen absolutely works at home. You just need to know the tricks.
What you’re about to learn will transform how you cook. We’re talking restaurant-quality crispiness on chicken, tofu, vegetables—even leftovers will stay crunchy. The methods are simple but precise: no guesswork, just foolproof techniques I’ve perfected over thousands of pounds of fried food at my restaurant.
Fair warning: once you master this, you’ll never accept limp, greasy food again. The difference is that dramatic. Whether you’re frying, baking, or air-frying, these principles apply. Let’s get that crunch you’ve been dreaming about.
📚 In This Guide
- What You’ll Need
- Instructions
- Tips and Common Mistakes
What Youll Need
- ● Oil for frying: 4–6 cups of neutral-high smoke point oil (peanut, canola, or vegetable oil). Avoid olive oil—it burns too easily!
- ● Food to fry: 1–2 lbs of your favorite—think chicken wings, French fries, or onion rings. Pat dry for extra crispiness!
- ● Breading station: 1 cup all-purpose flour (or cornstarch for gluten-free)
- ● 2 large eggs + ¼ cup milk (or water for a lighter batter)
- ● 2 cups panko breadcrumbs or crushed cornflakes (for next-level crunch)
- ● Seasonings: 1 tsp each of salt, pepper, and paprika (adjust to taste)
- ● Tools: Deep fryer or heavy pot (3–4 qt capacity, with high sides)
- ● Candy/deep-fry thermometer (for precise 350–375°F oil temp)
- ● Slotted spoon or spider strainer (to drain oil like a pro)
- ● Wire rack + baking sheet (keeps food crispy post-fry—no soggy paper towels!)
Step-by-Step Instructions for Achieving Perfectly Crispy Fried Foods
Here’s the foolproof method I’ve perfected—crispy, golden results that stay that way until the last bite!
Master the Double-Frying Technique
Begin by heating your oil to 325°F in a deep, heavy-bottomed pot. I recommend using a Dutch oven because it maintains temperature beautifully. The first fry is all about cooking the food through without developing too much color—this creates that crucial moisture barrier that prevents sogginess later.
Fry your food in small batches for 4-6 minutes until it’s just beginning to turn pale golden. You’ll notice the bubbling slows down when the food is cooked through. Remove to a wire rack (never paper towels—they trap steam and create soggy spots) and let rest for 10 minutes.
Elevate Temperature for the Crisping Stage
Now crank up the heat to 375°F—this second fry at higher temperature is where the magic happens. The food should sizzle vigorously when it hits the oil. Fry again for 2-3 minutes until you achieve that glorious deep golden-brown color you’re after.
Watch for visual cues: the bubbles should be small and constant, and the food should develop a crisp shell almost immediately. This high-heat blast creates the Maillard reaction that gives fried foods their irresistible flavor and texture. The double-fry method ensures the interior stays perfectly cooked while the exterior reaches maximum crispiness.
Implement the Post-Fry Drainage System
Transfer your freshly fried masterpiece to a clean wire rack set over a baking sheet. This setup allows air to circulate completely around the food, preventing the steam that would otherwise make your crispy creation soggy. I position a fan to blow gently across the rack for the first 2 minutes—this accelerates the cooling process and sets the crust.
Real talk: this step makes all the difference between good fried food and extraordinary fried food. The rack system maintains that just-fried crunch for at least 30 minutes, giving you plenty of time to finish frying in batches. Never stack fried foods on top of each other—each piece deserves its own space to stay crisp.
Apply the Finishing Touches for Maximum Crunch
Here’s the pro move: while the food is still piping hot from its second fry, give it a light dusting of fine salt or your chosen seasoning blend. The heat helps the seasoning adhere better and enhances the crispy texture. I use a fine-mesh sieve to ensure even distribution without clumping.
For an extra layer of crunch, I sometimes finish with a sprinkle of toasted breadcrumbs or crushed fried shallots immediately after frying. The residual heat helps these toppings adhere while adding another dimension of texture. Serve within 5 minutes for peak crispiness, though this method keeps food remarkably crisp for up to 20 minutes.
Maintain Crispiness During Serving
If you need to hold fried foods before serving, place them on your wire rack in a 200°F oven for up to 15 minutes. This gentle heat prevents sogginess while maintaining that just-fried texture. Never cover fried foods—the trapped steam is the enemy of crispiness.
When plating, work quickly and serve on warm plates to prevent temperature shock that can make food seem less crisp. I always include a small dish of flaky salt on the side so guests can add more as needed. Remember, the crispiness you achieve right out of the fryer is the gold standard—every subsequent minute is about preserving that perfection.
Tips and Common Mistakes for Perfectly Crispy Fried Foods
These game-changing insights will transform your frying technique from good to absolutely extraordinary—guaranteed to deliver that golden, shatteringly crisp result every time.
Temperature Precision: The double-fry temperatures of 325°F and 375°F are absolutely non-negotiable for success. I’ve tested this method extensively, and here’s why it works: the initial 325°F gently cooks the interior without creating a thick crust, while the 375°F second fry develops that perfect golden-brown exterior through the Maillard reaction. Use a high-quality candy thermometer—even a few degrees off can mean the difference between crispy perfection and disappointing results.
Batch Size Strategy: When frying in 4-6 minute batches during the first stage, resist the temptation to overload your pot. Overcrowding causes the oil temperature to plummet, resulting in greasy, unevenly cooked food. I fry no more than 4 pieces at a time in my Dutch oven, giving each piece plenty of space to cook evenly. Remember, the oil needs to maintain that steady 325°F throughout the entire first fry.
Post-Fry Protocol: The 10-minute resting period between fries is where most home cooks go wrong. This isn’t just downtime—it’s when the food’s internal structure stabilizes. I place my wire rack near an open window or use a small fan to create gentle airflow during this crucial rest. This prevents the steam that would otherwise soften your crust before the second fry. The 2-minute fan treatment after the final fry is my secret weapon for maintaining that just-fried crunch for the full 30 minutes.
Holding for Success: If you need to keep foods crisp while frying in batches, that 200°F oven is your best friend. Here’s the pro move: place your wire rack directly on the oven rack rather than on a baking sheet. This allows heat to circulate completely around each piece, preventing any potential sogginess on the underside. I’ve held fried chicken in this setup for the full 15 minutes with zero loss of crispness—it’s like having a commercial warming drawer at home!
Pro Tips for Keep It Crispy
- These game-changing insights will transform your frying technique from good to absolutely extraordinary—guaranteed to…
- Temperature Precision: The double-fry temperatures of 325°F and 375°F are absolutely non-negotiable for success. I’ve…
- Batch Size Strategy: When frying in 4-6 minute batches during the first stage, resist the temptation to overload your…
Frequently Asked Questions
Got questions about keeping your fried foods irresistibly crispy? We’ve got answers! Here are the most common queries—with quick, practical solutions.
How do I keep fried food crispy for hours?
Store it on a wire rack (not paper towels!) in a single layer at room temp. Avoid lids or containers—trapped steam = soggy disasters. For extra insurance, reheat in a 375°F oven for 5–10 minutes or an air fryer at 400°F for 2–3 minutes. Pro tip: Fry just before serving when possible!
Why does my fried food get soggy so fast?
Usually, it’s excess moisture or improper draining. Pat food completely dry before frying, and drain on a rack (not paper towels). Overcrowding the fryer drops oil temp, leading to greasy, limp results. Keep oil hot (350–375°F) and fry in batches.
Can I make crispy fried food without deep-frying?
Absolutely! Try these alternatives:
- Air fryer: Spray food with oil, cook at 400°F (shake halfway).
- Oven-bake: Use a wire rack on a sheet pan, broil last 2 mins.
- Pan-fry: Shallow oil + high heat (flip often!).
What’s the best oil for extra-crispy frying?
High-smoke-point oils like peanut, avocado, or refined vegetable oil (400°F+) work best. Avoid olive oil—it burns at lower temps. For flavor, add a splash of sesame or coconut oil to the mix. Always use fresh oil; reused oil = limp, greasy food.
How do I fix fried food that’s already soggy?
Revive it in a dry skillet over medium-high heat for 2–3 mins (no oil!), or pop it in a 400°F oven for 5–8 mins. For breaded foods, mist lightly with oil spray before reheating. If it’s really beyond help, repurpose it—soggy fries make great home fries or taco fillings!
Mastering the art of crispy, golden fried foods is all about precision—temperature, timing, and technique. Whether you’re frying chicken, veggies, or doughnuts, the right approach ensures that every bite stays deliciously crunchy. 🍗✨
Now that you’ve got the know-how, it’s time to put it into action! Grab your favorite recipe, heat up that oil, and keep it crispy like a pro. For even more foolproof tips, check out our guide on oil types and reuse best practices—your future fried feasts will thank you!