
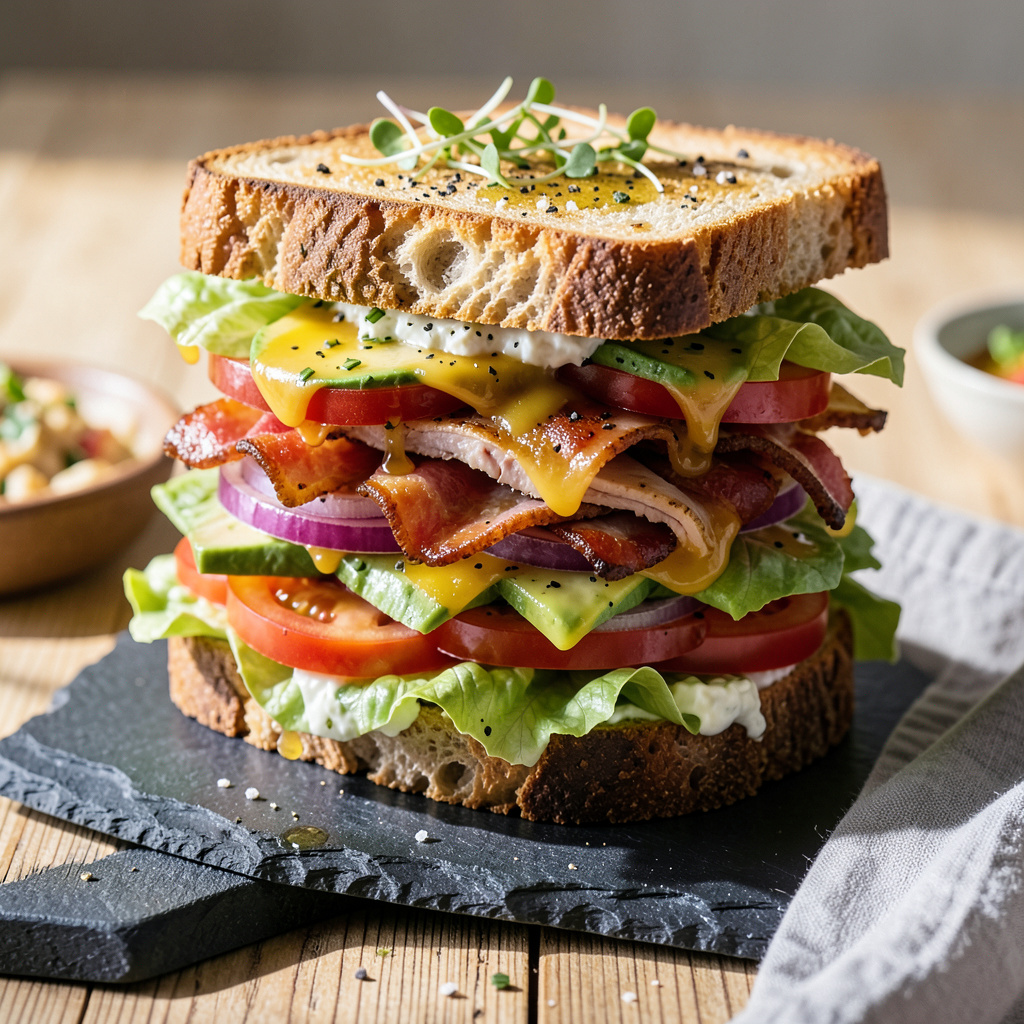
I’ll be real with you—there’s an art to building a sandwich that actually delivers in every bite. After years of making thousands of pork sandwiches at The Smoky Pig, I’ve learned that perfect layers and texture balance make all the difference. This isn’t just slapping meat between bread; it’s about creating harmony with each ingredient.
We’re talking about crusty artisan bread that holds up to juicy fillings, proteins cooked just right (whether it’s smoked pork, grilled chicken, or crispy tofu), and fresh vegetables that add crunch. The spreads matter too—homemade mayo, tangy mustard, or herby aioli can transform a good sandwich into something extraordinary. I’ve tested every combination to find what works best.
What you’ll end up with is a sandwich where every bite delivers all the flavors and textures in perfect balance. No soggy bottoms, no sliding fillings, just layer upon layer of deliciousness. The kind of sandwich that makes you pause mid-bite because it’s exactly what you’re looking for.
Perfect for lunch, dinner, or even breakfast if you swap in some eggs. Let’s build this sandwich right—from the bread up to that final satisfying bite.
📚 In This Guide
- What You’ll Need
- Instructions
- Tips and Common Mistakes
What Youll Need
- ● Bread (2 slices per sandwich): White, whole wheat, sourdough, or artisanal loaves (fresh or lightly toasted)
- ● Gluten-free or low-carb options (if preferred)
- ● Protein (2–4 oz per sandwich): Deli meats (turkey, ham, roast beef, salami, or pastrami)
- ● Grilled chicken, steak, or tofu (½-inch thick slices)
- ● Hard-boiled eggs, tuna salad, or chickpeas (for veggie options)
- ● Cheese (1–2 slices or ¼ cup shredded): Cheddar, Swiss, provolone, pepper jack, or brie
- ● Vegan cheese alternatives
- ● Veggies (¼–½ cup total): Lettuce (romaine, iceberg, or spinach), tomato (2–3 slices), onion (2 thin rings), or cucumber (3–4 slices)
- ● Pickles, jalapeños, or roasted red peppers (for a tangy kick)
- ● Condiments (1–2 tbsp each): Mayonnaise, mustard (Dijon or yellow), ketchup, or pesto
- ● Hot sauce, aioli, or hummus (for extra flavor)
- ● Tools: Sharp chef’s knife (8–10”) and cutting board
- ● Butter knife or spreader
- ● Toaster or skillet (for toasted sandwiches)
- ● Fresh herbs (basil, cilantro, or dill)
- ● Avocado (¼, sliced or mashed)
- ● Bacon (2 crispy strips) or prosciutto
- ● Specialty breads (brioche, ciabatta, or baguette)
- ● Sandwich press (for panini-style results)
Instructions for Making the Perfect Sandwich
Here’s how to build a sandwich with balanced flavors and textures in every bite.
Choose and Prepare Your Bread
Start with fresh, quality bread that matches your sandwich style. For hearty sandwiches, I love crusty sourdough or ciabatta. For lighter options, brioche or whole wheat works beautifully. The key is freshness—stale bread makes a sad sandwich.
Toast your bread lightly if you’re using soft varieties like white or wheat. A quick 30-45 seconds in a toaster or under the broiler adds structure and prevents sogginess. For crusty breads, skip toasting—they’ll hold up perfectly on their own. Always let toasted bread cool for 1 minute before assembling to avoid wilting your ingredients.
Create a Flavor Barrier with Spreads
This is where the magic begins! Apply a thin layer of your chosen spread to both slices of bread, all the way to the edges. I’m talking mayonnaise, mustard, pesto, hummus, or even flavored cream cheese. This creates a moisture barrier that protects your bread from getting soggy.
Don’t be shy with seasoning here. A sprinkle of salt and pepper on the spread layer enhances all the flavors to come. For extra depth, add a dash of hot sauce to mayo or mix Dijon mustard with honey. The spread should complement your main ingredients—tangy for rich meats, creamy for crunchy veggies.
Layer Ingredients Strategically
Now for the fun part—building your flavor profile! Start with your protein layer if using meat or cheese. Arrange slices evenly across the bread, leaving a small border to prevent spillover. For deli meats, fold them rather than stacking flat—they’ll distribute better in each bite.
Next add your vegetables. Place leafy greens first to create a bed, then add other veggies. For crunchy elements like pickles or onions, distribute them evenly so every bite has texture. The order matters: put juicy ingredients (tomatoes, cucumbers) next to the spread layer, not directly on bread. This prevents the bread from absorbing too much moisture.
Add the Finishing Touches
Sprinkle fresh herbs like basil, cilantro, or parsley over the top layer—they add brightness and freshness. A final grind of black pepper or flaky sea salt elevates all the flavors. For hot sandwiches, this is when you’d add melted cheese or return it to the heat source.
Press down gently on the sandwich to compact the layers slightly. This helps everything stay together when you bite in. Cut your sandwich diagonally or horizontally based on preference—I find diagonal cuts expose more of the beautiful layers inside.
Serve and Enjoy Immediately
The perfect sandwich is best enjoyed fresh! Serve immediately while all the textures are at their peak. If you must pack it for later, wrap it tightly in parchment paper or foil to maintain freshness. Most sandwiches keep well for 3-4 hours at room temperature.
Take that first bite and notice how all the flavors and textures work together. The crispness of the bread, the creaminess of the spread, the savory protein, and the fresh vegetables should create a harmonious experience. This is what makes a truly perfect sandwich!
Tips and Common Mistakes for Perfect Sandwiches
Building the perfect sandwich is all about technique and attention to detail. Here’s what I’ve learned from years of making thousands of sandwiches that people rave about.
Bread Preparation Secret: In Step 1, those 30-45 seconds of toasting make all the difference! For soft breads, aim for just barely golden – you want structure without losing tenderness. I always use the middle toaster setting for white or wheat bread. The 1 minute cooling time is crucial too – it prevents condensation from forming when you add cold ingredients to warm bread.
Spread Technique That Changes Everything: When applying spreads in Step 2, use an offset spatula or butter knife to get that perfect thin, even layer. Press gently as you spread to ensure complete coverage right to the edges. This creates a perfect moisture barrier. I like to add a tiny pinch of salt directly to the spread layer – it amplifies all the flavors in your sandwich!
Layering Pro Tip: For Step 3, here’s what nobody tells you – fold your deli meats into thirds like a letter before placing them on the bread. This creates multiple layers of flavor in every bite rather than one thick layer. When adding vegetables, place the juiciest items (like tomatoes) directly on top of the spread layer, not touching the bread. This simple ordering prevents sogginess while maintaining freshness.
Final Assembly Trick: In Step 4, don’t skip the gentle pressing step! Place your second slice of bread on top, then press down firmly but gently with both hands. This helps all the layers adhere together. For the perfect diagonal cut, use a serrated knife and cut in one smooth motion – no sawing back and forth which can squish your beautiful layers.
Pro Tips for Making Sandwich
- Building the perfect sandwich is all about technique and attention to detail. Here’s what I’ve learned from years of …
- Bread Preparation Secret: In Step 1, those 30-45 seconds of toasting make all the difference! For soft breads, aim fo…
- Spread Technique That Changes Everything: When applying spreads in Step 2, use an offset spatula or butter knife to g…
Frequently Asked Questions
Got questions about crafting the perfect sandwich? We’ve got answers! Here are the most common queries—solved in a snap.
How do I keep my sandwich from getting soggy?
Layer wet ingredients (like tomatoes or pickles) between dry items (cheese, meat, or lettuce) to create a barrier. Spread condiments on both slices of bread lightly, or pack sauces separately for dipping. Pro tip: Toast the bread for extra crispiness!
What’s the best bread for a sandwich that won’t fall apart?
Opt for sturdy, dense breads like sourdough, ciabatta, or whole-grain. Avoid overly soft loaves (like white sandwich bread) for heavy fillings. If using baguettes or rolls, slice them horizontally to maximize surface area for toppings.
How far in advance can I make a sandwich?
Most sandwiches stay fresh for 2–4 hours at room temperature or up to 24 hours refrigerated (wrap tightly in parchment or foil). For meal prep, assemble dry ingredients first, then add wet components (like avocado or mayo) just before eating.
What are some quick protein alternatives to deli meat?
Swap in grilled chicken, hard-boiled eggs, hummus, tofu, or canned tuna/salmon. For plant-based options, try tempeh, chickpea salad, or nut butters with banana or honey. Even leftover steak or roasted veggies work great!
Why does my sandwich taste bland? How can I fix it?
Balance is key! Add acidity (pickles, vinegar), crunch (nuts, fresh veggies), creaminess (avocado, cheese), and herbs/spices (basil, smoked paprika). A dash of salt and pepper on each layer also boosts flavor—don’t skip seasoning!
Mastering the art of making sandwiches is all about balancing textures, flavors, and creativity—whether you’re whipping up a quick lunch or crafting a gourmet masterpiece. 🌟 With the right ingredients, techniques, and a little experimentation, every bite can be a delicious adventure!
Now that you’ve got the know-how, why not put it into action? Grab your favorite bread, pick a protein or veggie star, and start layering your way to sandwich perfection. Don’t forget to share your creations—tag us with #PerfectBiteChallenge and inspire others!