
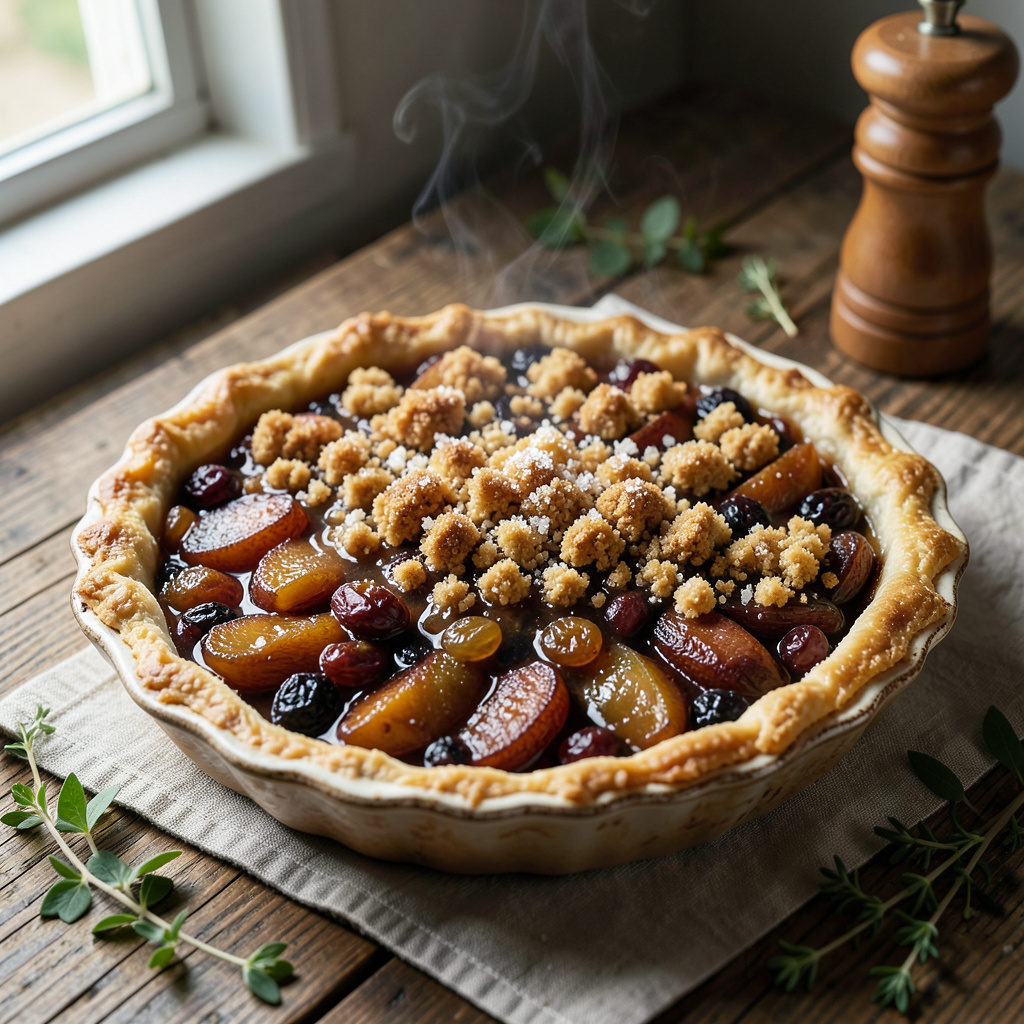
There’s something deeply nostalgic about the rich flavors of an old-fashioned mincemeat pie, especially one that dates back to 1798. This heritage dessert brings warmth to any holiday table and evokes memories of family gatherings and festive cheer. I can’t wait to share this classic with you.
What makes this dish truly special is its combination of dried fruits, spices, and a hint of brandy, creating a filling that’s both sweet and savory. The flaky crust holds it all together, making each slice a delightful experience. Trust me, it’s worth every minute spent preparing.
Once baked, you’ll be rewarded with a golden-brown pie that fills your kitchen with an irresistible aroma. The flavors meld beautifully as it cools, making it a perfect centerpiece for your holiday celebrations. Each bite is a taste of history that your guests will adore.
This timeless recipe is perfect for holiday gatherings or cozy evenings at home. Serve it warm with a scoop of vanilla ice cream for an unforgettable dessert experience. Let’s dive into the details and bring this classic to life!
Ingredients for Old-fashioned Mincemeat Pie Recipe from 1798
Nothing fancy here—just a few wholesome ingredients to create this classic dessert.
| Ingredient | Amount | Notes |
|---|---|---|
| Dried Apples 🍏 | 1 cup | Chopped for filling |
| Raisins 🍇 | ¾ cup | Plump and sweet |
| Currants 🍇 | ½ cup | For extra flavor |
| Brown Sugar 🍬 | ½ cup | Packed for sweetness |
| Ground Cinnamon 🌿 | 1 tsp | For warm spice notes |
| Ground Nutmeg 🌰 | ¼ tsp | Freshly grated preferred |
| Allspice 🌶️ | ½ tsp | Adds depth of flavor |
| Brandy 🥃 | 2 tbsp | For richness in filling |
| Pie Crusts 🥧 | 2 whole | Homemade or store-bought |
| Egg Wash 🥚 | 1 whole | For a golden crust finish |
The dried apples are essential for that nostalgic texture, so look for unsweetened varieties—they have more flavor. I often find mine at Trader Joe’s or the bulk section of the grocery store. Raisins and currants add sweetness and a bit of chew, perfect for balancing the spices. Make sure your spices are fresh; old ones lose their kick and flavor fast.
No brandy? Apple cider vinegar or a splash of apple juice can work in a pinch, but trust me, the brandy adds that special something! Feel free to swap out currants for more raisins if that’s what you have. You can also use store-bought crusts if you’re short on time—no judgment here! Just ensure they’re flaky and not soggy.
This pie keeps well for about 3 days in the fridge, and honestly, it tastes even better the next day as the flavors meld. If you want to make it ahead of time, you can freeze it before baking—just wrap tightly! It’ll last for about 3 months in the freezer. Just let it thaw in the fridge overnight before baking.
Step-by-Step Instructions for Old-Fashioned Mincemeat Pie
Creating this classic pie is a delightful journey into culinary history. Let’s get started!
👨🍳 Step 1: Prepare the Filling
Begin by chopping the dried apples into small pieces and placing them in a large mixing bowl. Add the raisins and currants, ensuring they’re plump and sweet. Next, sprinkle in the brown sugar, ground cinnamon, ground nutmeg, and allspice. These spices provide warm notes that define the flavor of your filling.
To bring everything together, pour in the brandy. This adds richness to the mixture. Stir everything thoroughly until well combined; you want the fruits to be evenly coated with the sugars and spices. Let this mixture sit for about 15 minutes so the flavors meld beautifully.
🥘 Step 2: Roll Out the Pie Crusts
While your filling is resting, take out the two pie crusts. If you’re using homemade crusts, roll them out on a lightly floured surface to about 1/8 inch thick. I find that keeping the dough cold helps prevent it from becoming tough when baked.
Place one rolled-out crust into a 9-inch pie dish, pressing gently into the corners. Trim any excess hanging over the edges. This step is crucial because it ensures a clean edge once baked. If there are any cracks, just pinch the dough back together—no one will notice after it’s baked!
🔥 Step 3: Assemble and Bake the Pie
Preheat your oven to 425°F. Pour the prepared filling into the crust, spreading it evenly. Then, place the second crust on top. Crimp the edges together to seal in all that deliciousness. Don’t forget to cut a few slits in the top crust; this allows steam to escape and prevents sogginess.
Brush the top crust with the egg wash for a beautiful golden finish. Place your pie in the oven and bake for about 30-35 minutes, or until the crust is golden brown and you can see bubbling juices through the slits. Keep an eye on it—if it browns too quickly, cover it loosely with foil.
⏰ Step 4: Cool and Serve
Once baked, remove the pie from the oven and let it cool for at least 1 hour. This cooling period allows the filling to set properly, making slicing easier. I know it’s tempting to dig right in, but waiting will enhance your experience!
Serve slices warm or at room temperature with a scoop of vanilla ice cream or whipped cream. This pie is a true holiday classic that brings warmth and nostalgia to any gathering. Enjoy every bite of your heritage creation!
Troubleshooting Perfect Results
Common Filling Issues
If your mincemeat filling turns out too dry, it might be lacking moisture. Adding an extra splash of brandy or even a bit of apple juice can help. On the flip side, if it’s too wet, try cooking it down a little before filling the crust. This prevents a soggy pie! 🍏
Crust Concerns
A tough crust often results from overworking the dough. I recommend handling it gently and keeping everything cold. If your crust shrinks during baking, ensure you let it rest for at least 30 minutes in the fridge before rolling it out. It really makes a difference!
Baking Temperature Troubles
Sometimes, ovens can be finicky. If your pie browns too quickly, cover the edges with foil to protect them while the filling continues to bake. Ideally, you’re looking for that perfect golden color after about 30-35 minutes at 425°F. 🔥
Setting Problems
If your filling doesn’t set properly after cooling, it may need more time in the oven. You want to see bubbling juices through the slits in the crust. If it’s still runny after cooling for 1 hour, it might just need a longer baking time next time! ⏰
Flavor Adjustments
Taste your filling before baking! If it lacks sweetness, add a touch more brown sugar. For added depth, consider incorporating more spices like ground cinnamon or allspice. Remember, flavors develop as it bakes, but starting off strong is key! 🌿
Storage Solutions
This pie keeps well in the fridge for about 3 days. If you want to make it ahead of time, freeze it before baking. Just wrap it tightly! It’ll last for about 3 months, and thawing overnight in the fridge is the best method to prepare it for baking later.
Nutrition Facts
Frequently Asked Questions
What makes this mincemeat pie recipe unique?
This recipe dates back to 1798, incorporating traditional ingredients like dried fruits, spices, and a hint of brandy. It’s a blend of sweet and savory flavors that reflects historical cooking practices. Enjoy a slice of history with every bite!
Can I make this pie ahead of time?
You can prepare the pie and freeze it before baking. Just wrap it tightly for up to 3 months. Thaw it overnight in the fridge before baking for the best results. It actually tastes even better the next day!
What should I do if my filling is too dry?
If your filling seems dry, add a splash of brandy or some apple juice to moisten it. This will help ensure a rich and flavorful filling that won’t disappoint!
How do I prevent my crust from shrinking?
To avoid shrinking,