
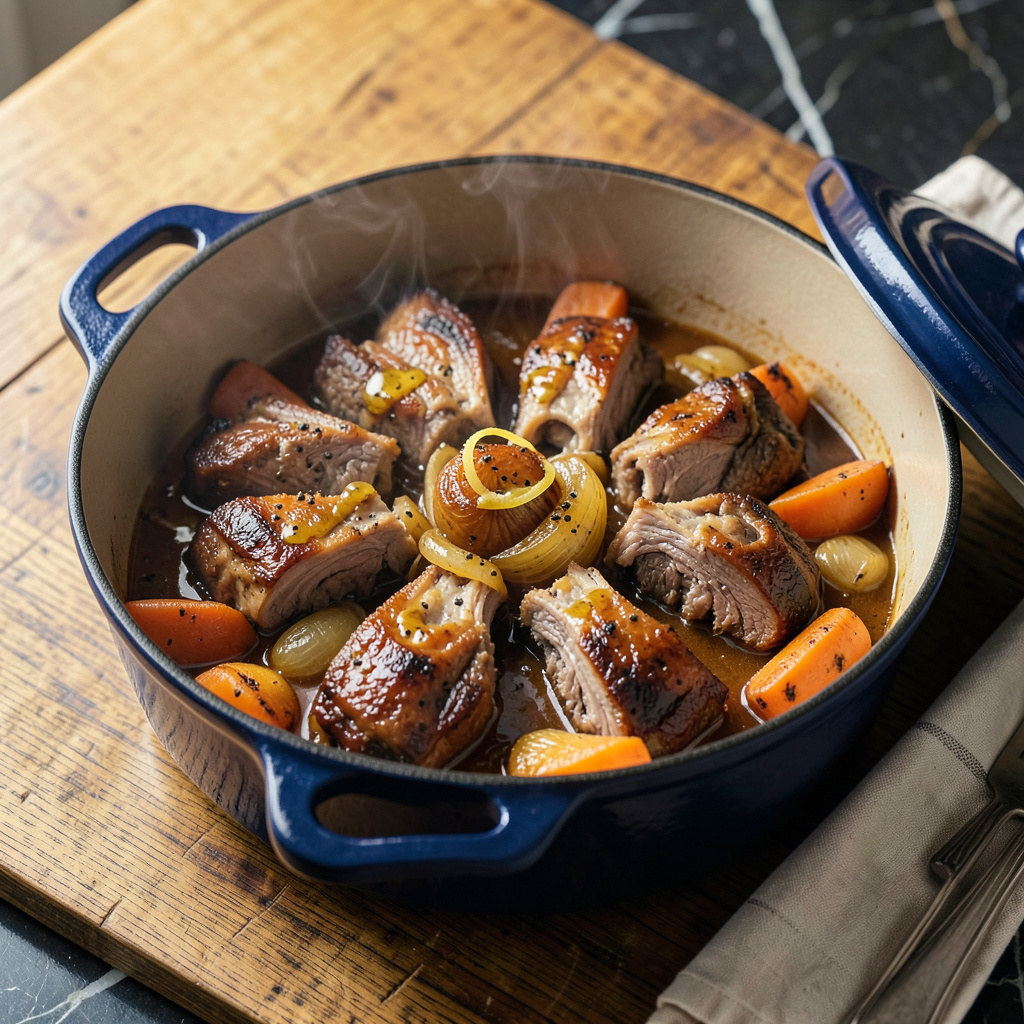
Oxtail demands patience, but the reward is unmatched—deeply caramelized meat that collapses at the touch of a fork. After years of perfecting this method in professional kitchens, I’ve streamlined the process for home cooks while maintaining restaurant-quality results. The oven’s consistent heat transforms this tough cut into something luxurious.
This recipe relies on a two-step approach: first searing the oxtail until deeply browned, then slow-braising in a rich aromatic liquid. The searing creates a flavor foundation through the Maillard reaction, while the braising liquid—typically a combination of stock, wine, and tomatoes—breaks down connective tissue over 3-4 hours. Aromatics like onions, garlic, and thyme build complexity without overwhelming the meat’s natural richness.
What emerges from the oven is oxtail with meat so tender it nearly slides from the bone, surrounded by a velvety sauce reduced to intense, savory perfection. The dish achieves balance between the meat’s unctuousness and the sauce’s bright acidity. This isn’t fast food—it’s an investment in a meal that tastes like it simmered all day in a professional kitchen.
Serve over creamy polenta or buttery mashed potatoes to soak up every drop of sauce. The leftovers, if any remain, improve overnight as flavors meld further. This technique adapts well to both Dutch ovens and slow cookers for those preferring hands-off convenience.
Ingredients for Oxtail Recipe Oven
Professional-grade ingredients transform this humble cut into restaurant-quality braised oxtail with unparalleled depth of flavor.
| Ingredient | Amount | Notes |
|---|---|---|
| Oxtail Segments 🥩 | 4 lb | Trimmed of excess fat by butcher |
| Kosher Salt 🧂 | 2 tbsp | Diamond Crystal preferred for even distribution |
| Freshly Ground Black Pepper 🌶️ | 1 ½ tsp | Coarse grind for optimal adhesion |
| Grapeseed Oil 🫒 | ¼ cup | High smoke point for searing |
| Yellow Onions 🧅 | 2 whole | Large dice, uniform 1/2-inch pieces |
| Carrots 🥕 | 3 whole | Peeled, cut into 1-inch chunks |
| Celery Stalks 🌿 | 3 whole | Cut into 1-inch pieces, leaves reserved |
| Garlic Cloves 🧄 | 8 cloves | Smashed, skins removed |
| Tomato Paste 🍅 | 3 tbsp | San Marzano preferred for sweetness |
| Dry Red Wine 🍷 | 2 cups | Bold Cabernet Sauvignon or Merlot |
| Beef Stock 🥩 | 4 cups | Low-sodium, high-quality preferred |
| Fresh Thyme Sprigs 🌿 | 6 sprigs | Tied with kitchen twine |
| Bay Leaves 🍃 | 2 whole | Dried, intact leaves |
| Unsalted Butter 🧈 | 2 tbsp | European-style for finishing sauce |
| Fresh Italian Parsley 🌿 | ¼ cup | Finely chopped for garnish |
The oxtail quality determines the final dish’s success. Specialty butchers or Asian/Latin markets typically offer the best selection—look for segments with generous meat-to-bone ratio. Diamond Crystal kosher salt ensures proper seasoning without over-salting, while San Marzano tomato paste (available at Italian markets or Whole Foods) provides the ideal sweet-acid balance. For the wine, a bold, dry red with tannic structure (Cabernet Sauvignon or Merlot) creates the necessary depth—avoid cooking wines with added salt.
Substitutions must maintain the dish’s structural integrity. Beef shank can replace oxtail (increase braising time by 30 minutes), while dried porcini mushrooms (rehydrated in warm stock) add umami if tomato paste is unavailable. For alcohol-free preparation, substitute 2 cups beef stock plus 2 tbsp balsamic vinegar for the wine. The butter finish is non-negotiable for sauce emulsification, though vegan butter alternatives (like Miyoko’s) work in a pinch. Fresh thyme can be replaced with 1 tsp dried thyme added during the last hour of cooking.
Proper storage preserves the dish’s quality for 5 days refrigerated or 3 months frozen. Cool completely before transferring to airtight containers, ensuring the oxtail remains submerged in sauce to prevent drying. The sauce will thicken significantly when chilled—reheat gently with splashes of stock to restore consistency. For optimal flavor development, prepare the dish 1 day ahead; the extended resting time allows collagen to further gelatinize, enhancing mouthfeel and sauce body.
Why You’ll Love This Recipe
- One-Pan Magic: I love that this entire dish comes together in a single oven-safe pot. Brown the oxtail, soften the onions in the same pan, then let the oven do the rest—no mountain of dishes, just rich, caramelized flavor building in one place.
- Fall-Off-The-Bone Good: The slow oven braise transforms those tough oxtail segments into something buttery and tender, while the onions melt into a sweet, jammy sauce. That first bite—when the meat practically dissolves but still has that deep, roasted crust? Worth every minute.
- Sunday or Wednesday: This isn’t just for special occasions. I’ve made it for lazy weekends (with crusty bread to soak up the juices) and rushed weeknights (the leftovers reheat like a dream). Honestly, it’s the kind of dish that feels fancy but doesn’t demand your undivided attention.
- Budget-Friendly Luxury: Oxtail’s not cheap, but a little goes a long way—those bony segments pack so much gelatin and flavor that you’re basically getting a built-in stock upgrade. Stretch it with extra onions, and suddenly you’ve got two meals: tonight’s stew and tomorrow’s ramen broth. My wallet and my taste buds approve.
Step-by-Step Instructions for Oxtail Braising
This method transforms tough oxtail segments into tender, flavorful meat through careful browning and slow oven braising.
Step 1: Sear the Oxtail Segments
Pat the oxtail segments completely dry with paper towels. Season generously with the 2 tbsp kosher salt and 1.5 tsp freshly ground black pepper, ensuring even coverage on all sides. Heat the 0.25 cup grapeseed oil in a large Dutch oven over medium-high heat until shimmering.
Working in batches to avoid crowding, add the oxtail segments and sear undisturbed for 4-5 minutes per side until deeply browned. You’re looking for a rich mahogany crust that will form the flavor foundation of your dish. Transfer the browned oxtail to a plate and set aside.
Step 2: Develop the Aromatic Base
In the same Dutch oven, add the 2 whole yellow onions, 3 whole carrots, and 3 whole celery stalks. Cook over medium heat for 8-10 minutes, stirring occasionally, until the vegetables begin to caramelize and develop color.
Add the 8 cloves garlic cloves and 3 tbsp tomato paste, stirring constantly for 2 minutes until the tomato paste darkens slightly and coats the vegetables. This step intensifies the umami base of your braising liquid.
Step 3: Deglaze and Begin Braising
Pour in the 2 cups dry red wine, scraping up all the browned bits from the bottom of the pot. Simmer for 5 minutes until the liquid reduces by about half. Add the 4 cups beef stock, 6 sprigs fresh thyme sprigs, and 2 whole bay leaves.
Return the oxtail segments to the pot, along with any accumulated juices. The liquid should come about three-quarters up the sides of the meat. Bring to a gentle simmer, then cover tightly with the lid.
Step 4: Oven Braise to Tenderness
Transfer the covered Dutch oven to a preheated 325°F oven. Braise for 3-3.5 hours, turning the oxtail segments halfway through, until the meat is fork-tender and nearly falling off the bone.
Remove from the oven and let rest for 15 minutes. Skim any excess fat from the surface, then stir in the 2 tbsp unsalted butter to enrich the sauce. Garnish with the 0.25 cup fresh Italian parsley before serving.
Pro Tips For Making Oxtail Recipe Oven
- Brown in Batches: Crowding the pan steams the oxtail instead of searing it—I learned this the hard way after ending up with gray, sad meat. Use a wide, heavy pan (cast iron works best) and sear no more than 4-5 segments at a time in 2 tablespoons grapeseed oil over medium-high heat until deep brown. Yes, it takes longer, but that crust is non-negotiable for flavor.
- Salt Overnight: After burning a few batches trying to rush the seasoning, I now salt the oxtail segments heavily (1 teaspoon kosher salt per pound) and leave them uncovered in the fridge overnight. The salt penetrates deep, and the surface dries out just enough for a better sear—no extra patting needed.
- Skip the Boil: Resist the urge to add liquid right after browning. Instead, let those caramelized onions and fond (the brown bits) stick slightly, then deglaze with just ½ cup water or stock to scrape it all up. This concentrates the flavor instead of diluting it into a weak broth.
- Low and Slow Wins: Oxtail needs 3-4 hours at 300°F (150°C)—not the “2 hours at 350°F” some recipes suggest. I cover the pot tightly with foil then the lid to trap moisture, checking only once halfway. The meat should pull apart with a fork, not fight you. (Your kitchen will smell incredible, which is a decent consolation for the wait.)
Essential Equipment for This Recipe
Dutch Oven Essentials
For oxtail, I swear by my Le Creuset 7.25-quart Dutch oven—its heavy enameled cast iron distributes heat evenly and retains it perfectly for long braises. The wide base allows proper searing, while the tall sides prevent splatter during oven cooking. Look for one with sturdy handles that can withstand 325°F oven temps. 🔥
If you’re investing in your first Dutch oven, I recommend the Lodge 6-quart as a budget-friendly alternative. It lacks the enamel but develops a beautiful seasoning over time. Just be sure to dry it thoroughly after washing to prevent rust.
Fat Skimming Tools
A fat separator is worth its weight in gold for this recipe. I use the OXO Good Grips model—its strainer catches all the solids while the spout lets you pour just the defatted liquid. For smaller batches, a simple wide spoon works to skim fat from the surface after braising.
Pro tip: Chill the braising liquid for 20 minutes before skimming—the fat will solidify on top, making removal easier. This step ensures your final sauce has that perfect velvety consistency without being greasy.
Precision Thermometer
While oxtail doesn’t require exact internal temps like poultry, I still use my ThermoWorks Dot to monitor oven temperature. Place the probe in a separate oven-safe dish to track ambient heat—this helps maintain a steady 325°F environment for consistent results.
For the searing stage, an infrared thermometer (like the Etekcity Lasergrip) lets you check your Dutch oven’s surface temp. Aim for 400-450°F before adding the oxtail to ensure a proper sear.
Kitchen Twine
Don’t overlook unbleached cotton kitchen twine for bundling herbs. I tie my thyme sprigs and bay leaves together so they’re easy to remove after braising. The 12-inch length from Cottonelle is perfect for most bundles.
For a makeshift solution, use the green stems from your celery stalks to wrap around herbs—they’ll infuse flavor while keeping everything contained. Just
Serving Utensils
A pair of tongs with silicone tips (I love the OXO 12-inch) is essential for transferring oxtail segments without piercing the meat. The silicone protects your Dutch oven’s enamel while providing a firm grip on slippery, braised oxtail.
For plating, a large slotted spoon helps portion the vegetables while leaving most of the sauce behind. I finish with a small ladle to drizzle that precious braising liquid over each serving—because every drop counts with this dish. ✨
Storage Solutions
Glass Pyrex containers with snap-on lids are my go-to for leftovers. The clear sides let you admire your handiwork while keeping the oxtail submerged in sauce. For freezing, I prefer quart-sized silicone Souper Cubes—they stack efficiently and release frozen portions easily.
Always leave 1-inch headspace in containers to account for expansion. Label with the date—this dish keeps beautifully for 5 days refrigerated or 3 months frozen. The flavors actually improve after a day or two as the collagen continues to break down.
Nutrition Facts
Frequently Asked Questions
Why sear the meat before braising?
Searing creates a flavor foundation through the Maillard reaction, developing deep, complex flavors. The browned crust also adds texture contrast to the final dish. Skipping this step means missing out on that rich, caramelized depth.
Can I use a different cooking vessel?
While a Dutch oven is ideal, a heavy stainless steel pot with an oven-safe lid works too. Avoid thin pots—they don’t retain heat as well for even cooking. Always check your vessel’s oven-safe temperature rating first.
How do I know when it’s done?
The meat should pull away from the bone easily when prodded with a fork. If it resists, braise for another 30 minutes and check again. The sauce will also thicken noticeably when fully reduced.
What if my sauce is too thin?
Remove the oxtail and simmer the sauce uncovered for 10-15 minutes. For faster thickening, mix 1 tbsp cornstarch with cold water and stir in. The sauce will continue to thicken as it cools.