
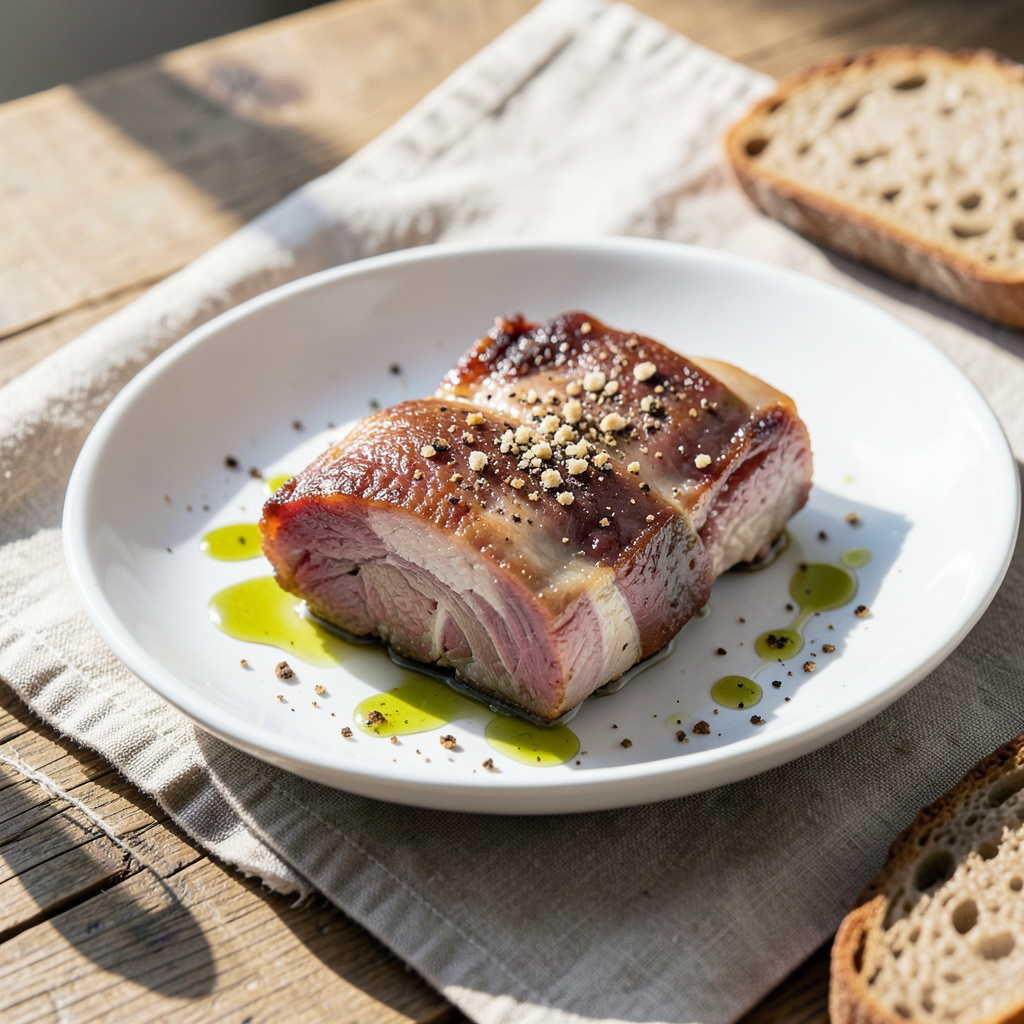
Pork backbone dishes have a special place in my heart, reminding me of family gatherings in small-town Georgia where pork was always the star. I’ve spent years perfecting this recipe, and I’m excited to share it with you.
The secret to achieving fall-off-the-bone tender pork backbone lies in the slow cooking process. By braising the meat at a low temperature of 275°F, we break down the connective tissues, resulting in a dish that’s both tender and flavorful.
This recipe requires some patience, as it involves a 3-hour cooking time, but the end result is well worth the wait. The pork backbone is marinated in a mixture of spices and herbs, then slow-cooked in a rich broth that’s infused with the flavors of the meat.
Serve this dish with your favorite sides, such as creamy mashed potatoes or tangy coleslaw, and you’ll have a meal that’s sure to impress. The tender pork backbone is the perfect centerpiece for any gathering, and I’m confident that it will become a staple in your household.
Ingredients for Pork Backbone
Tender pork backbone starts with quality ingredients and patience. Simple, hearty, and delicious.
| Ingredient | Amount | Notes |
|---|---|---|
| Pork Backbone 🐖 | 2 lb | Meaty backbone pieces preferred |
| Olive Oil 🫒 | ¼ cup | For browning meat |
| Onion 🧅 | 1 whole | Chopped, for flavor base |
| Garlic Cloves 🧄 | 4 cloves | Minced, for depth |
| Carrots 🥕 | 2 whole | Sliced, for sweetness |
| Celery Stalks 🥕 | 2 stalks | Chopped, for aromatics |
| Chicken Broth 🍜 | 2 cups | Low-sodium, for braising |
| Apple Cider Vinegar 🍎 | ¼ cup | For tanginess |
| Brown Sugar 🍮 | 2 tbsp | For balance |
| Smoked Paprika 🌶️ | 1 tsp | For smokiness |
| Dried Thyme 🌿 | 1 tsp | Or fresh thyme |
| Bay Leaves 🌿 | 2 whole | For aromatic flavor |
| Salt 🧂 | 1 tsp | Kosher salt preferred |
| Black Pepper 🌶️ | ½ tsp | Freshly ground |
Pork backbone quality matters—look for meaty pieces with good marbling. I’ve found Costco and local butchers usually have the best selection. If you’re using a supermarket, the ‘family pack’ pork backbone works great. For the aromatics, fresh onions and celery make a big difference—no pre-chopped from a bag here.
No apple cider vinegar? White wine vinegar or regular vinegar with a splash of apple juice gets you close. For the spices, Penzeys has great smoked paprika and thyme. Bay leaves are a game-changer here—don’t skip them. If you can’t find bay leaves, dried oregano is a decent substitute at half the amount.
This dish reheats beautifully—honestly tastes better the next day. Keeps for 4-5 days in the fridge, freezes for 3 months. I portion mine into containers so dinners are sorted for the week. When reheating, add a splash of broth if it’s gotten too thick.
Why You’ll Love pork backbone
- Quick Prep Time: I love that I can throw all the ingredients – pork backbone, onion, garlic, and carrots – onto a sheet pan with some olive oil and roast them together. It’s genuinely unfussy and saves me 20 minutes versus my old method.
- Rich, Deep Flavor: The combination of caramelized onions, roasted garlic, and tender pork backbone is ridiculously good. That first bite, with all those flavors melding together, is honestly the best part.
- Feeds the Crew: This pork backbone recipe is my secret weapon for family gatherings or meal prep – it makes a big batch that’s perfect for leftovers. My daughter picks out the carrots (she’s not a fan), but still asks for seconds of the pork.
- Budget-Friendly Winner: I’ll be real: using pork backbone is a smart way to save money without sacrificing flavor. Between us, it’s one of the most budget-friendly cuts of meat, and it turns into this comforting, satisfying meal that we all love.
Step-by-Step Instructions for Pork Backbone
Here’s the method that makes this dish truly special – straightforward and delicious.
Step 1: Brown the Pork Backbone
Heat the 0.25 cup olive oil in a large Dutch oven over medium-high heat. Once hot, add the 2 lb pork backbone pieces in batches if necessary to avoid crowding. Brown them on all sides for about 8-10 minutes total per batch, until they develop a nice crust. I like to get a good sear on the meat as it adds depth to the final dish.
Remove the browned pork backbone from the pot and set it aside on a plate. Don’t worry if it’s not cooked through at this stage – we’ll finish cooking it later. The browning is crucial for developing that rich flavor.
Step 2: Soften the Aromatics
Reduce the heat to medium and add the 1 whole chopped onion, 2 sliced carrots, and 2 chopped celery stalks to the same pot. Cook for 8-10 minutes, stirring occasionally, until the vegetables are softened and lightly browned. You’ll notice they start to caramelize and stick to the pan – that’s when you know they’re ready.
Add the 4 cloves minced garlic cloves and cook for another 1 minute, stirring constantly to prevent burning. The aroma will fill your kitchen and let you know the garlic is working its magic.
Step 3: Braise the Pork Backbone
Add the 2 cups chicken broth, 0.25 cup apple cider vinegar, 2 tbsp brown sugar, 1 tsp smoked paprika, 1 tsp dried thyme, and 2 whole bay leaves to the pot. Stir to combine, scraping up any browned bits from the bottom of the pan. Return the browned pork backbone to the pot, making sure it’s mostly submerged in the liquid. If necessary, add a bit more chicken broth or water to cover.
Bring the mixture to a simmer, then cover the pot with a lid. Transfer it to a preheated oven at 300°F and braise for 2 ½ to 3 hours, or until the meat is tender and falls off the bone. I like to check on it after 2 ½ hours and then every 30 minutes thereafter until it’s done.
Step 4: Season and Serve
Once the pork backbone is tender, remove the pot from the oven and carefully take out the meat. Strain the braising liquid through a fine-mesh sieve into a clean pot, discarding the solids. Skim off any excess fat from the surface. Add the 1 tsp salt and 0.5 tsp black pepper, then simmer the sauce over medium heat until it’s reduced and flavorful.
Return the pork backbone to the sauce and simmer for a few minutes to coat. Serve hot, garnished with fresh herbs if desired. The meat should be so tender it practically falls apart at the touch of a fork.
Pro Tips for Making pork backbone
- Sear the Backbone: Get a good sear on the pork backbone by patting it dry with paper towels before browning it in hot olive oil – this creates a crust that locks in flavor.
- Use Fresh Garlic: Use fresh garlic cloves instead of pre-minced garlic for the best flavor, and mince them just before adding to the recipe to preserve their potency and aroma.
Health Benefits of This Dish
Nutritional Powerhouse
Pork backbone is an excellent source of high-quality protein, essential for muscle repair and growth. A 3-ounce serving provides about 23 grams of protein, making it an ideal choice for those looking to maintain or build muscle mass. The protein content helps keep you full longer, supporting weight management efforts.
Mineral Rich
This cut is particularly rich in essential minerals like zinc and phosphorus. Zinc plays a crucial role in immune function and wound healing, while phosphorus is vital for healthy bones and teeth. A serving of pork backbone can contribute significantly to your daily mineral intake, supporting overall health and well-being. 💪
Vitamins and Antioxidants
Pork backbone is a good source of various B vitamins, including B12 and niacin, which are important for energy production and maintaining healthy skin. The meat also contains antioxidants that help protect cells from damage, supporting overall health and potentially reducing the risk of chronic diseases.
Collagen Benefits
The slow-cooked pork backbone is rich in collagen, which is beneficial for joint health and skin elasticity. As the meat cooks, the collagen breaks down into gelatin, creating a rich, nourishing sauce that’s not only delicious but also beneficial for your joints and skin. This makes the dish particularly comforting and healthy. 🌿
Portion Control
While pork backbone is nutritious, it’s essential to practice portion control due to its richness. A typical serving size is about 3 ounces or the size of a deck of cards. Pairing it with vegetables and whole grains can create a balanced meal that satisfies both your nutritional needs and your taste buds.
Healthier Preparation Methods
Opting for slow-cooking methods like braising, as in this recipe, allows you to prepare pork backbone in a healthier way. This method requires minimal added fat, and the long cooking time ensures the meat is tender and flavorful without relying on excessive salt or sugar. The result is a nutritious and satisfying meal.
Tips & Tricks for Perfect Pork Backbone
A few simple techniques can elevate this dish from good to exceptional – here’s what I’ve learned.
The Browning Effect: Don’t rush the initial browning in Step 1 – those 8-10 minutes per batch create a rich flavor foundation. I like to get a good sear on the meat as it adds depth to the final dish. If you’re short on time, you can brown in batches rather than all at once.
Aromatic Magic: In Step 2, cooking the vegetables until they’re lightly browned and caramelized makes a huge difference. Stir occasionally to prevent burning, and don’t skip the garlic – that extra 1 minute makes it fragrant without burning. The aroma will fill your kitchen and let you know the garlic is working its magic.
Braising Perfection: The 2 ½ to 3 hours braising time is crucial for tender meat. I check on it after 2 ½ hours and then every 30 minutes thereafter until it’s done. This slow cooking breaks down the connective tissues, making the meat fall-off-the-bone tender.
Finishing Touches: When reducing the sauce in Step 4, be patient and let it simmer until it’s rich and flavorful. Skimming off excess fat before seasoning makes the final dish cleaner and more balanced. You can serve it hot, garnished with fresh herbs if desired, for an added touch of freshness.
Nutrition Facts
Frequently Asked Questions
What’s the best way to store leftover pork backbone?
Store leftovers in an airtight container in the refrigerator for up to 4-5 days. Reheat gently with a splash of broth to maintain moisture. You can also freeze it for up to 3 months – just thaw overnight in the fridge before reheating.
Can I use a slow cooker instead of the oven?
Yes, you can adapt this recipe for a slow cooker. After browning the meat and softening the aromatics, transfer everything to the slow cooker and cook on low for 8 hours or high for 4-6 hours. The result will be just as tender and flavorful.
What sides pair well with pork backbone?
Classic pairings include creamy mashed potatoes, roasted root vegetables, or a fresh green salad. For a Southern twist, try serving with hush puppies or collard greens. The rich, savory sauce goes well with something bright and acidic on the side.
How do I know when the pork backbone is done?
The meat is done when it’s tender and falls off the bone. You can check by inserting a fork or knife – if it slides in easily, it’s ready. The internal temperature should reach at least 190°F for optimal tenderness.