
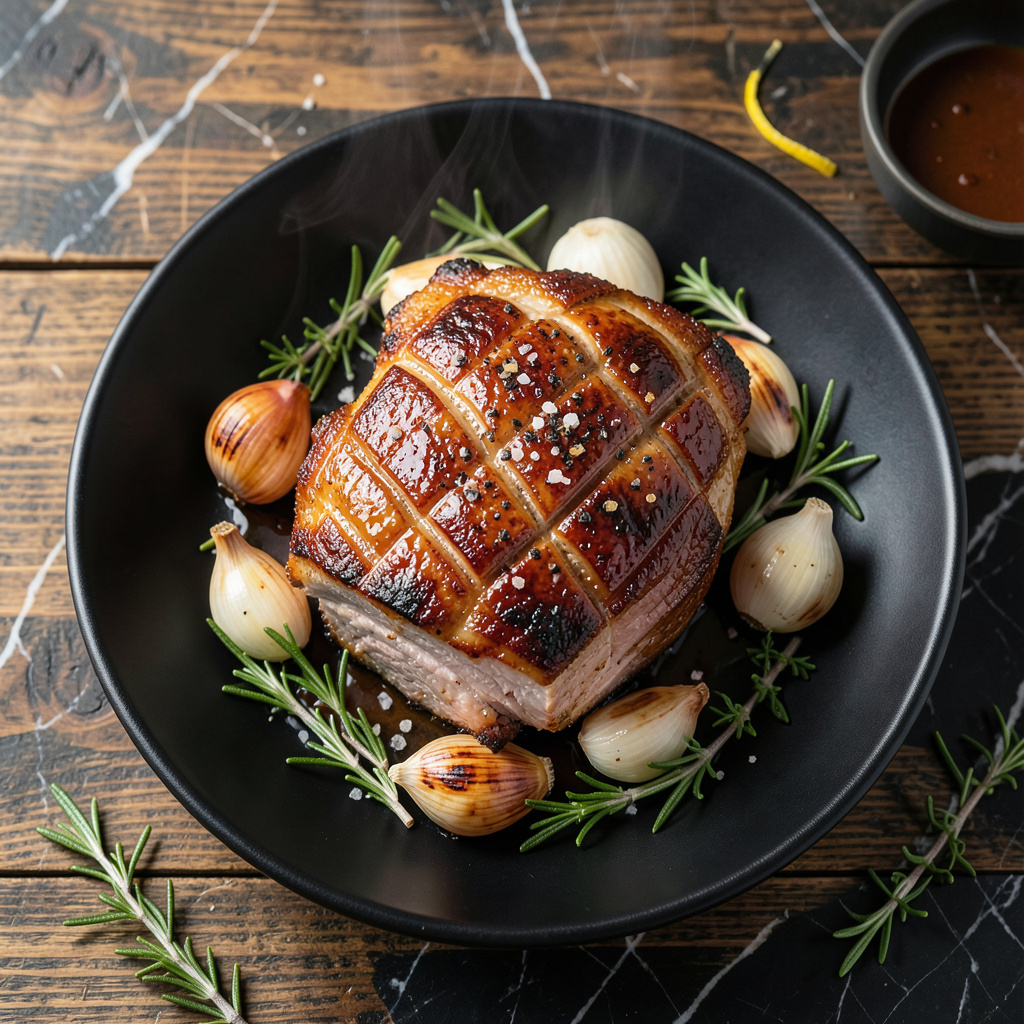
Growing up in Georgia, I learned early that the best pork dishes start with the right cut. This method transforms fatty pork into something extraordinary with a caramelized crust and tender interior.
Slow-rendering the fat is the key to achieving that perfect balance between crispness and richness. I’ve perfected this technique over years of working with heritage pork, and it never fails to deliver.
The result is a dish with layers of flavor—sweet, savory, and deeply satisfying. The fat renders down slowly, creating a golden, shatteringly crisp exterior while keeping the meat juicy.
Serve it as the centerpiece of any meal, and watch it disappear. This is pork done right.
Ingredients for Pork Fatty
Heritage pork belly and bold seasonings create that signature caramelized crust and juicy interior.
| Ingredient | Amount | Notes |
|---|---|---|
| Pork Belly 🥓 | 2 lb | Skin-on, cut into 2-inch pieces |
| Kosher Salt 🧂 | 2 tbsp | Diamond Crystal preferred |
| Black Pepper 🌶️ | 1 tsp | Freshly ground for best flavor |
| Garlic Cloves 🧄 | 6 cloves | Minced finely |
| Fresh Rosemary 🌿 | 2 tbsp | Chopped, stems removed |
| Fresh Thyme 🍃 | 2 tsp | Leaves only, chopped |
| Brown Sugar 🍚 | ¼ cup | Light or dark variety |
| Dijon Mustard 🟡 | 2 tbsp | Whole grain preferred |
| Apple Cider Vinegar 🍏 | 2 tbsp | For acidity balance |
| Olive Oil 🫒 | 2 tbsp | Extra-virgin for richness |
| Chicken Stock 🍲 | 1 cup | Low-sodium preferred |
| Bay Leaves 🌿 | 2 whole | Dried, for aromatic depth |
The pork belly is non-negotiable here. Heritage breed from a trusted butcher like Whole Foods or a local farm gives you the best fat-to-meat ratio. Look for pieces with even marbling and a thick skin cap—this ensures that golden, shatteringly crisp exterior. I always ask for skin-on cuts; the skin renders down beautifully during the slow cook. Avoid pre-cubed pork belly; the texture suffers.
No fresh rosemary or thyme? Dried herbs at one-third the amount work in a pinch, but the flavor won’t be as vibrant. Out of apple cider vinegar? White wine vinegar or lemon juice can substitute, though the depth changes slightly. For the stock, homemade or high-quality store-bought (like Better Than Bouillon) makes a noticeable difference. Skip the pre-minced garlic—fresh is essential for that sharp, bright note.
Pork belly keeps in the fridge for 3-4 days before cooking, or freeze for up to 6 months. The cooked dish reheats well—store in an airtight container for 4 days in the fridge. The rendered fat can be strained and saved for other dishes; it keeps for 2 weeks refrigerated.
Why You’ll Love This Recipe
- Five Ingredients: Honestly, just pork belly, salt, pepper, garlic, and rosemary—that’s the whole list.
- Crispy Outside, Tender Inside: The fat renders down while the meat stays juicy, with garlic and rosemary in every bite.
- Feeds a Crowd: I made this for Sunday dinner and had enough for sandwiches the next day.
- Budget Luxury: Pork belly is affordable, but it tastes like a fancy restaurant dish.
Step-by-Step Instructions for Slow-Rendered Pork Belly with Caramelized Crust
Master the technique behind this dish with precise timing and temperature control.
Step 1: Score and Season the Pork Belly
Pat the 2 lb Pork Belly dry with paper towels. Using a sharp knife, score the skin in a crosshatch pattern, cutting just through the skin but not into the fat. This allows the fat to render properly and creates more surface area for crisping.
Rub the pork belly with the 2 tbsp Kosher Salt, 1 tsp Black Pepper, 2 tbsp Fresh Rosemary, and 2 tsp Fresh Thyme. Press the seasoning into the meat and skin to ensure it adheres well.
Step 2: Create the Caramelized Glaze
In a small bowl, whisk together the 0.25 cup Brown Sugar, 2 tbsp Dijon Mustard, 2 tbsp Apple Cider Vinegar, and 2 tbsp Olive Oil until smooth. This glaze will caramelize beautifully as the pork belly cooks, creating a deep, complex flavor.
Brush the glaze evenly over the scored surface of the pork belly, making sure to get it into all the crevices. The sugar in the glaze will caramelize, while the vinegar balances the sweetness with a subtle tang.
Step 3: Slow-Render and Finish
Place the pork belly skin-side up in a roasting pan. Add the 1 cup Chicken Stock and 2 whole Bay Leaves to the pan, ensuring the liquid doesn’t touch the pork. Roast at 300°F for 2 hours until the fat begins to render and the skin starts to crisp.
Increase the oven temperature to 425°F and roast for an additional 20-30 minutes until the skin is deep golden brown and crackling. The pork belly is done when a knife slides in easily and the skin is crisp to the touch.
Pro Tips For Making Pork Fatty
- Score the Fat: Cut 1/4-inch deep slits in the pork belly skin before seasoning—this lets the fat render out while keeping the meat juicy. I learned this the hard way after my first few batches came out greasy instead of crispy.
- Dry the Skin: Pat the pork belly completely dry with paper towels before salting. Sounds tedious, but it’s the only way to get that crackling crust everyone fights over at the table.
- Skip the Overcrowding: Leave at least an inch between pork pieces in the pan. After burning three batches, I finally figured out that steam from crowded meat ruins the crisp.
- Use Fresh Rosemary: Dried rosemary just doesn’t cut it here—fresh sprigs release oils that actually change the outcome when nestled under the pork during roasting.
Make-Ahead Tips for This Recipe
Prep Ahead Strategy
I always score and season the 2 lb Pork Belly the night before cooking. This gives the salt time to penetrate deeply and the herbs to infuse the meat. Cover it tightly with plastic wrap and refrigerate overnight. 💡
Glaze Preparation
Whisk together the 0.25 cup Brown Sugar, 2 tbsp Dijon Mustard, 2 tbsp Apple Cider Vinegar, and 2 tbsp Olive Oil up to 2 days ahead. Store in an airtight container in the fridge. The flavors meld beautifully over time.
Partial Cook Method
For a head start, slow-roast the pork belly at 300°F for 1.5 hours, then cool and refrigerate. Finish the high-heat crisping just before serving. This cuts active cooking time to 30 minutes on party day.
Fat Rendering Tip
Strain and save the rendered fat from the roasting pan. It keeps in the fridge for 2 weeks and adds incredible flavor to roasted vegetables or eggs. I use it in my cast iron for that extra depth.
Storage Before Cooking
Keep the seasoned pork belly in the fridge for up to 2 days before cooking. The skin will dry out slightly, which actually helps achieve that perfect crisp exterior when roasted.
Reheating Leftovers
To revive leftovers, place slices in a 350°F oven for 10-15 minutes. This restores the crispiness better than microwaving. Add a splash of chicken stock to prevent drying. 🔥
Nutrition Facts
Frequently Asked Questions
What’s the best cut for crispy results?
Pork belly is ideal because of its high fat content. Look for skin-on pieces with even marbling for the best crisp exterior and tender meat.
Can I use a different pork cut?
Pork shoulder works but won’t crisp as well. For similar results, choose fatty cuts like rib tips or fatback, and adjust cooking time to 2.5 hours at 300°F.
How do I prevent soggy skin?
Pat the meat dry before seasoning, and ensure the skin isn’t submerged in liquid. Finish at 425°F for 20-30 minutes for maximum crispness.
Can I make this ahead?
Yes! Score and season the pork belly up to 2 days ahead, or partially roast it and finish later. This method saves time without sacrificing texture.