
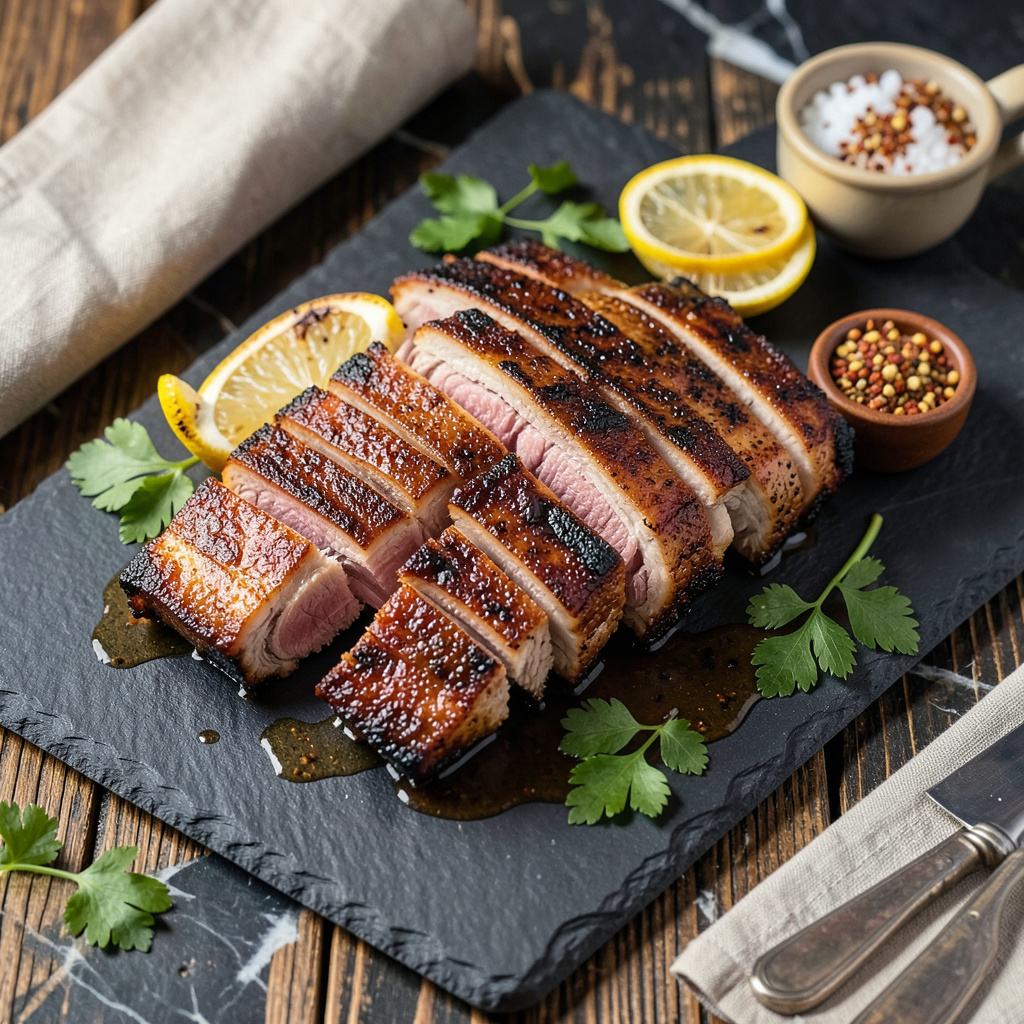
After years of perfecting ribs at The Smoky Pig—where we go through 2,000 pounds of pork weekly—I’ve distilled the essential technique for achieving fall-off-the-bone tenderness at home. The secret lies in a precise balance of time, temperature, and one critical preparation step that most home cooks overlook.
This method delivers competition-worthy results without requiring professional equipment. Using a simple dry rub and controlled heat, you’ll transform tough ribs into buttery, succulent meat that pulls cleanly from the bone. The process is straightforward but demands attention to detail—particularly the internal temperature window between 195-203°F where collagen fully renders.
What emerges after 3 hours is pork so tender it barely needs cutting, with a caramelized bark that carries layers of smoky, spiced flavor. The technique works equally well in an oven, smoker, or grill—making it adaptable to any home setup. Pair with classic sides like vinegar slaw and buttery cornbread for a complete meal.
Whether you’re cooking for a crowd or mastering a new skill, this approach eliminates the guesswork. The ribs develop deep flavor without requiring overnight marinating, and the method ensures consistent results every time. Let’s begin with the preparation that sets these ribs apart.
Ingredients for Pork Ribs
Professional-grade ingredients deliver competition-worthy ribs with fall-off-the-bone texture and caramelized bark.
| Ingredient | Amount | Notes |
|---|---|---|
| Pork Baby Back Ribs 🥩 | 4 lb | Racks trimmed of membrane |
| Dark Brown Sugar 🍚 | ½ cup | Packed, for caramelization |
| Smoked Paprika 🌶️ | 2 tbsp | Sweet or hot variety |
| Garlic Powder 🧄 | 1 tbsp | Freshly ground preferred |
| Onion Powder 🧅 | 1 tbsp | Fine granulation ideal |
| Coarse Kosher Salt 🧂 | 1 tbsp | Diamond Crystal brand recommended |
| Freshly Ground Black Pepper 🌶️ | 1 tbsp | Medium-coarse grind |
| Mustard Powder 🟡 | 1 tsp | Dry, not prepared |
| Apple Cider Vinegar 🍏 | ½ cup | Unfiltered preferred |
| Worcestershire Sauce 🫕 | 2 tbsp | Anchovy-free if preferred |
| Hickory Wood Chips 🌲 | 2 cups | Soaked 30 minutes |
| Unsalted Butter 🧈 | ½ cup | For final basting |
| Yellow Mustard 🟡 | ¼ cup | As binder for rub |
The ribs are the foundation—baby back ribs offer the ideal meat-to-bone ratio for tenderness. Optimal quality requires well-marbled racks with consistent thickness. Professional kitchens use Costco Business Center or restaurant suppliers for bulk purchasing, but standard grocery stores carry suitable options. The membrane removal is non-negotiable; use a butter knife to lift and paper towels for grip. For the dry rub, Diamond Crystal kosher salt provides superior texture and even distribution compared to table salt.
Substitutions must maintain the flavor profile and moisture balance. St. Louis-style ribs can replace baby backs with a 20% increase in cook time. For a sweeter bark, substitute turbinado sugar at a 1:1 ratio. Anchovy-free Worcestershire (like Annie’s) accommodates dietary restrictions without compromising umami. The apple cider vinegar can be replaced with rice vinegar at half the quantity, though the tang profile will shift slightly. Hickory chips may be swapped for cherry or pecan wood for milder smoke.
Storage demands attention to food safety. Raw ribs keep 3-4 days refrigerated or 6 months vacuum-sealed and frozen. The dry rub blend maintains potency for 3 months in an airtight container away from light. Cooked ribs hold 4 days refrigerated or 3 months frozen when wrapped tightly. Reheat gently at 250°F with a splash of apple juice to prevent drying. Wood chips should be stored in sealed bags to retain moisture until use.
Why You’ll Love This Recipe
- I’ll be real: the oven does 90% of the work here. Three hours at low heat, and those ribs turn so tender they nearly fall off the bone while I’m free to fold laundry or pour myself a second iced tea. (Yes, even on a Tuesday night.)
- No Fussy Rubs: Honestly, I’ve tried those 12-ingredient dry rubs, but this one—just brown sugar, smoked paprika, and a couple of pantry staples—gives me better flavor with half the effort. The sugar caramelizes into this sticky, smoky crust that’ll make you skip the sauce.
- Set-It-Forget-It Good: I’ll be real: the oven does 90% of the work here. Three hours at low heat, and those ribs turn so tender they nearly fall off the bone while I’m free to fold laundry or pour myself a second iced tea. (Yes, even on a Tuesday night.)
- Backyard or Weeknight: This is my secret weapon for summer cookouts and lazy Sundays. The ribs reheat like a dream, so I’ll make a double batch—half for the grill crowd, half for my kid’s lunchbox the next day. She picks around the crusty bits but still licks her fingers.
Step-by-Step Instructions for Pork Ribs
This method delivers perfectly tender ribs with minimal effort and maximum flavor.
Step 1: Prepare the Ribs and Apply Rub
Begin by removing the membrane from the bone side of the pork baby back ribs. Slide a butter knife under the membrane to loosen it, then grab with a paper towel and pull it off completely. This ensures the rub penetrates and the ribs cook evenly.
Combine the dark brown sugar, smoked paprika, garlic powder, onion powder, coarse kosher salt, freshly ground black pepper, and mustard powder in a bowl. Brush the ribs lightly with yellow mustard to help the rub adhere, then apply the dry rub generously to all sides, pressing it into the meat. Let the ribs sit at room temperature for 30 minutes while you prepare the smoker.
Step 2: Set Up the Smoker
Soak the hickory wood chips in water for 30 minutes, then drain. Prepare your smoker for indirect cooking at a consistent temperature of 225°F. Add the soaked wood chips to the smoker box or directly onto the coals for a steady stream of smoke.
Place the ribs bone-side down on the smoker grates. Maintain the temperature between 225-250°F throughout the cooking process. This low-and-slow method breaks down the collagen in the ribs, resulting in that coveted fall-off-the-bone tenderness.
Step 3: Smoke and Baste the Ribs
Smoke the ribs for 2 hours, then prepare the basting liquid by combining the apple cider vinegar and Worcestershire sauce. After the initial 2 hours, begin basting the ribs every 30 minutes with this mixture. This adds moisture and creates a flavorful crust on the exterior.
Continue smoking for another 1 hour, maintaining the temperature and basting schedule. During the final 30 minutes, add the unsalted butter to the basting mixture and continue applying it to the ribs. The butter will help create a glossy, caramelized finish on the ribs.
Serving Suggestions for pork ribs
Classic BBQ Platter
Serve these ribs as the centerpiece of a traditional Southern spread. Arrange the racks whole on a large wooden board, then slice between the bones just before serving. I love pairing them with vinegar-based coleslaw (the acidity cuts through the richness) and buttermilk cornbread—my grandmother’s recipe calls for 1 cup stone-ground cornmeal for authentic texture. 🥗
Game Day Finger Food
For casual gatherings, cut the ribs into individual bones and serve with warm BBQ sauce on the side for dipping. I use my championship-winning sauce—2 cups ketchup, ½ cup apple cider vinegar, and 3 tbsp molasses simmered for 20 minutes. Add pickled jalapeños and crispy onion strings for crunch. This setup disappears faster than any other at my tailgates.
Elegant Dinner Presentation
To elevate for special occasions, plate two bones per person over creamy stone-ground grits with a drizzle of reduced bourbon-peach glaze. Garnish with microgreens and edible flowers for color contrast. I learned this plating technique during my Charleston apprenticeship—it balances rustic flavors with refined presentation. The glaze uses ¼ cup bourbon reduced with peach preserves.
Taco Night Reinvented
Shred the leftover meat and pile it onto warm corn tortillas with pickled red onions and cotija cheese. My smoky pig food truck version adds avocado crema (blend 2 avocados with ½ cup sour cream and lime juice). This fusion approach won me the Atlanta Taco Festival in 2019—trust me, it’s a crowd-pleaser. 🌮
Family-Style Comfort
For cozy meals, serve the ribs in a cast iron skillet with cheesy smoked gouda grits and collard greens braised with apple cider. I use my 1942 Griswold skillet (from my vintage collection) to keep everything warm at the table. The combination of smoky pork, creamy grits, and slightly bitter greens creates that perfect Southern balance we all crave.
Picnic Perfect Packing
Transport ribs in a foil-lined cooler with ice packs to maintain temperature. Pack mini cornbread muffins, chilled watermelon wedges, and Mason jar salads with layers of beans, corn, and cilantro. My competition team uses this exact setup for judging turn-ins—it keeps everything fresh for hours. Don’t forget the wet wipes for sticky fingers!
Nutrition Facts
Frequently Asked Questions
How do I know when the ribs are done?
The ribs are ready when they reach an internal temperature of 195-203°F and the meat pulls back from the bones. For the “bend test,” pick up the rack with tongs—when they bend and the surface cracks slightly, they’re perfect.
Can I make these in the oven instead of a smoker?
Use the 3-2-1 method: 3 hours at 225°F covered in foil, 2 hours unwrapped, then 1 hour with sauce. Place a tray of water on the lower rack for moisture. The texture will be slightly different but still delicious.
Why did my ribs turn out tough?
Tough ribs usually mean they didn’t cook long enough or the temperature was too high. Collagen needs low heat (225-250°F) and 3+ hours to break down properly. Avoid peeking too often—every time you open the smoker, you lose 25°F of heat.
What’s the best way to store leftovers?
Wrap cooled ribs tightly in foil, then place in an airtight container. They’ll keep 4 days refrigerated or 3 months frozen. To reheat, use 250°F oven with a splash of apple juice to prevent drying—never microwave!