
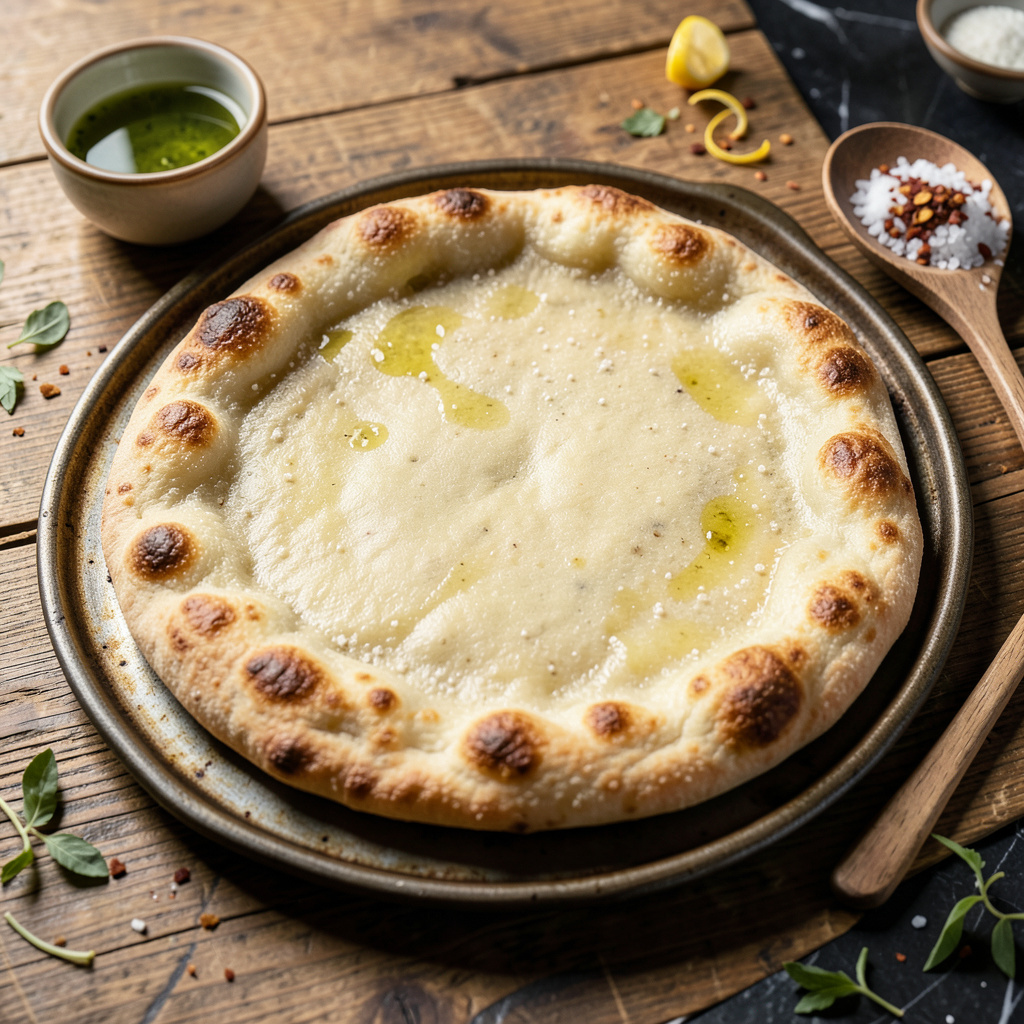
I’ve lost count of how many pizzas I’ve ruined by skipping this one crucial step. After years of serving soggy-bottomed pies at family gatherings, I finally discovered the game-changer: pre-baking the crust before adding toppings. This simple technique transforms homemade pizza from disappointing to restaurant-quality, every single time.
The science is simple but powerful. When you pre-bake the crust for just 5-7 minutes at high heat, it creates a protective barrier that prevents sauce and toppings from turning the bottom into a mushy mess. I learned this the hard way during my early cooking days, watching perfectly good dough turn into a sad, floppy disaster under all those delicious toppings.
What you get is a pizza with a crispy, sturdy base that holds up to even the heaviest toppings. The crust develops that perfect golden color and slight crunch on the bottom, while staying tender inside. No special equipment needed – just your regular oven and a baking sheet or pizza stone. It’s the difference between “meh” pizza and “please make this every Friday” pizza.
This method works with homemade dough, store-bought crusts, or even gluten-free bases. Whether you’re loading up with classic pepperoni or getting fancy with fig and prosciutto, pre-baking ensures your pizza stays crisp where it should and melty where it counts. Let me show you exactly how to nail this technique.
📚 In This Guide
- What You’ll Need
- Instructions
- Tips and Common Mistakes
What Youll Need
- ● Pizza dough – 1 lb (450g) of store-bought or homemade dough (room temperature for even baking)
- ● Olive oil – 1–2 tbsp for brushing (extra virgin preferred for flavor)
- ● Cornmeal or flour – ¼ cup for dusting (prevents sticking; semolina works too!)
- ● Pizza stone or baking sheet – 12–16″ diameter (stone = crispier crust; sheet = budget-friendly)
- ○ Parchment paper – 1 sheet (optional but helps with easy transfer)
- ● Fork or docker – To poke holes in the dough (prevents bubbles!)
- ● Pastry brush – For even olive oil coating
- ○ Oven thermometer – Optional but recommended to verify 475°F+ (245°C+) heat
- ● Pizza peel or flat spatula – For safe crust transfer (or use a rimless baking sheet)
- ● Timer – To track 5–8 minutes of pre-baking (no guesswork!)
- ○ Cooling rack – Optional to prevent steam buildup after pre-baking
Step-by-Step Instructions for Pre Baking Pizza Crust
This simple technique transforms your homemade pizza from good to restaurant-quality every time.
Prepare Your Dough and Oven
Start by shaping your pizza dough into your desired crust thickness on a lightly floured surface. I like to roll it out to about ¼-inch thickness for a classic New York-style crust, but adjust based on your preference. The key is even thickness throughout—no thin spots that might burn.
While shaping, preheat your oven to its highest setting, typically 500-550°F. If you’re using a pizza stone or steel, place it in the oven during preheating so it gets screaming hot. This high heat is crucial for creating that perfect crispy base. Let the oven heat for at least 30 minutes to ensure it reaches full temperature.
Dock the Dough to Prevent Bubbles
Before baking, use a fork to dock the dough by poking holes all over the surface. I make about 20-30 holes evenly spaced across the crust. This prevents large air bubbles from forming during baking, which can create uneven surfaces and make topping application difficult.
If you’re using a pizza peel, dust it generously with cornmeal or semolina to prevent sticking. Transfer your docked dough onto the peel. For extra insurance against sticking, I like to give the peel a quick shake—if the dough doesn’t move easily, add more cornmeal. This step is especially important since you’ll be handling the crust twice.
Pre Bake the Crust Until Set
Slide your dough onto the preheated stone or baking sheet. Bake for 4-6 minutes until the crust is just set but not browned. You’re looking for a matte finish rather than any color development. The edges should be firm to the touch but still pale.
Watch carefully during this stage—the crust can go from perfect to overdone quickly at these high temperatures. I check at the 4-minute mark and then every 30 seconds after that. The goal is to create a sturdy base that will hold toppings without becoming soggy, while still leaving room for final baking that will develop flavor and texture.
Add Toppings and Finish Baking
Remove the partially baked crust from the oven and immediately add your sauce and toppings. Work quickly but carefully—the crust will be hot. I like to brush the crust with a thin layer of olive oil before adding sauce to create an extra moisture barrier.
Return the topped pizza to the oven and bake for an additional 8-12 minutes until the cheese is bubbly and golden, and the crust edges are deep golden brown. The pre-baking step means you won’t have to worry about the bottom getting soggy from all those delicious toppings.
Rest and Serve
Let your pizza rest for 2-3 minutes before slicing. This brief rest allows the cheese to set slightly, preventing all your toppings from sliding off when you cut into it. I use a pizza wheel for clean cuts, running it through each slice with one confident motion.
Serve immediately while the crust is still crisp. You’ll notice the difference right away—the bottom stays perfectly crisp even under all those toppings, and each bite has that ideal balance of chewy interior and crunchy exterior that makes great pizza so satisfying.
Tips and Common Mistakes for Perfect Pre-Baked Pizza Crust
Mastering this technique takes your homemade pizza to professional levels—here’s what I’ve learned from years of trial and error.
Oven Heat is Everything: Don’t rush the 30-minute preheat at 500-550°F. I once tried cutting this short and ended up with a pale, soggy crust. The stone or steel needs that full time to reach screaming-hot temperatures that create the perfect crisp base. If your oven doesn’t go that high, set it to the maximum temperature and extend the pre-bake by 1-2 minutes.
Docking Technique: When poking those 20-30 holes in Step 2, go all the way through the dough but don’t tear it. I use a fork at a 45-degree angle for clean punctures. This prevents those frustrating air bubbles that can ruin your topping distribution. If you notice bubbles forming during the 4-6 minute pre-bake, pop them immediately with a fork.
Pre-Bake Precision: That 4-6 minute window in Step 3 is critical. I set a timer for exactly 4 minutes, then check every 30 seconds. You want the crust firm enough to hold toppings but still pale—think matte finish, not golden. Overdo it here and your final pizza will taste like crackers. Underdo it and you’ll get that dreaded soggy bottom despite your efforts.
Double-Handling Strategy: When transferring the hot crust after pre-baking, slide it onto a cutting board or inverted baking sheet. This gives you a stable surface for quick topping without burning your fingers. I keep all my toppings prepped and measured so I can work fast during this critical moment between bakes.
Pro Tips for Pre Bake Pizza Crust Before Adding Toppings
- Mastering this technique takes your homemade pizza to professional levels—here’s what I’ve learned from years of tria…
- Oven Heat is Everything: Don’t rush the 30-minute preheat at 500-550°F. I once tried cutting this short and ended up …
- Docking Technique: When poking those 20-30 holes in Step 2, go all the way through the dough but don’t tear it. I use…
Frequently Asked Questions
Do I always need to pre bake pizza crust before adding toppings?
Not always! Pre-baking (or “par-baking”) is ideal for crispy crusts or wet toppings (like fresh veggies or saucy meats). Skip it for thin crusts or quick-cooking pizzas (under 10 mins). If you love a soft, chewy base, try baking without pre-baking—but expect a slightly soggier result.
How long should I pre bake the crust before adding toppings?
For most homemade dough, bake at 425°F (220°C) for 5–7 minutes until lightly golden. Store-bought crusts? Check the package—some need just 3–4 minutes. Overdo it, and you’ll get a cracker-like base! Use a timer to avoid guesswork.
Can I pre bake pizza crust the day before?
Let the crust cool completely, wrap it tightly in plastic or foil, and store at room temp for up to 24 hours. Re-crisp in a 375°F (190°C) oven for 2–3 minutes before adding toppings. Avoid refrigerating—it’ll turn soggy.
What if my pre baked crust is too hard or burnt?
If it’s slightly overdone, brush with olive oil or garlic butter before adding toppings to soften it. For a burnt crust, gently scrape off charred bits with a grater or knife. Next time, reduce bake time by 1–2 minutes or lower the temp by 25°F (-4°C).
Are there alternatives to pre baking for a crispy crust?
Yes! Try these tricks:
- Use a pizza stone or steel (preheated for 30+ mins).
- Sprinkle cornmeal or semolina under the dough for extra crunch.
- Bake on the lowest oven rack for direct heat.
- Pat dry wet toppings (like spinach) before adding.
Pre-baking your pizza crust is the game-changer you didn’t know you needed—say goodbye to soggy bottoms and hello to crispy, restaurant-quality results! 🍕✨ With just a few extra minutes of prep, you’ll lock in texture, prevent moisture buildup, and let your toppings shine without the dreaded “doughy” disappointment.
Ready to put this trick to the test? Grab your favorite crust, fire up the oven, and experiment with bake times to find your perfect crisp. Your next pizza night just got a serious upgrade—happy baking! 🔥