
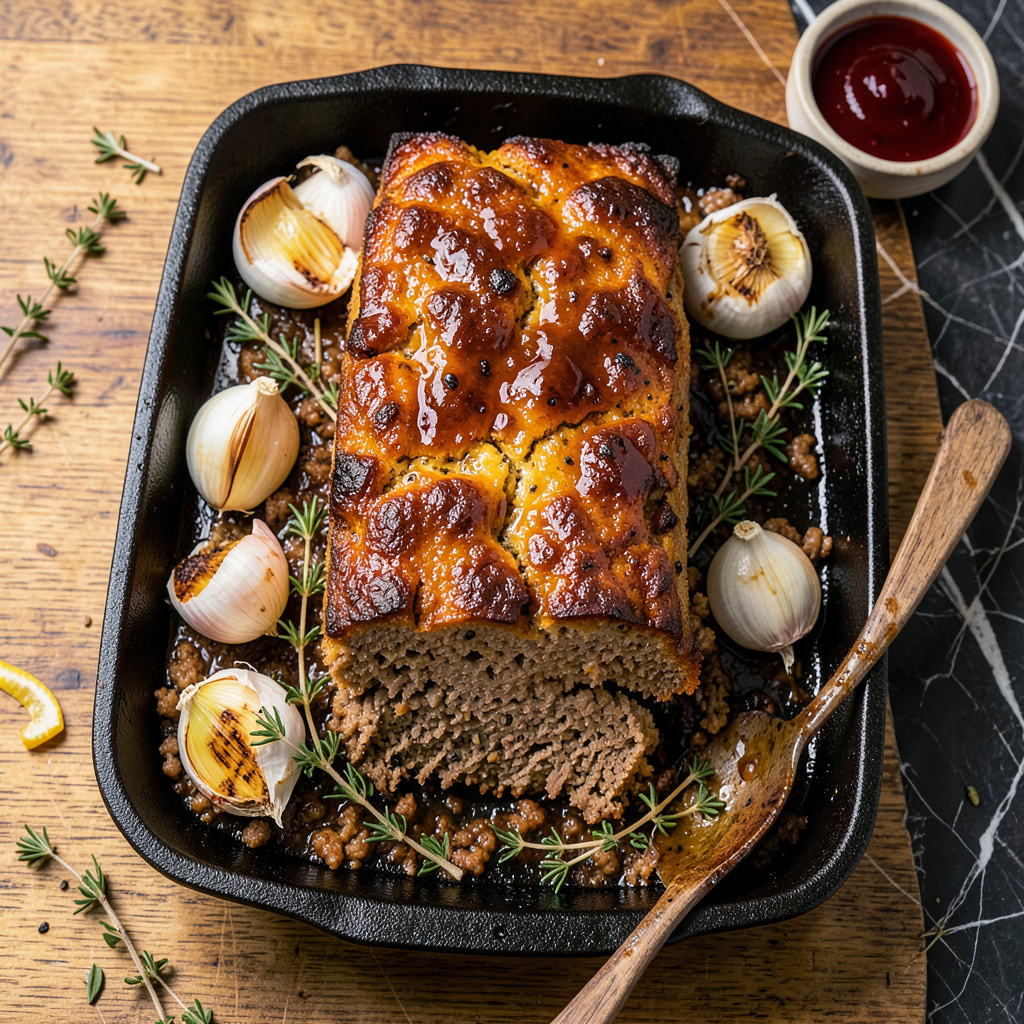
There’s something deeply satisfying about pressed meat—those crispy, savory layers that transform simple ingredients into old-school comfort food. I grew up watching my grandma make this in her Georgia kitchen, where nothing went to waste and every bite carried generations of flavor. The secret? Patience and the right balance of fat, meat, and spices.
This isn’t your average deli meat. We’re talking about tender, juicy layers bound together with just enough fat to keep it moist, then pressed until firm and sliced into perfect, crisp-edged pieces. The best part? You control every ingredient—no mystery fillers, just pure, rich flavor. I’ve been making this for years at The Smoky Pig, and it’s always a crowd-pleaser.
What you’ll end up with is a rustic loaf that’s crispy on the outside, tender inside, and packed with that unmistakable pressed-meat texture. It’s perfect for sandwiches, charcuterie boards, or even as a main course with mustard and pickles. The aroma alone—smoky, herby, and deeply savory—will have everyone gathering in the kitchen.
Fair warning: once you try homemade, store-bought will never compare. The process takes time, but the payoff is worth every minute. Let’s bring this old-school technique back to your kitchen.
📚 In This Guide
- What You’ll Need
- Instructions
- Tips and Common Mistakes
What Youll Need
- ● Meat: 2 lbs freshly ground pork shoulder (80% lean, 20% fat) or a mix of pork and beef (1:1 ratio). Avoid pre-packaged ground meat—freshness is key! 🥩
- ○ Binder: ½ cup ice-cold water or chicken/vegetable broth (enhances flavor). Optional: 1 tbsp unflavored gelatin (for extra firmness).
- ● Seasonings: 1 tbsp kosher salt (adjust to taste).
- ● 1 tsp black pepper (freshly cracked).
- ○ 1 tsp onion powder or garlic powder (optional but recommended).
- ● ½ tsp paprika or smoked paprika (for depth).
- ● Tools: Meat press or loaf pan (standard 9×5-inch for even layers).
- ● Parchment paper (to prevent sticking).
- ● Sharp knife or meat cleaver (for slicing post-press).
- ● Meat thermometer (to hit the perfect 160°F internal temp).
- ○ Optional Add-Ins: 1 tbsp Worcestershire sauce (umami boost).
- ● 1 tsp fennel seeds (for an Italian twist).
- ● ¼ cup finely chopped herbs (parsley, sage, or thyme).
- ● For Crisping: 2 tbsp neutral oil (avocado or vegetable) or butter (for a richer crust).
Instructions for Press Meat
This is where the magic happens—layering flavors and textures for that perfect crispy, savory bite.
Prepare the Meat Mixture
Start by selecting your ground meat—traditionally pork, but a pork-beef blend works beautifully too. Place it in a large mixing bowl and add your seasonings. I love using a combination of garlic powder, onion powder, smoked paprika, and a generous amount of black pepper for that classic, bold flavor.
Mix everything together with your hands (yes, get in there!) until the seasonings are evenly distributed. You want the meat to feel slightly sticky—that’s how you know the flavors are well incorporated. Don’t overwork it, though, or the texture will become dense instead of tender.
Here’s the thing—this step sets the foundation for your entire dish. The better you season and mix, the more flavorful each bite will be. Trust me, it’s worth taking your time here.
Layer the Meat and Potatoes
Thinly slice your potatoes—about ⅛-inch thick—using a sharp knife or mandoline. You want them thin enough to cook through and crisp up but not so thin they turn to mush. Peel them if you prefer, but I like leaving the skins on for extra texture and flavor.
In a greased baking dish, create your first layer of potatoes, slightly overlapping them. Then spread half of your seasoned meat mixture evenly over the potatoes. Repeat with another layer of potatoes and the remaining meat. Press down gently with your hands to compact everything—this ensures even cooking and that signature pressed texture.
Real talk: the layering is what makes this dish special. Take your time arranging the potatoes neatly, and don’t skimp on pressing the layers together. This is where that comforting, hearty texture comes from.
Add the Broth for Moisture and Flavor
Pour your broth—chicken or beef works great—over the top layer, making sure it seeps down into all the nooks and crannies. You want enough to moisten everything but not so much that it’s swimming. About 1 to 1½ cups should do the trick for a standard 9×13-inch dish.
This step is crucial because it keeps the meat juicy while the potatoes crisp up on top. The broth also infuses every layer with extra flavor as it cooks. I like to tilt the dish slightly to ensure the liquid distributes evenly before popping it in the oven.
Bake to Crispy, Golden Perfection
Bake uncovered in a preheated 375°F oven for 45-55 minutes. You’re looking for the top layer of potatoes to turn deep golden brown and crispy, while the meat underneath stays tender and juicy. Halfway through, I like to press down gently with a spatula to help everything compact even more.
Don’t be tempted to cover it with foil—you want that top layer to get nice and crispy! The edges should be slightly caramelized, and you’ll know it’s done when the potatoes are tender when pierced with a fork and the meat is cooked through.
Here’s what I love about this step: your kitchen will smell incredible, and that sizzling sound when you pull it out of the oven? Pure comfort food magic. Let it rest for 5-10 minutes before serving to allow everything to set.
Slice and Serve with Pride
Run a knife around the edges of the dish to loosen everything, then slice into squares or rectangles. Each piece should hold its shape beautifully, with crispy potato layers sandwiching the savory meat. Serve it hot, straight from the dish, for that true old-school comfort experience.
The contrast of textures is what makes this dish so satisfying—the crispy, caramelized potatoes giving way to the tender, flavorful meat. I love serving it with a simple green salad or some steamed veggies to balance out the richness. Enjoy the crispy, savory layers you’ve created!
Tips and Common Mistakes for Perfect Press Meat
Let me share the secrets I’ve learned from years of making this dish—small details that make a huge difference in texture and flavor.
Layering Technique: In Step 2, when arranging your potatoes, take extra time to overlap them like shingles on a roof. This creates a continuous crispy layer rather than separate slices. Press down firmly after each meat layer—this compactness is what gives that signature dense, satisfying texture. I use the bottom of a measuring cup to get even pressure across the entire dish.
Broth Distribution: For Step 3, here’s what nobody tells you—pour the broth slowly along the edges of the dish rather than dumping it in the center. This lets it seep between layers naturally without disturbing your careful arrangement. I also tilt the dish slightly side-to-side to help the liquid penetrate evenly before baking.
Baking Strategy: During the 45-55 minute bake in Step 4, rotate your dish halfway through for even browning. When you press down with the spatula at the midpoint, you’re not just compacting—you’re helping the broth redistribute for maximum flavor in every bite. Watch for that deep golden color to develop in the final 10 minutes.
Resting Period: Don’t skip the 5-10 minute rest after baking! This is when the layers set and the flavors meld. I place a clean towel over the dish during resting to keep it warm while allowing steam to escape—this prevents soggy potatoes on top.
Pro Tips for Press Meat
- Let me share the secrets I’ve learned from years of making this dish—small details that make a huge difference in tex…
- Layering Technique: In Step 2, when arranging your potatoes, take extra time to overlap them like shingles on a roof….
- Broth Distribution: For Step 3, here’s what nobody tells you—pour the broth slowly along the edges of the dish rather…
Frequently Asked Questions
What’s the best cut of meat for press meat?
Lean ground beef (80/20 fat ratio) works best for flavor and texture, but you can mix in pork or veal for extra richness. Avoid overly fatty cuts—they’ll make your press meat greasy instead of crispy!
How long should I press the meat to get crispy layers?
Press the meat for at least 3-4 hours under a heavy weight (like a cast-iron skillet). For extra crispiness, refrigerate overnight—this helps the layers set and develop that perfect golden crust!
Can I make press meat without a meat press?
Use a heavy baking dish or even a stack of plates wrapped in foil as a DIY weight. Just ensure even pressure across the meat to avoid uneven cooking.
Why did my press meat turn out soggy instead of crispy?
Sogginess usually means excess moisture or not enough pressing time. Pat the meat dry before cooking, and ensure your weight is heavy enough. A hot skillet (medium-high heat) also helps crisp it up!
What are some tasty alternatives to traditional press meat?
Try ground turkey or chicken for a lighter version, or swap in plant-based crumbles for a veggie twist. Add spices like smoked paprika or garlic powder to keep the flavor bold!
Press meat is more than just a nostalgic dish—it’s a delicious, budget-friendly way to turn simple ingredients into crispy, flavor-packed layers. Whether you’re craving comfort food or looking to impress with a retro twist, this dish delivers big on taste and texture. Now that you’ve got the know-how, why not roll up your sleeves and give it a try? 🍽️
Start with a small batch to test your seasoning, then scale up for family dinners or meal prep. Tag us in your press meat creations—we’d love to see (and taste!) your results!