
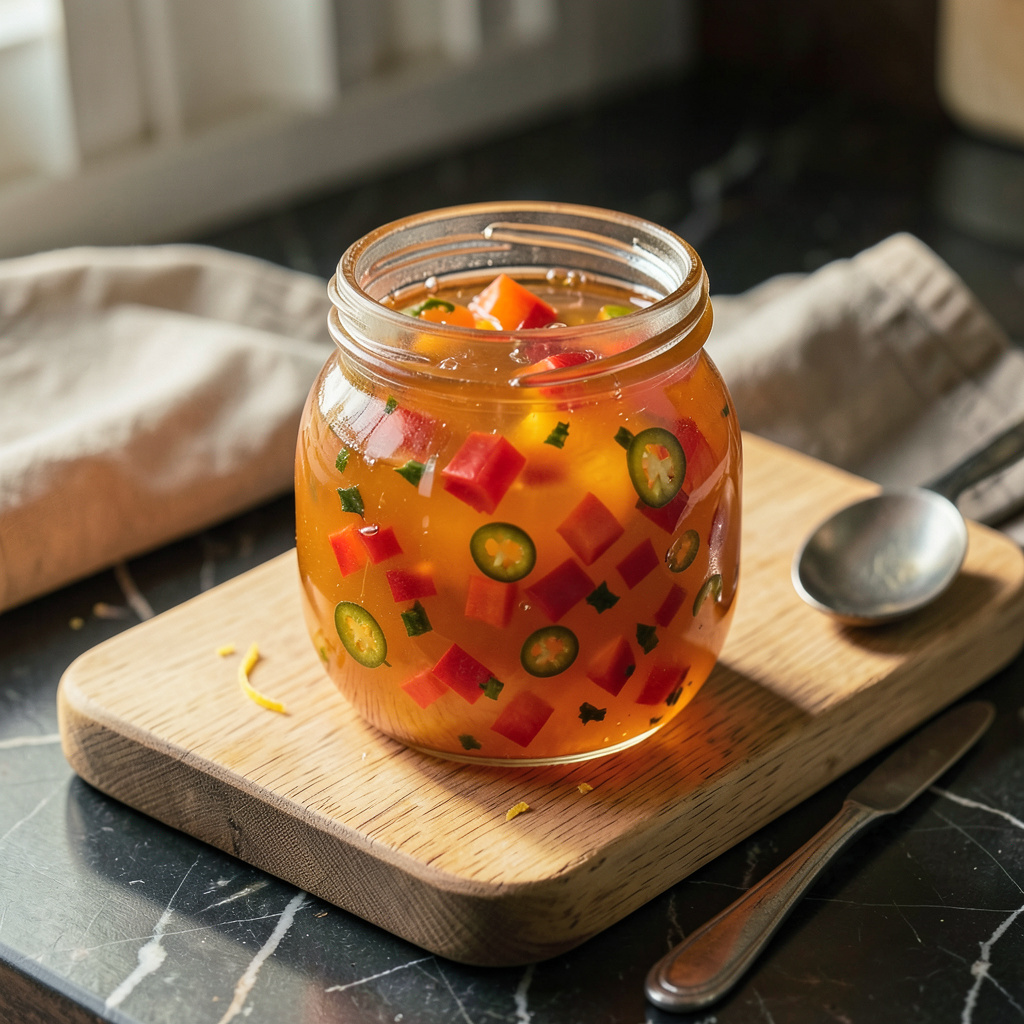
This satsuma pepper jelly captures the perfect balance of bright citrus sweetness and subtle back-end heat. After years of experimenting with citrus-based preserves at my Charleston kitchen, I’ve refined this recipe to highlight the unique floral notes of satsumas while letting the pepper warmth build gradually. The result is a versatile condiment that elevates everything from cheese boards to grilled meats.
The process combines precise timing with simple ingredients—fresh satsuma juice, finely diced peppers, and a measured amount of pectin for ideal consistency. Unlike traditional pepper jellies that overwhelm with heat, this version lets the citrus shine first, with the spice emerging as an afternote. I’ve found that using a 3:1 ratio of fruit to peppers creates that perfect sweet-heat harmony.
What sets this jelly apart is its spreadable yet glossy texture, achieved through controlled boiling and proper pectin activation. The finished product glistens in the jar and holds its shape beautifully when spooned over cream cheese or drizzled onto crackers. Its vibrant orange hue makes it as visually appealing as it is flavorful.
Beyond its immediate appeal, this jelly keeps exceptionally well—maintaining its balance of flavors for up to a year when properly canned. The satsuma’s natural acidity acts as a preservative while keeping the pepper notes fresh. Whether you’re new to canning or a seasoned preserver, this recipe delivers consistent results every time.
Ingredients for Satsuma Pepper Jelly
Eight precisely measured ingredients transform into this vibrant citrus-pepper jelly with professional-grade consistency and flavor balance.
| Ingredient | Amount | Notes |
|---|---|---|
| Fresh Satsuma Juice 🍊 | 3 cups | Strained, no pulp or seeds |
| Red Bell Peppers 🌶️ | 1 cup | Finely diced, seeds removed |
| Jalapeño Peppers 🌶️ | ¼ cup | Seeds removed, finely minced |
| Granulated Sugar 💰 | 4 cups | Pure cane sugar recommended |
| Powdered Pectin 🧪 | 1 ¾ oz | Low/no-sugar needed type |
| Apple Cider Vinegar 🍎 | ¼ cup | 5% acidity for balance |
| Lemon Juice 🍋 | 2 tbsp | Freshly squeezed, bottled acceptable |
| Unsalted Butter 🧈 | 1 tbsp | For foam reduction (optional) |
The satsuma juice quality is paramount for this preserve. Optimal results require freshly squeezed juice from fully ripe fruit—avoid bottled varieties as they lack the necessary acidity and floral complexity. For the peppers, red bell peppers provide sweetness while jalapeños contribute controlled heat; both should be processed immediately after cutting to preserve freshness. Ball or Sure-Jell powdered pectin yields the most reliable set, particularly when using low-sugar formulations that maintain the jelly’s clarity.
Substitutions must be approached cautiously to maintain the 3:1 fruit-to-pepper ratio. Orange juice may replace satsuma in equal volume, though the flavor profile will differ. For heat adjustments, substitute serrano peppers at half the jalapeño quantity or Fresno peppers for milder heat. The apple cider vinegar is non-negotiable for acidity balance, but white vinegar at 90% volume can substitute in emergencies. Sugar alternatives like honey or agave will alter the set and are not recommended for this formulation.
Properly processed and sealed, this jelly maintains its vibrant color and flavor balance for 12-18 months in a cool, dark pantry. Unopened jars can be stored at room temperature, while opened jars require refrigeration and should be consumed within 3 months. The high acid content naturally preserves the pepper notes, though prolonged exposure to light may dull the citrus hue. For optimal texture, allow the jelly to set undisturbed for 24 hours before testing consistency.
Why You’ll Love This Recipe
- No Fancy Equipment: I make this in one saucepan with a wooden spoon—no canning tools, no thermometer, just a quick boil and jar. The pectin does all the heavy lifting while I sip my coffee.
- Sweet Heat Surprise: That first taste is pure sunshine from the satsuma juice, then the jalapeño sneaks in with just enough kick to make you reach for another cracker. The red bell peppers? They add this mellow, almost jammy depth that balances everything.
- Gift-Jar Hero: I double the batch in December and stash little jars for hostess gifts, teacher thank-yous, even last-minute dinner party favors. Honestly, it feels fancy but costs less than a bottle of wine—and people actually use it.
- Fridge Stays Stocked: A single batch fills three half-pint jars, and it keeps for months. I’ll be real: I’ve spooned it over cream cheese for breakfast, glaze for meatloaf, even stirred into yogurt when I’m craving something bright. No waste, just options.
Step-by-Step Instructions for Satsuma Pepper Jelly
Follow this precise method to achieve the perfect balance of sweet citrus and spicy heat in every batch.
Step 1: Prepare the Pepper and Juice Mixture
Combine the 3 cups Fresh Satsuma Juice, 1 cup Red Bell Peppers, and 0.25 cup Jalapeño Peppers in a large, heavy-bottomed saucepan. The peppers should be uniformly diced and minced as specified to ensure even distribution in the final product.
Bring the mixture to a full rolling boil over high heat, stirring frequently to prevent scorching. This step develops the initial flavor foundation and begins the reduction process. You’ll notice the aroma becoming more concentrated as the liquid reduces by about one-third.
Step 2: Incorporate the Sugar and Acid Components
Whisk in the 4 cups Granulated Sugar gradually, ensuring complete dissolution before adding more. The mixture will become noticeably thicker as the sugar integrates. Once fully combined, stir in the 0.25 cup Apple Cider Vinegar and 2 tbsp Lemon Juice.
Return the mixture to a full rolling boil that cannot be stirred down. This vigorous boil is essential for proper pectin activation in the next step. The color will deepen to a rich amber hue, and the liquid will become slightly syrupy.
Step 3: Activate the Pectin and Finalize Texture
Sprinkle the 1.75 oz Powdered Pectin evenly over the boiling mixture while stirring constantly to prevent clumping. Continue boiling for exactly 1 minute – this precise timing ensures proper gel formation without breaking down the pectin’s structure.
Add the 1 tbsp Unsalted Butter to reduce foam formation. Skim off any remaining foam with a metal spoon. The jelly should now coat the back of a spoon and drip slowly in thick sheets rather than individual drops.
Step 4: Test and Jar the Finished Jelly
Perform the gel test by placing a small amount on a chilled plate. After 1 minute, push the edge with your finger – it should wrinkle slightly when properly set. If not ready, continue boiling for 1-2 minute intervals, retesting each time.
Ladle the hot jelly into sterilized jars, leaving ¼-inch headspace. Process in a water bath for 10 minutes to ensure proper sealing. The finished product will have a brilliant orange hue with visible pepper flecks suspended throughout the clear gel.
Pro Tips For Making Satsuma Pepper Jelly
- Boil Hard, Then Simmer: When combining the satsuma juice, peppers, and sugar, bring it to a rolling boil that can’t be stirred down—then immediately reduce to medium-low. I learned this the hard way after my first batch turned into candy because I kept it at a full boil too long.
- Strain the Peppers Fine: After blending the bell and jalapeño peppers, strain them through a fine-mesh sieve—don’t just rely on a food processor. The texture matters most here, and skipping this leaves the jelly grainy instead of smooth.
- Test Pectin Before Adding: Mix your powdered pectin with a spoonful of sugar first to prevent clumping. Sounds weird, but it works: dumping pectin straight into hot liquid creates lumps that never dissolve, no matter how much you stir.
- Use a Candy Thermometer: Don’t guess at doneness—jelly sets at 220°F (104°C). I was skeptical until I tried it, but now I never make jelly without one. The “wrinkle test” on a cold plate is fine, but the thermometer is foolproof.
Troubleshooting satsuma pepper jelly
Jelly Won’t Set
If your jelly remains runny after processing, the most common culprit is improper pectin activation. I’ve found that using old pectin (check that expiration date!) or not achieving a full rolling boil before adding it can prevent proper gelling. Always boil the sugar mixture for 1 full minute after adding pectin—this is non-negotiable for structure. 🌡️
Another frequent issue is undercooking the initial fruit mixture. The satsuma juice needs to reduce by about one-third before adding sugar. If you’re in doubt, use the plate test: place a spoonful on a chilled plate, let it sit for 1 minute, then push the edge—it should wrinkle when ready.
Too Much Heat
When the pepper flavor overpowers the citrus, you’ve likely used peppers with too many seeds or membranes. Remember that 80% of a pepper’s heat comes from those white ribs and seeds. For next time, remove all seeds and soak the minced peppers in ice water for 10 minutes before adding to the mixture. This draws out some capsaicin while keeping the flavor.
If you’re stuck with an overly spicy batch, balance it by stirring in 2 tbsp honey or 1 tbsp orange marmalade after opening the jar. The extra sweetness will help mellow the heat without altering the texture.
Cloudy Appearance
Cloudiness usually indicates either improper straining or overcooking. For crystal-clear jelly, strain your satsuma juice through a fine-mesh sieve lined with cheesecloth—this catches any pulp that could cloud the final product. I use unbleached cheesecloth from my local Charleston market for best results.
Avoid boiling the mixture too vigorously after adding pectin, as this can break down the gel structure and create cloudiness. Maintain a gentle but steady boil, and never let it reach the point where bubbles stack higher than ½ inch in your pot.
Foam Won’t Dissipate
That stubborn foam layer happens when proteins in the fruit react with air during boiling. While the recipe includes 1 tbsp butter to help reduce foam, sometimes you need extra intervention. I keep a small bowl of ice water nearby and dip my spoon in it before skimming—this helps the foam stick to the spoon better.
For persistent foam, sprinkle ½ tsp powdered citric acid over the surface after removing from heat. This breaks the surface tension immediately. Just be sure to skim thoroughly before jarring, as any remaining foam can cause mold growth during storage.
Jars Didn’t Seal
Failed seals are often traceable to two issues: either the jar rims weren’t perfectly clean, or the processing time was insufficient. Always wipe rims with a vinegar-dampened cloth before applying lids—this removes any sticky residue that could prevent a tight seal. My grandmother taught me this trick during our first canning session together.
If you’re at high altitude (above 1,000 feet), increase processing time by 5 minutes. And remember—never reuse lids! The sealing compound only works once. I learned this the hard way after losing an entire batch of peach preserves to reused lids.
Flavor Fades Quickly
When your jelly loses its bright citrus notes within weeks, light exposure is typically the culprit. Store jars in a dark pantry or wrap them in brown paper bags to protect from light degradation. The satsuma’s delicate floral compounds are particularly light-sensitive.
For longer flavor retention, add 1 tsp ascorbic acid (vitamin C powder) when mixing the ingredients. This acts as a natural preservative for both color and flavor. I’ve found this extends the vibrant taste by at least 3-4 months in properly stored jars.
Nutrition Facts
Frequently Asked Questions
Can I use regular oranges instead of satsumas?
While you can substitute, the flavor will differ significantly. Satsumas have a unique honeyed sweetness and floral notes that regular oranges lack. If substituting, use 2 cups orange juice + 1 cup tangerine juice to approximate the flavor profile.
How long does the jelly need to set before using?
Allow at least 24 hours at room temperature for proper gel formation. The pectin continues working during this time. For best texture, avoid disturbing the jars during this setting period.
What’s the best way to adjust the heat level?
For milder jelly, remove all pepper seeds and membranes. For more heat, add 1 tbsp minced habanero with the jalapeños. Remember that flavors intensify over time, so taste test after 48 hours before making adjustments.
Can I make this without canning equipment?
Yes, but shelf life will be shorter. Store in clean jars in the refrigerator for up to 3 months. For longer storage, freezing works well for 6-8 months. Always use sterilized containers regardless of storage method.
Why did my jelly turn out cloudy?
Cloudiness usually results from improper straining or overcooking. Always strain juice through cheesecloth-lined sieve and maintain a gentle boil after adding pectin. Avoid stirring vigorously once pectin is added to prevent air bubbles.