
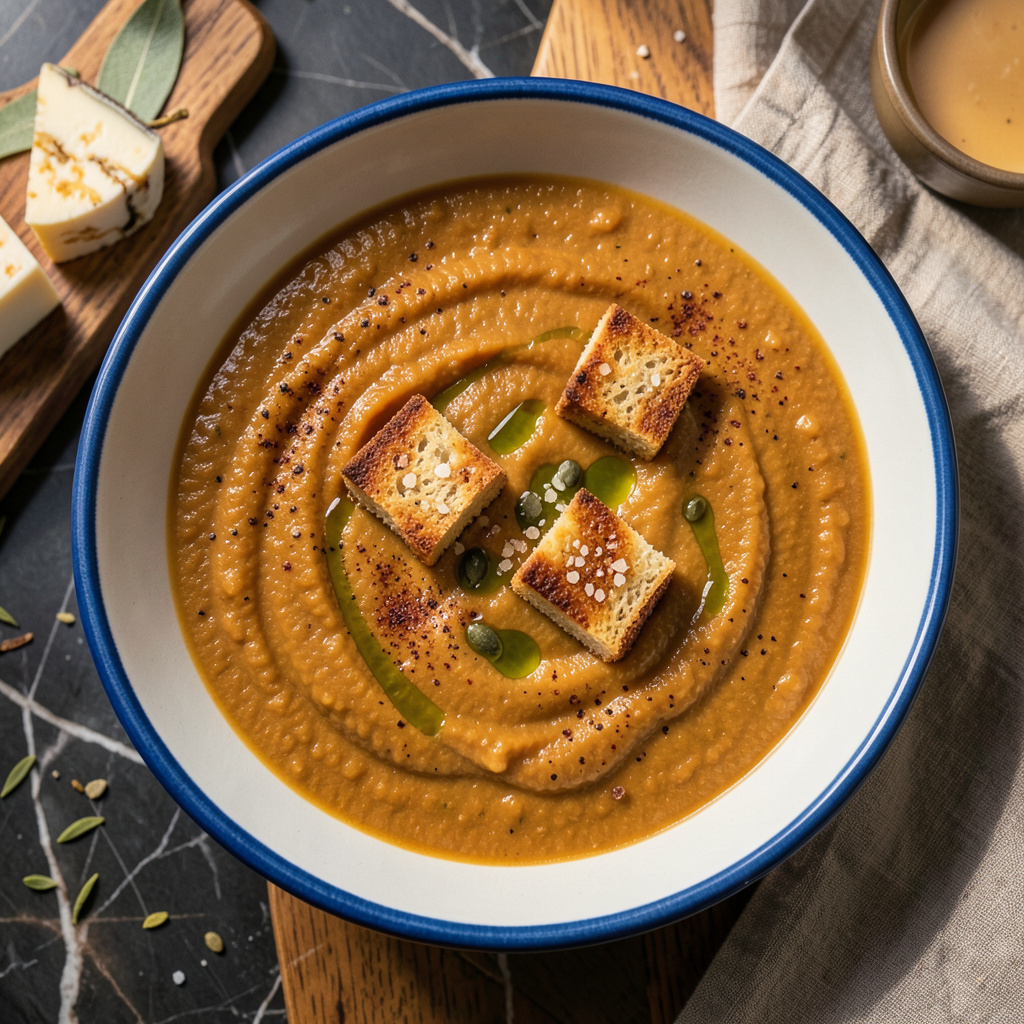
I’ll be real with you—serving soup at home doesn’t have to look like a sloppy afterthought. After years of watching diners’ eyes light up when I brought out beautifully presented bowls at The Smoky Pig, I realized the same principles work for any kitchen. The difference between “meh” and “wow” often comes down to three simple things: the bowl, the garnish, and the little details most people skip.
Here’s the thing—restaurant-style presentation isn’t about fancy equipment or hours of prep. It’s about working with what you’ve got. A warm bowl makes soup smell more inviting, a drizzle of good olive oil adds instant sophistication, and fresh herbs on top signal care. I’ve seen these small touches turn basic chicken noodle into something people photograph before eating.
What you’re really serving is an experience, not just liquid in a bowl. The steam rising from a properly heated dish, the contrast of textures between creamy soup and crispy garnishes, the way colors pop against a neutral bowl—these elements make soup feel special. And honestly? Most of it takes less than 60 seconds of extra effort.
Whether you’re serving classic tomato, hearty chili, or delicate consommé, the same rules apply. The right temperature, thoughtful garnishes, and intentional plating elevate even the simplest recipes. Let’s break down how to make every bowl look like it came from your favorite bistro.
📚 In This Guide
- What You’ll Need
- Instructions
- Tips and Common Mistakes
What Youll Need
- ● Soup: 6–8 cups of your favorite soup (homemade or store-bought), heated to 165°F (74°C) for safety.
- ● Serving bowls: 4–6 shallow, wide-rimmed bowls (12–16 oz capacity) for optimal presentation.
- ● Ladle: 1 medium-sized (8–10 oz capacity) with a long handle for easy serving.
- ● Garnishes (pick 2–3): Fresh herbs (parsley, cilantro, or chives) – 1–2 tbsp per bowl.
- ● Toasted bread croutons – ¼ cup per bowl.
- ● Shredded cheese (cheddar, parmesan) – 2 tbsp per bowl.
- ● Drizzle of olive oil or chili oil – 1 tsp per bowl.
- ● Sour cream or crème fraîche – 1 dollop per bowl.
- ○ Optional upgrades: Bread rolls or crusty bread slices for dipping.
- ● Soup spoons (wide, round-bowl design preferred).
- ● Small ramekins for side garnishes (e.g., extra cheese or hot sauce).
- ● Edible flowers or microgreens for a fancy touch.
- ● Cleanup: Damp cloth or paper towels for quick spills, and a trivet to protect tables from hot bowls.
Step-by-Step Instructions for Serving Soup Like a Pro
Transform your soup service from ordinary to extraordinary with these restaurant-tested techniques.
Choose the Right Bowl for Your Soup
Selecting the proper bowl makes all the difference in presentation. For creamy soups like chowders or bisques, I prefer shallow, wide-rimmed bowls that showcase the soup’s texture and allow for easy dipping of bread. Hearty stews look best in deep, rustic bowls that contain all the chunky ingredients.
Consider the color contrast too—dark soups pop in light-colored bowls, while pale soups stand out in darker vessels. Always warm your bowls first by filling them with hot water for 1-2 minutes, then drying them completely. This keeps your soup hot longer and prevents thermal shock to delicate china.
Create a Stunning Base Presentation
Before ladling the soup, create visual interest at the bottom of the bowl. For creamy soups, I like to drizzle a thin swirl of flavored oil (like chili or herb oil) or a spoonful of crème fraîche. For broth-based soups, arrange a few key ingredients artfully—perhaps a single perfect shrimp or a few herb leaves.
This base layer becomes visible when guests first see their soup, creating that “wow” moment. I’ve found that odd numbers of elements (3 herb leaves, 5 croutons) look more natural than even arrangements. Just remember: less is more—you want to enhance the soup, not overwhelm it.
Ladle with Precision and Care
Use a ladle that’s appropriately sized for your bowl—too small and you’ll make a mess, too large and you’ll overfill. Hold the ladle about 2 inches above the bowl and pour steadily but not too quickly. For creamy soups, pour down the side of the bowl to create a smooth surface.
For broth-based soups, ladle the solids first, then add just enough broth to cover them by about ½ inch. This prevents the ingredients from floating to the top and looking crowded. I always leave a little space at the top of the bowl—about 1 inch—to prevent spills when carrying to the table.
Add the Finishing Touches
Now comes the fun part—the garnishes that elevate your soup from good to restaurant-quality. For creamy soups, I sprinkle garnishes in a line or circle pattern. For broth-based soups, scatter them more naturally. Always add delicate garnishes like herbs or microgreens last so they stay fresh and vibrant.
Consider texture contrast too—crispy fried shallots on creamy soup, or soft herb leaves on hearty stew. I like to offer some garnishes on the side (like grated cheese or croutons) so guests can customize their bowl. The key is to make each bite interesting, not just the first one.
Present with Professional Flair
Carry the soup bowls carefully on a tray with a folded napkin underneath to prevent sliding. Present them from the guest’s left side if possible, which is the traditional service approach. For family-style service, place the soup tureen on a trivet at the table with a serving ladle.
Always serve soup with the appropriate utensils—a round-bowl spoon for creamy soups, a larger soup spoon for broth-based varieties. I like to place a small side plate with a spoon rest for guests to place their spoon between bites. This attention to detail shows you’ve thought of everything, just like in a fine restaurant.
Tips and Common Mistakes for Restaurant-Style Soup Presentation
Mastering these small but impactful details will transform your soup service from homey to haute cuisine.
Bowl Preparation Secret: The 1-2 minutes you spend warming bowls with hot water in Step 1 makes all the difference. I learned this the hard way after serving lukewarm soup in cold bowls—it changes the entire dining experience. For delicate china, test with warm (not boiling) water first to prevent cracking. This simple step keeps your soup at the perfect temperature from first to last spoonful.
Ladling Technique: When following Step 3, the 2-inch height for pouring isn’t arbitrary. Holding the ladle too high creates splashes, while too low makes the soup look flat. For creamy soups, pour against the bowl’s side to create that smooth, professional swirl. With broth-based soups, the ½-inch broth coverage over solids is crucial—it lets ingredients peek through without floating away.
Garnish Placement Strategy: In Step 4, the pattern matters more than you think. For creamy soups, arrange garnishes in a perfect circle or line—it guides the eye and makes the dish look intentional. With broth-based soups, scatter garnishes asymmetrically for a more natural appearance. Always add delicate herbs last; I’ve ruined many bowls by adding cilantro too early and watching it wilt.
Service Detail That Impresses: The 1-inch space at the top of the bowl in Step 3 isn’t just about preventing spills. It creates that elegant “room to breathe” look that fine dining establishments use. When carrying bowls to the table, place them on a folded napkin—not just for grip, but because the slight elevation makes the presentation look more deliberate and professional.
Pro Tips for Serving Soup
- Mastering these small but impactful details will transform your soup service from homey to haute cuisine.
- Bowl Preparation Secret: The 1-2 minutes you spend warming bowls with hot water in Step 1 makes all the difference. I…
- Ladling Technique: When following Step 3, the 2-inch height for pouring isn’t arbitrary. Holding the ladle too high c…
Frequently Asked Questions
How long should soup sit before serving to reach the ideal temperature?
Let hot soups rest for 3–5 minutes off the heat before serving—this evens out flavors and prevents burns. For chilled soups (like gazpacho), refrigerate at least 2 hours (overnight is best). Aim for 160°F+ for hot and 40°F or below for cold soups.
What’s the best way to serve soup without spilling?
Use a ladle with a pouring lip and tilt the bowl slightly as you pour. For brothy soups, place the bowl on a saucer or shallow plate to catch drips. Pro tip: Fill bowls ¾ full to avoid overflow when adding garnishes!
Can I serve soup in something other than a bowl?
Try:
- Bread bowls (for creamy soups like clam chowder)
- Mugs (cozy for small portions)
- Hollowed-out vegetables (e.g., pumpkin or bell pepper for a wow factor)
- Thermos flasks (great for on-the-go serving)
How do I keep soup warm when serving a crowd?
Use a slow cooker (on “Warm” setting), chafing dish, or insulated serving pot. For broth-based soups, avoid boiling—stir occasionally and add a splash of water if it reduces too much. For creamy soups, stir in warm (not hot) liquid to prevent curdling.
Why does my soup look dull when served? How can I fix it?
Brighten it up with last-minute garnishes:
- Fresh herbs (parsley, cilantro, basil)
- Citrus zest or a squeeze of lemon
- Crunchy toppings (toasted nuts, croutons, seeds)
- A drizzle of flavored oil (chili, garlic, or truffle)
Serving soup like a pro isn’t just about taste—it’s about creating an experience! With the right tools, techniques, and a little creativity, you can turn even the simplest bowl into a showstopper. Whether you’re hosting a dinner party or just elevating weeknight meals, presentation makes every spoonful feel special.
Ready to impress? Start with one new tip—like garnishing with fresh herbs or upgrading your bowls—and watch your soup game transform. Your next bowl could be your best yet! 🥄✨