
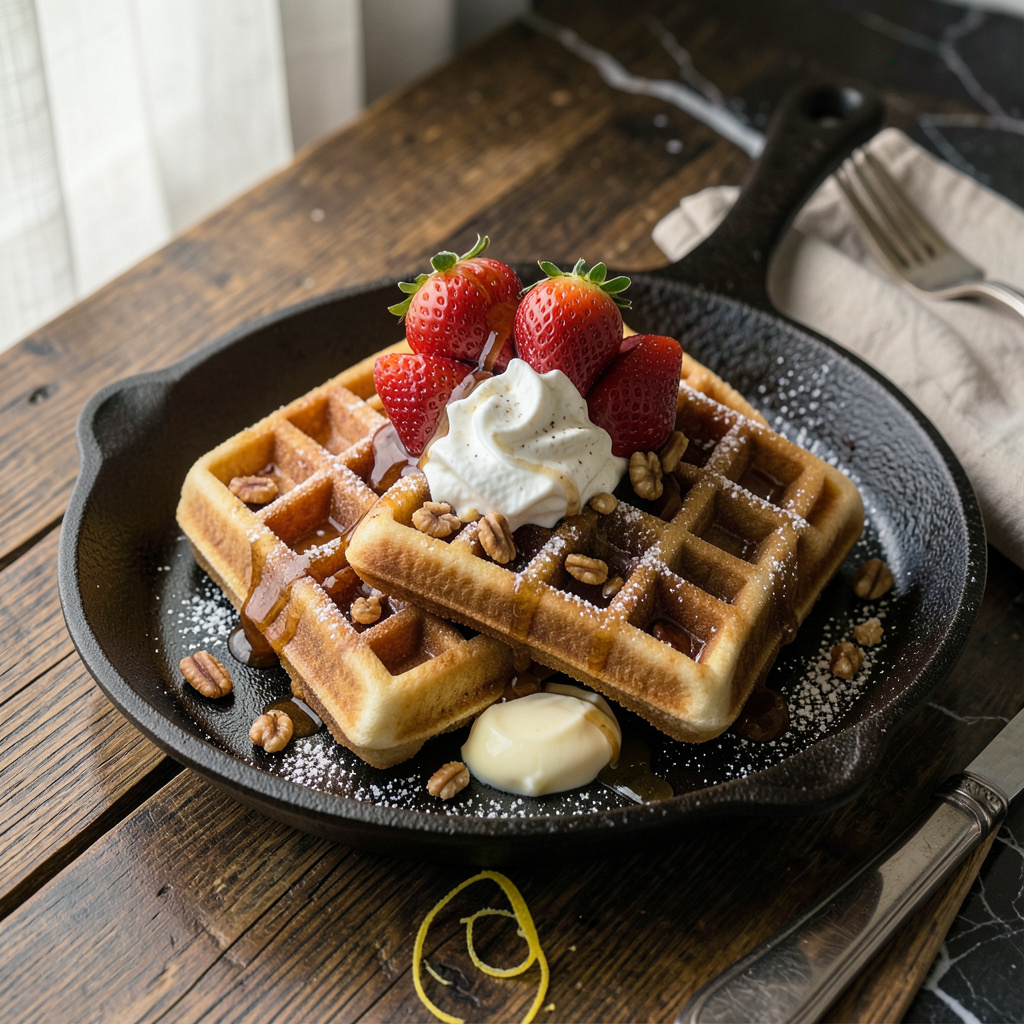
I’ll let you in on a secret I discovered during my early days at culinary school—you don’t need a fancy waffle maker to achieve those golden, crispy waffles we all love. Using just a cast iron skillet and a simple batter, I’ve perfected a method that delivers that classic waffle texture right on your stovetop.
The key to this technique is patience and the right heat level. I found that cooking the batter in a well-heated skillet creates that signature crispy exterior while keeping the inside fluffy. After testing different pans, my vintage cast iron proved to be the game-changer—it distributes heat evenly and gives that perfect golden-brown crust.
What you’ll end up with are waffles that have all the characteristics you love—crispy edges, tender centers, and those beautiful grid-like patterns. The best part? You can make them any shape you want, from classic rounds to fun squares. I’ve even used cookie cutters for special occasions.
This method works with any standard waffle batter, so you can stick with your favorite recipe. Whether you’re craving a weekend breakfast treat or need a quick solution when your waffle maker’s in storage, this stovetop technique delivers every time. Let’s get that skillet heating!
📚 In This Guide
- What You’ll Need
- Instructions
- Tips and Common Mistakes
What Youll Need
- ● Batter ingredients: 1 ½ cups all-purpose flour (or gluten-free alternative)
- ● 2 tbsp granulated sugar (or honey/maple syrup for a twist)
- ● 1 tbsp baking powder (for that fluffy rise!)
- ● ½ tsp salt (balance is key!)
- ● 1 ¼ cups milk (dairy or plant-based)
- ● 1 large egg (or flax egg for vegan)
- ● ⅓ cup melted butter (or coconut oil for dairy-free)
- ○ 1 tsp vanilla extract (optional but chef’s kiss 🤌)
- ● Tools: 1 non-stick skillet (8–10 inches, must have a lid!)
- ● 1 whisk or fork (for lump-free batter)
- ● 1 measuring cups/spoons (precision matters!)
- ● 1 spatula (thin-edged for easy flipping)
- ● Cooking spray or extra butter (to grease the pan)
- ○ Optional but handy: Parchment paper (to shape batter if freehand is tricky)
- ● Cookie cutter (for perfect circles—fun for kids!)
- ● Waffle grid stencil (DIY with foil if you’re fancy 🎨)
- ● Toppings: syrup, berries, whipped cream (because why not?)
Instructions
Here’s how to transform your stovetop into a waffle-making powerhouse with just a pan and some clever technique.
Prepare Your Stovetop “Waffle Iron”
Choose a heavy-bottomed skillet or griddle—I prefer cast iron for its even heat distribution. Preheat it over medium-low heat for 5 minutes to ensure consistent temperature throughout the cooking process. This gradual heating prevents hot spots that could burn your waffles before they cook through.
While the pan heats, lightly brush it with neutral oil using a pastry brush. You want just enough to create a nonstick surface without pooling. The oil should shimmer slightly when the pan is properly heated—this is your visual cue that it’s ready for batter.
Create the Grid Pattern
Here’s the magic trick: use a sharp knife to cut a ¼-inch thick slice from a potato (peeled or unpeeled). Pat it dry with paper towels. When your pan is hot, press the potato slice firmly into the oil for 30 seconds to create a grid pattern.
Remove the potato and let the pan reheat for 1 minute. You’ll see the oil settle into the grid lines you’ve created. This technique mimics the waffle iron’s grid, giving you those characteristic crispy edges. The potato also absorbs any excess oil, preventing greasy waffles.
Cook the Waffle Batter
Pour ¼ cup of your prepared waffle batter into the center of the pan, spreading it slightly with the back of a spoon to fill the grid pattern. Cook undisturbed for 3-4 minutes until bubbles form on the surface and the edges appear set.
Watch for the batter to lose its glossy sheen—this indicates the bottom has developed that crucial crispy crust. Gently slide a thin spatula under the waffle and flip it carefully. Cook for another 2-3 minutes until golden brown and cooked through. The grid pattern should be clearly visible and crisp.
Achieve Maximum Crispiness
Transfer the cooked waffle to a wire rack set over a baking sheet. This allows air to circulate on both sides, preventing the steam that would make your waffles soggy. If you’re making multiple waffles, keep them warm in a 200°F oven while you finish the batch.
For extra crispiness, I like to press the waffles gently with a clean kitchen towel after cooking. This absorbs any surface moisture while maintaining the grid pattern. The waffles should hold their shape when lifted and have a satisfying crunch when you break off a piece.
Serve with Confidence
Stack your crispy stovetop waffles on a warm plate. The grid pattern should be deep golden brown with crisp edges. Serve immediately with your favorite toppings—the contrast between the crispy exterior and tender interior is what makes these special.
Real talk: your first attempt might not be perfect, but the beauty of this method is you can adjust as you go. If the first waffle isn’t crispy enough, increase the heat slightly for the next one. The potato grid technique gives you that authentic waffle texture without any special equipment.
Tips and Common Mistakes
Mastering this stovetop waffle technique takes a little practice, but these insights will help you avoid common pitfalls and achieve perfect results every time.
Heat Control: The 5-minute preheating time in Step 1 is crucial for even cooking. I’ve found that cast iron holds heat beautifully, but if you’re using a thinner pan, you might need to adjust slightly. Watch for that shimmering oil—it’s your best indicator that the pan is ready. If your first waffle isn’t crispy enough, increase the heat just slightly for the next one, but don’t go above medium-low or you’ll risk burning before the center cooks through.
Grid Pattern Technique: When creating your grid in Step 2, make sure to press the potato slice firmly and evenly into the oil. The 30 seconds might seem short, but it’s enough time to create those characteristic waffle lines. Don’t skip the 1-minute reheating after removing the potato—this ensures the oil redistributes properly in the grid pattern, which is what gives you those crispy edges we’re after.
Cooking Time Precision: In Step 3, the 3-4 minutes on the first side might feel long, but resist the urge to peek or move the waffle. You’ll know it’s ready to flip when the surface loses its glossy sheen and bubbles form consistently across the top. The 2-3 minutes on the second side should give you that perfect golden brown color—don’t rush it, as this is when the grid pattern really crisps up.
Crispiness Secret: The wire rack mentioned in Step 4 isn’t just for show—it’s the key to maintaining crispiness. I learned this the hard way after my first few batches turned soggy on a regular plate. The air circulation prevents steam from collecting underneath, which is what keeps your waffles crisp long after they come off the stovetop. If you don’t have a wire rack, prop the waffles up against each other on their edges to achieve similar airflow.
Pro Tips for Waffles Without Waffle Maker
- Mastering this stovetop waffle technique takes a little practice, but these insights will help you avoid common pitfa…
- Heat Control: The 5-minute preheating time in Step 1 is crucial for even cooking. I’ve found that cast iron holds hea…
- Grid Pattern Technique: When creating your grid in Step 2, make sure to press the potato slice firmly and evenly into…
Frequently Asked Questions
Can I make waffles without a waffle maker using a regular pan?
A nonstick skillet or griddle works perfectly. Pour batter into a greased pan, cook on medium-low heat until bubbles form (like pancakes), then flip. For crispy grids, use a waffle-shaped mold (like a silicone press) or draw a grid with a knife after cooking!
How long does it take to cook stovetop waffles?
About 3–5 minutes per side on medium-low heat. Watch for golden-brown edges and a firm center. Avoid high heat—it burns the outside before the inside cooks. Pro tip: Cover the pan for 1–2 minutes to help them rise!
What’s the best batter consistency for pan waffles?
Your batter should be thicker than pancake batter but still pourable (like heavy cream). Too thin? Add 1–2 tbsp flour. Too thick? Stir in a splash of milk. This ensures crispy edges without soggy centers.
Can I use a sandwich maker or George Foreman grill instead?
Yes! Preheat the grill, lightly grease the plates, and spoon batter onto the bottom plate only. Close the lid and cook for 3–4 minutes (check for doneness). Avoid overfilling—these grills press batter thin!
Why are my stovetop waffles not crispy?
Crispiness depends on heat control and moisture. Pat cooked waffles with a paper towel, then finish in a 350°F oven for 2–3 minutes. For extra crunch, add 1 tbsp cornstarch to your batter or cook in butter + oil (not just oil).
Who knew you could whip up golden, crispy waffles without a waffle maker—just a pan and a little creativity? 😉 From stovetop grids to muffin tins, you’ve got all the tools to turn breakfast into a delicious adventure—no fancy gadgets required.
Now that you’re armed with these tricks, why not experiment with flavors? Try adding cinnamon, berries, or even a drizzle of Nutella next time. Bookmark this guide, grab your spatula, and get flipping—your perfect waffle is just a stovetop away! 🧇✨