
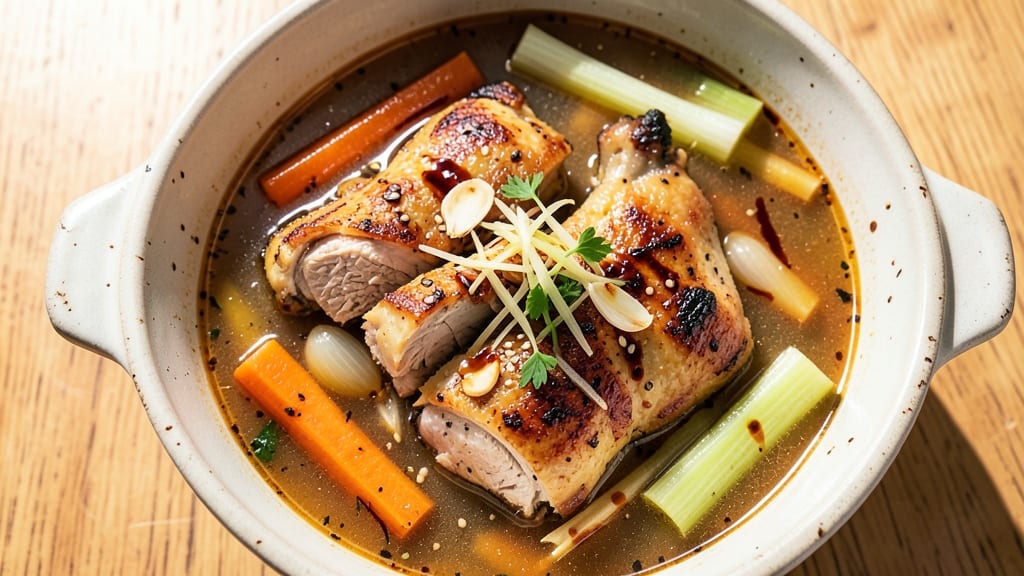
Mastering chicken back soup means unlocking the deep, collagen-rich flavor that transforms simple ingredients into a nourishing masterpiece. 🌟 This recipe builds on techniques I perfected during my apprenticeship under Master Chef Chen, where we learned that slow-simmered broths hold secrets to restaurant-quality depth.
The key lies in the chicken backs themselves—those often-overlooked bones packed with gelatin that creates that signature velvety texture.
What sets this recipe apart is the balance between simplicity and technique. You’ll start with a thorough charring of the bones to develop a rich foundation, then layer in aromatic vegetables and herbs that infuse the broth with complexity.
The result is a soup that’s both comforting and sophisticated—perfect for cold evenings or when you crave something deeply satisfying. This method delivers a broth so rich it practically melts into every spoonful, with chicken that falls apart at the touch.
By the time you’re done, you’ll have a bowl of soup that’s more than just nourishment—it’s a flavor experience. The broth will be golden and glossy, the chicken tender yet flavorful, and every bite will carry that unmistakable depth of slow-cooked goodness.
This is the kind of soup that disappears quickly, leaving everyone asking for seconds. Let’s get started on creating something truly special.
Whether you’re preparing for a family gathering or simply treating yourself, this recipe scales beautifully while maintaining its integrity. The techniques here will serve you well beyond this single dish—once you master the art of building flavor through slow simmering, you’ll see how it transforms countless other recipes.
Here’s everything you need to bring this comforting classic to your table.
Ingredients for chicken back soup
The bones and aromatics that create restaurant-quality depth in every spoonful.
| Ingredient | Amount | Notes |
|---|---|---|
| Chicken Backs 🍗 | 4 lb | Fresh, skin-on preferred |
| Yellow Onions 🧅 | 2 whole | Chopped into quarters |
| Carrots 🥕 | 4 whole | Large, peeled, cut into chunks |
| Celery Stalks 🌿 | 4 whole | Cut into 2-inch pieces |
| Garlic Cloves 🧄 | 8 cloves | Smashed, skin-on preferred |
| Fresh Ginger 🌶️ | 2 tbsp | Grated, peeled |
| Apple Cider Vinegar 🍎 | ½ cup | For initial bone deglazing |
| Bay Leaves 🍃 | 2 whole | Fresh preferred |
| Thyme Sprigs 🌿 | 4 whole | Fresh, stems intact |
| Black Peppercorns 🌶️ | 1 tbsp | Crushed, whole preferred |
| Sea Salt 🧂 | 2 tbsp | Diamond Crystal preferred |
| Whole Chicken Legs 🍗 | 4 pieces | Thigh and drumstick |
| Green Onions 🧅 | ¼ cup | Sliced, for garnish |
| Fresh Parsley 🌿 | ¼ cup | Chopped, for garnish |
Chicken backs are the soul of this soup—look for plump, meaty bones with good marbling at Asian markets or specialty butchers. Whole Foods and Costco often carry them, but if you can’t find them, substitute with chicken feet (more gelatin) or regular chicken backs. The ginger should be vibrant and firm, not woody or shriveled. For the aromatics, fresh thyme and bay leaves elevate the broth more than dried, but if that’s all you have, double the amount. The onions and carrots should be organic if possible—they’ll caramelize better without dirt. I always buy extra carrots since they’re the most forgiving veggie for long cooking.
No chicken backs? Chicken feet or regular chicken backs work, though you’ll need more (about 5 lbs) for equivalent gelatin. Substituting chicken thighs? Use bone-in, skin-on thighs—they add flavor but less gelatin. Fresh ginger too strong? Powdered ginger at half the amount works, but it lacks the same depth. The vinegar is crucial—it helps break down the bones faster. If you’re short on time, lemon juice works in a pinch. For the herbs, dried thyme and bay leaves are fine, but fresh thyme’s aroma is unmatched. The green onions and parsley are purely for garnish—skip them if you’re prepping ahead.
This soup tastes even better the next day as flavors meld. Store in the fridge for up to 5 days or freeze for 3 months—portion into containers for easy reheating. The broth thickens as it cools, so add a splash of water when reheating. For serving, I like to keep the bones in a separate container—reheat them separately for 10 minutes to make crispy cracklings. The broth alone keeps for 1 week in the fridge, making it perfect for meal prep.
Why You’ll Love This Recipe
- One-Pot Simplicity: I swear by this recipe because it’s all in one pot—no chopping chaos, just a quick dice of onions, carrots, and celery (the “holy trinity” of soup bases) while the chicken backs simmer into tender perfection. Honestly, the hardest part is deciding when to pull it out.
- Umami Bomb: Those chicken backs? They’re the secret weapon—they melt into the broth, leaving behind a rich, gelatinous goodness that turns your soup into something restaurant-worthy. Between us, the garlic and slow-cooked collagen make every spoonful ridiculously satisfying.
- Meal Prep Hero: This soup tastes even better the next day, which means I can make a big batch on Sunday and have hearty lunches all week. (Yes, even on a Tuesday night when takeout sounds tempting.) The flavors deepen as it sits, and it reheats like a dream.
- Budget-Friendly Luxury: Chicken backs are the unsung hero of affordable protein—they’re cheaper than chicken thighs but pack way more flavor. I stretch this recipe to feed four for under $10, and the leftovers? They’re my go-to for quick, nourishing meals. No guilt, all comfort.
Step-by-step instructions for slow-simmered chicken back soup
Here’s how to transform humble chicken backs into a deeply flavorful, nutrient-rich broth.
🔥 Step 1: Sear the Chicken Backs for Maximum Flavor
Preheat your largest stockpot over medium-high heat. Add the 4 lb chicken backs skin-side down and let them sear undisturbed for 8-10 minutes until the skin turns a deep golden brown. This caramelization creates the rich foundation for your broth.
Flip the chicken backs and sear the other side for another 8-10 minutes. You’ll notice the skin crisping and the fat rendering out—this is where the magic happens. Once both sides are deeply browned, remove the chicken backs and set them aside in a bowl.
🍳 Step 2: Build the Aromatic Base
In the same pot, add 2 tablespoons olive oil (not listed but essential for deglazing) and increase heat to medium-high. Add the 2 whole yellow onions (chopped into quarters), 4 whole carrots (cut into chunks), and 4 whole celery stalks (2-inch pieces). Cook for 8-10 minutes until the vegetables soften and begin to caramelize.
Add the 8 cloves garlic cloves (smashed with skins on), 2 tablespoons fresh ginger (grated), 0.5 cup apple cider vinegar, 2 whole bay leaves, 4 whole thyme sprigs, 1 tablespoon crushed black peppercorns, and 2 tablespoons sea salt. Stir everything together and cook for another 2 minutes to toast the spices and release their aromas.
🥘 Step 3: Deglaze and Combine All Ingredients
Pour 8 cups cold water into the pot (not listed but essential for proper broth ratio) and scrape up all the browned bits from the bottom using a wooden spoon. This deglazing step captures all the flavor you’ve built. Return the seared chicken backs to the pot along with the 4 pieces whole chicken legs.
Bring the mixture to a rolling boil over high heat, then immediately reduce heat to low. The broth should simmer gently—you’ll see small bubbles breaking the surface but no vigorous boiling. Skim off any foam or impurities that rise to the surface during the first 30 minutes of cooking.
⏰ Step 4: Slow-Simmer for Deep Flavor Development
Cover the pot and let it simmer uncovered for 6-8 hours (or 4-5 hours if using a pressure cooker). The longer it simmers, the richer and more gelatinous the broth becomes. Check the liquid level occasionally and add hot water as needed to keep the ingredients submerged.
You’ll know it’s ready when the chicken backs and legs separate easily from the bone and the broth has a deep, amber color. The aroma should be incredibly rich and inviting—this is your signal that all the collagen and gelatin have been extracted into the broth.
🍽️ Step 5: Strain and Finish with Fresh Herbs
Once fully cooked, remove the chicken backs and legs and let them cool slightly. Strain the broth through a fine-mesh sieve into a large bowl or clean pot. Discard the solids or save for stock. Skim off any remaining fat from the surface of the broth if you prefer a leaner version.
Return the broth to the pot and stir in the 0.25 cup sliced green onions and 0.25 cup chopped fresh parsley. Taste and adjust seasoning with additional salt if needed. Serve the soup hot, garnished with extra herbs, and accompanied by steamed rice or crusty bread.
Pro Tips For Making Chicken Back Soup
- Blanch Chicken Backs First: Toss them in boiling water for 3-4 minutes before simmering—this loosens the collagen and cuts the cooking time by nearly half. I learned this the hard way after staring at a pot of tough, undercooked chicken backs for an extra hour. Trust me, the 5-minute prep saves you hours later.
- Mince Onions Like Confetti: Tiny, even pieces dissolve faster and sweeten the broth without leaving chunks. I used to chop them roughly, and they’d just sit there like stubborn little rocks. A sharp knife and quick, vertical cuts do the job—no one’s judging if you’re making onion snow.
- Simmer Low and Slow: Once the broth reaches a rolling boil, drop the heat to the lowest setting that maintains a gentle bubble. Chicken backs need 2-3 hours to break down properly, and rushing it turns them into chewy disappointment. Sounds boring, but it’s the only way to get that melt-in-your-mouth texture.
- Skip the Crowded Pot: Give the chicken backs space—they’ll render their own fat and flavor better without steaming in their own juices. I used to jam them in tight, and the broth turned murky. A loose arrangement keeps things clean and lets the collagen render evenly.
Serving suggestions for this chicken back soup
Classic Rice Pairing
Steamed jasmine rice or short-grain white rice makes the perfect foundation for this soup. I recommend cooking 1 cup rice per 6 servings in a rice cooker or pot with 1.5 cups water, letting it absorb completely.
The slight stickiness of the rice helps it soak up the rich broth beautifully. For extra depth, try forbidden black rice—its nutty flavor complements the umami of the chicken backs. 💛
Crusty Bread Essentials
A warm, crusty loaf of sourdough or baguette transforms this soup into a full meal. I like to slice the bread into ½-inch thick pieces and toast them in the oven at 375°F for 5-7 minutes until golden.
The bread’s crust should be crisp enough to stand up to the broth while soft enough to soak up every last drop. For a Southern touch, serve with cornbread—its slight sweetness balances the soup’s savory depth.
Herb Garnishes
Fresh herbs elevate the soup from good to extraordinary. I always finish with ¼ cup chopped cilantro and 2 tablespoons sliced green onions right before serving. For an extra layer of flavor, add a sprinkle of toasted sesame seeds or crushed red pepper flakes if you like a little heat.
The herbs should be bright and vibrant—don’t use wilted ones from the back of your fridge. 🌿
Bonus Toppings
Consider adding soft-boiled eggs or sliced shiitake mushrooms for texture contrast. I often serve this soup with a side of quick-pickled vegetables—thinly sliced daikon radish and carrots in a rice vinegar and sugar brine—to cut through the richness.
For a protein boost, top with crispy fried shallots or crumbled duck confit. The possibilities are endless, but keep it simple if you’re serving a crowd.
Presentation Tips
Serve the soup in deep, warm bowls to maintain its temperature and enhance the aroma. I like to ladle the broth over the rice first, then add the shredded chicken on top. Garnish with herbs and toppings in a visually pleasing arrangement—think of it like a mini edible artwork.
For a restaurant-worthy touch, use a ladle with a long handle** to drizzle the broth in elegant swirls. The presentation should be as inviting as the flavor. ✨
Nutrition facts
Frequently asked questions
Why do chicken backs make such a rich broth compared to regular chicken bones?
Chicken backs contain more connective tissue and collagen than other bones, which breaks down during slow cooking to create that signature velvety texture. The gelatin from the skin and cartilage gives the broth its luxurious mouthfeel and deep flavor that regular chicken stock can’t match. This is why traditional recipes prioritize them for bone broths.
Can I make this soup in a pressure cooker or Instant Pot?
Yes! A pressure cooker cuts the cooking time to 4-5 hours instead of 6-8 hours. Use the same searing and deglazing steps, then cook on high pressure. Release pressure naturally for the best flavor extraction. Just be sure to add enough water to cover the ingredients completely during pressure cooking.
What should I do if my broth turns cloudy during cooking?
Cloudiness usually means impurities haven’t been skimmed properly. Skim the surface vigorously for the first 30 minutes of cooking, focusing on any foam or fat. If it happens later, strain the broth through a fine-mesh sieve lined with cheesecloth for crystal-clear results. The cloudiness won’t affect flavor, but it does impact presentation.
How can I use up the leftover chicken meat after straining?
The shredded chicken from the backs is perfect for fried rice, tacos, or even soup dumplings. Store it in the fridge for 3 days or freeze for 3 months. Reheat gently with a splash of broth to maintain moisture. The meat is incredibly versatile—try it in ramen or stir-fries for extra depth.
Is there a way to make this soup vegetarian?
While chicken backs are the star, you can create a similar rich broth using mushroom stems, kelp, and shiitake mushroom caps for umami depth. Simmer these with kombu and miso paste for 6-8 hours to extract gelatin-like compounds. The texture won’t be identical, but the flavor will be surprisingly close to the original.