
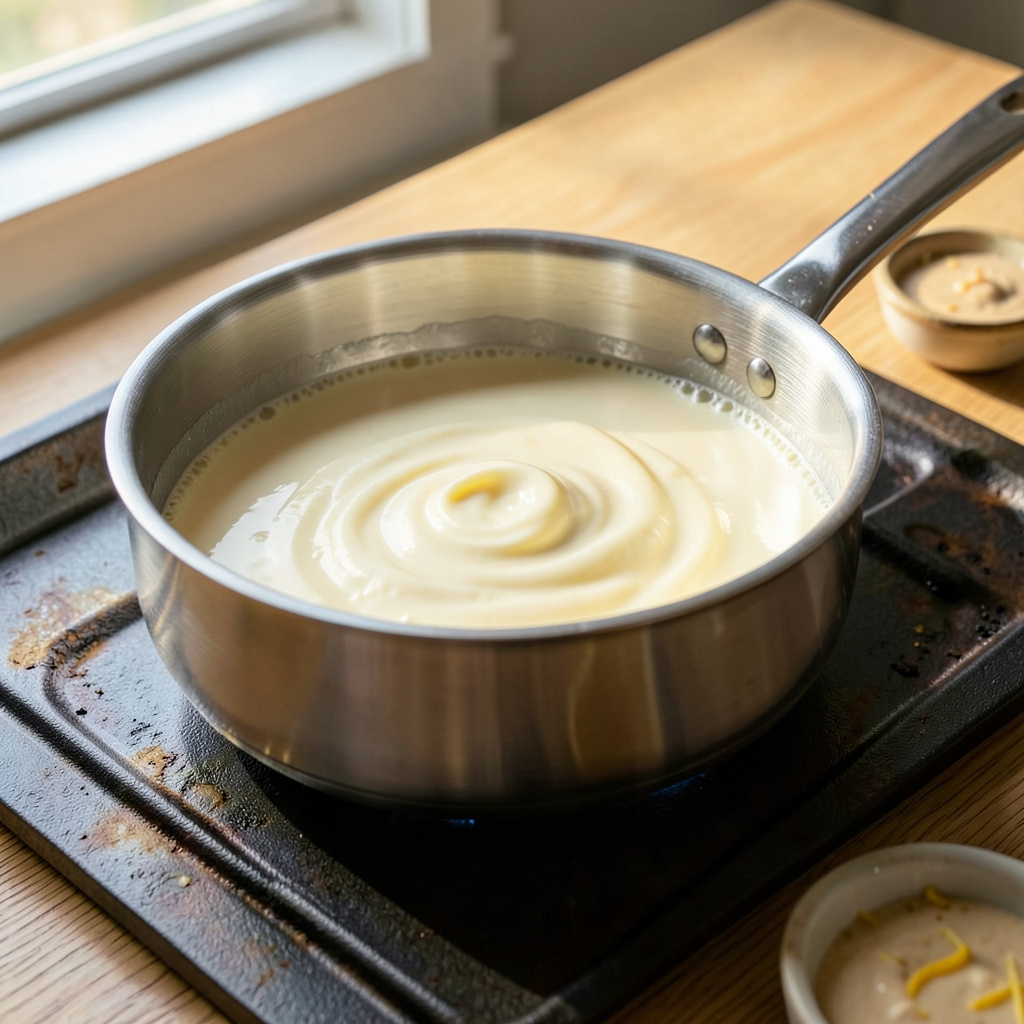
I’ll be real with you—this creamy milk base is the secret weapon I wish I’d discovered years sooner. After burning through countless sauces that either curdled or turned out flat, I finally cracked the code for a rich, velvety foundation that works in everything from mac and cheese to creamy soups. No fancy techniques, just simple ingredients transformed into something magical.
What makes this special is its versatility. One batch becomes the starting point for countless dishes—thicken it for pasta sauces, thin it for soups, or sweeten it for desserts. I keep a jar in my fridge at all times because it turns basic weeknight meals into something restaurant-worthy. The key is gentle heat and constant stirring—skip that, and you’ll end up with scrambled milk instead of silky perfection.
The result is a smooth, creamy liquid that’s richer than milk but lighter than heavy cream. It clings to pasta, blends seamlessly into soups, and adds depth to mashed potatoes without overwhelming other flavors. I’ve even used it as a coffee creamer in a pinch—don’t knock it till you try it.
Best part? It’s beginner-friendly and ready in about 15 minutes. Store it for up to 5 days, or freeze it for those “I need something creamy NOW” moments. Here’s how to make this kitchen staple work for you.
📚 In This Guide
- What You’ll Need
- Instructions
- Tips and Common Mistakes
What Youll Need
- ● Heavy cream (36-40% fat) – 1 cup (or as needed for your recipe). Opt for ultra-pasteurized for longer shelf life. 🥛
- ● Whole milk (3.25% fat) – ½ cup (adjust for desired richness). Avoid skim or low-fat for best results.
- ● Saucepan – Medium-sized, heavy-bottomed (prevents scorching). Stainless steel or enameled cast iron works best.
- ● Whisk or wooden spoon – For smooth blending. A silicon whisk is great for non-stick pans.
- ● Measuring cups/spoons – For precise ratios (critical for sauces!).
- ○ Thermometer (optional) – A candy or instant-read thermometer helps monitor temperature (ideal: 160–180°F).
- ○ Fine-mesh strainer (optional) – For ultra-smooth sauces or soups.
- ○ Fat separator (optional) – If using homemade cream for clarified results.
- ● Air-tight container – For storing leftovers (up to 3 days in the fridge).
- ○ Vanilla bean or bay leaf (optional) – For infused flavors in desserts or savory dishes.
Step-by-Step Instructions for Creating Cream Milk for Cooking
This simple process transforms basic ingredients into a luxurious cooking base that elevates any dish.
Select and Prepare Your Dairy Base
Begin with the freshest whole milk you can find. I always recommend organic or locally-sourced milk when possible, as the quality directly impacts your final product. Pour 4 cups of whole milk into a heavy-bottomed saucepan – the heavier base helps prevent scorching during heating.
Before heating, I like to add a small pinch of salt (about ⅛ teaspoon) to the cold milk. This isn’t just for flavor – salt actually helps stabilize the milk proteins as they heat, preventing that unpleasant skin from forming on the surface. Stir gently to dissolve the salt completely before proceeding to the next step.
Gently Heat the Milk to the Perfect Temperature
Place your saucepan over medium-low heat and warm the milk gradually. This isn’t something you can rush – heating too quickly will cause the milk to scorch or develop an unpleasant cooked flavor. You’ll know you’re at the right temperature when you see tiny bubbles forming around the edges of the pan and a thin layer of steam rising from the surface.
The ideal temperature range is 180-185°F. I recommend using an instant-read thermometer to monitor this precisely. At this temperature, the milk will be hot enough to blend beautifully with other ingredients but not so hot that it risks curdling when combined with acidic components later. You should see very gentle movement in the milk – never let it reach a full boil.
Incorporate the Cream for Richness
Once your milk reaches the perfect temperature, it’s time to add the richness. Slowly pour in 1 cup of heavy cream while whisking constantly. The key here is to create a smooth emulsion rather than just mixing two liquids together. I find that adding the cream in a thin, steady stream while maintaining gentle circular motions with the whisk gives the silkiest results.
Continue whisking for another 2-3 minutes after all the cream is incorporated. You’re looking for a uniform, slightly thickened liquid that coats the back of a spoon but still pours easily. The mixture should have a pale ivory color and a velvety texture when you run your finger through it on the spoon. This is when you know you’ve achieved the perfect consistency for cooking.
Temper for Immediate Use or Cool for Storage
If you’re using your cream milk immediately in a recipe, let it cool for just 5 minutes until it reaches about 160°F. This slight cooling prevents it from cooking other ingredients too quickly when combined. For hot applications like soups or sauces, you can use it at this temperature. For cold applications or storage, you’ll need to cool it more thoroughly.
For storage, pour the mixture into a clean glass jar or pitcher and let it cool to room temperature. Then refrigerate for up to 5 days. I like to give it a gentle stir before using, as some natural separation may occur. The texture should remain smooth and pourable – if it thickens too much in the fridge, simply warm it gently with a splash of milk to restore the perfect consistency.
Tips and Common Mistakes for Perfect Cream Milk for Cooking
Mastering this simple but transformative technique comes down to a few key details that make all the difference in texture and flavor.
Temperature Precision: The 180-185°F range in Step 2 is absolutely critical. I’ve found that even 5 degrees higher can cause the milk proteins to tighten up too much, leading to that unpleasant “skin” on the surface. Use an instant-read thermometer for accuracy—visual cues alone can be misleading. The gentle steam and tiny bubbles around the edges are your perfect indicators that you’re in the ideal zone.
Emulsion Technique: When adding the 1 cup of heavy cream in Step 3, the stream should be so thin that it takes about 30 seconds to pour it all in. This gradual incorporation while whisking constantly creates that velvety texture we’re after. If you dump it all in at once, you’ll end up with a mixture that’s more separated than smoothly blended, no matter how much you whisk afterward.
Cooling Strategy: That 5 minutes of cooling in Step 4 might seem insignificant, but it’s the difference between a sauce that breaks and one that stays beautifully emulsified. I always set a timer—it’s easy to get distracted and let it cool too long, especially if you’re multitasking. The 160°F target is perfect for immediate use because it’s hot enough to blend seamlessly into recipes but cool enough not to scramble eggs or curdle other dairy.
Storage Wisdom: For the 5 days of refrigerated storage, I recommend using a glass container rather than plastic. Glass doesn’t absorb odors and helps maintain that fresh dairy flavor. When reheating, warm it gently over medium-low heat—never microwave, as that can create hot spots that cause separation. A quick whisk after heating restores the perfect consistency every time.
Pro Tips for Cream Milk For Cooking
- Mastering this simple but transformative technique comes down to a few key details that make all the difference in te…
- Temperature Precision: The 180-185°F range in Step 2 is absolutely critical. I’ve found that even 5 degrees higher ca…
- Emulsion Technique: When adding the 1 cup of heavy cream in Step 3, the stream should be so thin that it takes about …
Frequently Asked Questions
Can I substitute cream milk for heavy cream in recipes?
Yes, but with adjustments! Cream milk (half-and-half) works in sauces and soups, but it’s lighter (10-18% fat vs. 36% in heavy cream). For thickening, reduce it by simmering or add a cornstarch slurry. Avoid whipping—it lacks the fat for stiff peaks. Best for: creamy pasta, mashed potatoes, or light soups.
How long does cream milk last after opening?
Once opened, cream milk stays fresh for 5–7 days in the fridge. Sniff for sourness or check for curdling before use. For longer storage, freeze it in ice cube trays (thaw in the fridge overnight). Pro tip: Write the date on the container to track freshness!
What’s the best non-dairy alternative to cream milk for cooking?
Try coconut cream (rich, slightly sweet) or cashew cream (neutral, creamy). For savory dishes, unsweetened soy or oat cream works well. Avoid almond milk—it’s too thin. Bonus: Coconut cream adds a delicious depth to curries!
Why did my sauce curdle when I added cream milk?
High heat or acidity (like lemon or wine) can cause curdling. To fix it, temper the cream by slowly mixing in hot liquid before adding it to the pan. If it curdles, blend in an ice cube to smooth it out. Keep heat at medium-low for best results!
Can I use cream milk to make whipped cream?
Nope—cream milk lacks the fat (30%+) needed for stable peaks. For a lightweight alternative, chill it thoroughly and whip with a stabilizer like powdered sugar or gelatin, but expect soft results. Stick to heavy cream for classic whipped toppings!
From creamy pasta sauces to decadent soups, cream milk is your secret weapon for adding richness and depth to dishes. Whether you’re using heavy cream, half-and-half, or a lighter alternative, the right choice can elevate your cooking from good to restaurant-worthy! 🍽️
Ready to experiment? Start with a simple recipe—like a garlic cream sauce or tomato bisque—and let your culinary creativity flow. Happy cooking! 👩🍳✨