
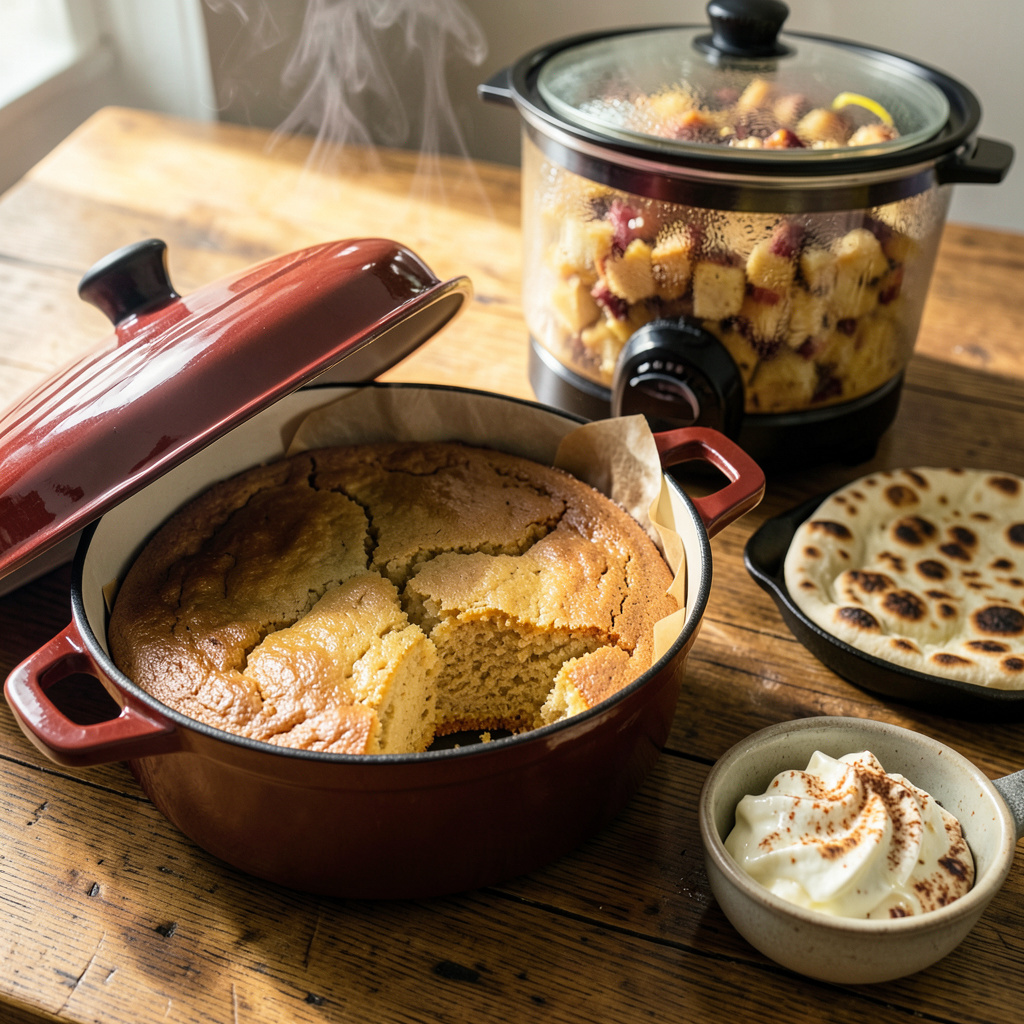
No oven? No problem. I’ve baked everything from cakes to breads without one, and the results might surprise you. After years of cooking in tiny apartments and outdoor kitchens, I’ve mastered techniques that deliver perfect baked goods using what you already have at home.
The secret is knowing which tools to use—your stovetop, microwave, or even a rice cooker can become makeshift ovens with the right approach. I’ve turned Dutch ovens into bread bakers, mugs into cake pans, and slow cookers into dessert machines. These methods aren’t just workarounds; they’re legitimate techniques I’ve used in professional kitchens when equipment failed.
What you’ll get are results that rival traditional baking: golden crusts, moist interiors, and that satisfying baked-good aroma. The key is understanding heat distribution and timing adjustments. I’ll walk you through exactly how to adapt your favorite recipes for each method, with clear temperature guidelines and doneness tests.
We’ll cover six foolproof methods with real recipes I’ve tested dozens of times—including my famous stovetop cornbread and microwave chocolate cake. Whether you’re in a dorm room, camping, or just avoiding heating up your kitchen, these techniques will change how you think about baking.
📚 In This Guide
- What You’ll Need
- Instructions
- Tips and Common Mistakes
What Youll Need
- ● Heat source: Stovetop (gas or electric) or
- ● Portable butane burner or
- ● Camp stove (for outdoor baking)
- ● Slow cooker (4–6 quarts) or
- ● Instant Pot (6+ quarts, with trivet)
- ● Baking vessels: Heavy-bottomed pot or Dutch oven (5–7 quarts, oven-safe up to 450°F) 🔥
- ● Large skillet with lid (10–12 inches, non-stick or cast iron)
- ● Heatproof glass or metal bowl (for steaming/boiling methods)
- ● Aluminum foil (heavy-duty, 12-inch wide roll)
- ● Essential tools: Tongs or heat-resistant gloves
- ● Parchment paper (pre-cut sheets or roll)
- ○ Cooling rack (optional but helpful)
- ● Kitchen thermometer (instant-read, for precision)
- ● Pantry staples: Salt, sugar, and oil (for greasing)
- ● Baking powder/soda (if recipe requires leavening)
- ● Extra flour (for dusting surfaces)
- ○ Optional (but handy!): Silicone baking mat (for easy release)
- ● Steamer basket (for dumplings or puddings)
- ● Pizza stone (for crispier crusts on a grill)
Instructions for Baking Without an Oven
Here’s how to achieve perfect baked goods using alternative heat sources—no oven required.
Prepare Your Alternative Heat Source
Choose your heat source based on what you’re making. For quick breads or cakes, a large Dutch oven works beautifully over a stovetop. Fill it with about 1 inch of water to create steam, which helps with even cooking. If using a slow cooker, line it with parchment paper to prevent sticking and ensure easy removal.
For griddle-based baking, preheat your electric griddle or stovetop griddle pan to medium-low heat. You’ll want consistent, even heat—too high and your creation will burn on the outside before cooking through. A heavy-bottomed skillet works similarly; just make sure it has a tight-fitting lid to trap heat.
Adapt Your Recipe for Alternative Baking
Most recipes need slight adjustments for alternative methods. For cakes or breads, reduce baking powder by 25%—steam cooking can make them rise too quickly. If using a pressure cooker, add 2-3 tablespoons extra liquid to prevent drying out, as the sealed environment intensifies heat.
For cookies or flatbreads, you’ll need to flatten them more than usual since they won’t spread in a pan like they would in an oven. Use a parchment paper round to help with even cooking and easy transfer. Remember, without circulating hot air, heat distribution differs—so expect slightly denser textures but equally delicious results.
Master the Cooking Process
For Dutch oven or slow cooker methods, place your batter in a greased heatproof dish that fits inside with at least 1 inch of clearance on all sides. Cover tightly with foil or the pot’s lid, then cook on medium heat for 45-60 minutes, checking occasionally. You’ll know it’s done when a toothpick inserted comes out clean and the top springs back when lightly pressed.
When using a griddle or skillet, cook covered on medium-low heat for 10-15 minutes before carefully flipping. I use two spatulas for stability when turning larger items like cakes. The second side will cook faster—watch for golden brown edges and a firm center. For cookies, cook uncovered for 3-5 minutes per side until edges are crisp.
Test for Doneness Without Visual Cues
Since you can’t rely on the same visual cues as oven baking, use alternative tests. For cakes and breads, insert a skewer into the center—it should come out clean with no wet batter, though moist crumbs are fine. The top should feel firm when gently pressed, not sticky or indented.
For cookies and flatbreads, look for edges that are set and beginning to brown. The center should no longer appear wet or glossy. Remember that carryover cooking continues after removal from heat, so pull items when they’re just shy of perfect—they’ll finish as they cool. A food thermometer helps too: 190-200°F for breads, 205°F for cakes.
Cool Properly for Best Texture
Transfer your creation to a wire rack immediately to prevent soggy bottoms from trapped steam. For cakes and breads, let cool in the pan for 10 minutes before removing—this prevents crumbling. Then cool completely on the rack before slicing to maintain structure.
Cookies should cool on the rack for 5 minutes until set, then can be enjoyed warm. The texture will continue to develop as they cool completely. I’ve found that alternative-baked goods often taste even better the next day as flavors meld, so don’t rush the cooling process—patience yields perfect results.
Tips and Common Mistakes for Perfect Oven-Free Baking
Mastering these alternative baking methods takes some practice, but these hard-won lessons will save you time and frustration.
Heat Distribution Secret: When using a Dutch oven or slow cooker for the 45-60 minute cooking time, rotate your dish halfway through if you notice uneven cooking. The steam created by that 1 inch of water is crucial, but heat sources often have hot spots. I learned this after my first attempt had one side perfectly done while the other remained doughy. A simple quarter-turn makes all the difference in achieving uniform results.
The Technique That Changed Everything: For griddle or skillet baking at medium-low heat, resist the urge to peek during those critical 10-15 minutes of covered cooking. Every time you lift the lid, you lose precious heat and steam that’s essential for even cooking. I use a glass lid when possible so I can monitor progress without disturbing the environment. The golden brown edges you’re looking for develop best with undisturbed, consistent heat.
Doneness Test Refinement: While the toothpick test works well for cakes, I’ve found that breads benefit from an additional check during that 45-60 minute window. Gently tap the top of your bread – it should sound hollow, not dull. This auditory cue, combined with the 190-200°F internal temperature, gives you double confirmation of perfect doneness. Too many bakers rely solely on visual cues and end up with undercooked centers.
Cooling Strategy: The 10-minute in-pan cooling time for cakes and breads isn’t just about preventing crumbling – it’s about texture development. This brief rest allows the structure to set while still warm, preventing that disappointing gummy layer that can form if you remove items too soon. I set a timer for this step because it’s easy to forget when you’re eager to taste your creation.
Pro Tips for Bake Without An Oven
- Mastering these alternative baking methods takes some practice, but these hard-won lessons will save you time and fru…
- Heat Distribution Secret: When using a Dutch oven or slow cooker for the 45-60 minute cooking time, rotate your dish …
- The Technique That Changed Everything: For griddle or skillet baking at medium-low heat, resist the urge to peek duri…
Frequently Asked Questions
Got questions about baking without an oven? You’re not alone! Here are the most common ones—with quick, actionable answers to help you bake like a pro.
Can I bake a cake without an oven using a stovetop?
Absolutely! A heavy-bottomed pot or Dutch oven works great. Place a heat-safe stand (like a small rack or upside-down bowl) inside, cover with a lid, and bake on low-medium heat (around 300°F/150°C). Check for doneness with a toothpick—just like oven baking!
How long does it take to bake cookies in a toaster oven vs. a regular oven?
Toaster ovens bake faster due to concentrated heat! Cookies typically take 8–12 minutes at 350°F (175°C)—about 25% less time than a conventional oven. Watch closely after 6 minutes to avoid burning, and rotate the tray for even browning.
What’s the best oven-free method for baking bread?
A slow cooker or Dutch oven on the stovetop mimics an oven’s environment. For crusty bread, preheat the Dutch oven, add dough, and bake covered for 20–25 minutes, then uncovered for 5–10. Pro tip: Spritz water inside the lid for a steamy rise!
Why did my microwave-baked mug cake turn rubbery?
Overmixing or overcooking is usually the culprit! Mix batter just until combined and microwave in 20–30-second bursts, checking after each. Stop when the center is slightly springy—it’ll firm up as it cools. Let it rest 1–2 minutes before eating.
Can I use a grill to bake pies or casseroles?
Yes! Set up your grill for indirect heat (turn off one burner or push coals to one side). Use a heat-safe dish (like cast iron) and monitor temps with a thermometer—aim for 325–350°F (160–175°C). Rotate the dish occasionally for even cooking.
Who knew you could whip up delicious baked goods without an oven? 🎉 From stovetop cakes to solar-powered cookies, these six methods prove that creativity (and a little patience) is all you need. Whether you’re camping, in a tiny apartment, or just oven-less for the day, you’ve got this!
Ready to put your new skills to the test? Pick one method—like the trusty slow cooker or a skillet—and try baking your favorite recipe this weekend. Don’t forget to snap a pic and tag us—we’d love to see your no-oven masterpieces! 📸✨