
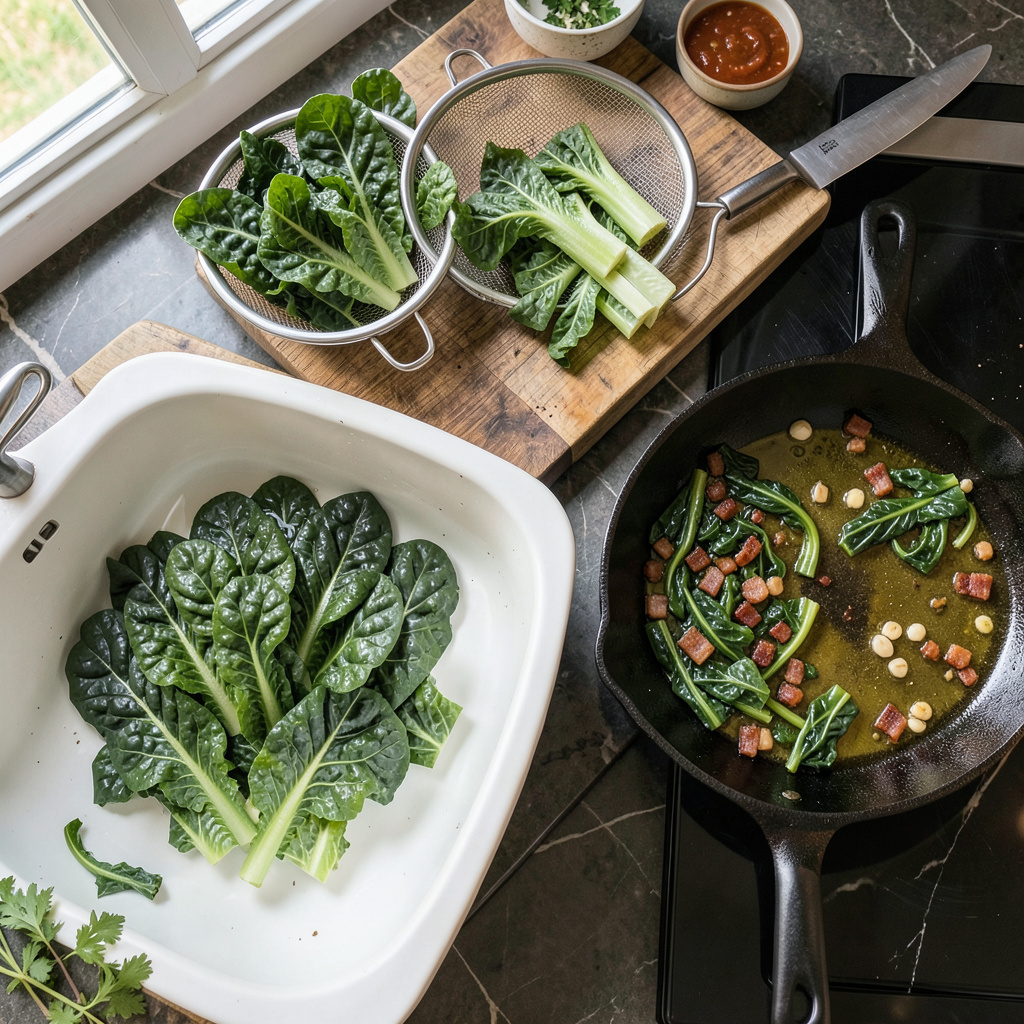
I’ll be real with you—collard greens get a bad rap for being tough and bitter, but that’s only because most folks don’t know the right way to handle them. Growing up in Georgia, I learned early that the secret starts with proper cleaning and prep. Those gritty leaves and fibrous stems can ruin a good pot of greens if you don’t tackle them first.
After years of cooking 2,000 pounds of pork weekly at my restaurant, I’ve perfected the balance between tender greens and rich flavor. The key is a 45-minute simmer with just enough seasoning to enhance, not overpower. No fancy equipment needed—just a big pot, some patience, and a technique that guarantees Southern-style tenderness every time.
What you’ll end up with is a pot of greens so silky they’ll melt in your mouth, with a broth that’s rich enough to sop up with cornbread. I’ve converted countless skeptics with this method, and the best part? It works whether you’re cooking for a crowd or just meal prepping for the week.
Fair warning: once you try this, you’ll never settle for mushy or bitter greens again. Let’s break down the process step by step—from washing those sandy leaves to achieving that perfect potlikker at the bottom of your bowl.
📚 In This Guide
- What You’ll Need
- Instructions
- Tips and Common Mistakes
What Youll Need
- ● Fresh collard greens: 1 large bunch (about 1–1.5 lbs) 🥬 – Look for crisp, deep green leaves without yellowing.
- ● Water: 4–6 cups (for cleaning) + 4 cups (for cooking).
- ● Salt: 1 tbsp (for cleaning) + 1 tsp (for cooking).
- ○ White or apple cider vinegar: ½ cup (for cleaning, optional but highly recommended).
- ● Large colander or strainer (for rinsing).
- ● Sharp chef’s knife 🔪 or kitchen shears (for trimming stems).li> Cutting board: Large (at least 12×18 inches).
- ● Large pot (5–6 qt) with lid (for boiling).
- ● Wooden spoon or tongs (for stirring).
- ○ Slotted spoon (for draining, optional).
- ● Smoked turkey neck/ham hock (1 piece) or bacon (2 slices, chopped).
- ● Garlic (2 cloves, minced).
- ● Red pepper flakes (½ tsp) or hot sauce (for heat).
- ● Lemon juice (1 tbsp, for brightness).
Instructions
Let’s walk through the process together—proper cleaning and slow cooking are the secrets to achieving that perfect Southern-style tenderness.
Thoroughly Wash the Collard Greens
Start by filling your sink or a large bowl with cold water. Submerge the collard greens completely and let them soak for 5 minutes. This first soak helps loosen any dirt or grit clinging to the leaves. I always use cold water because it keeps the greens crisp while cleaning.
Lift the greens out of the water (don’t pour them through a colander—this just redistributes the dirt) and discard the water. Repeat this process 2-3 times until the water remains clean. You’ll know they’re properly cleaned when no grit settles at the bottom of the bowl after swishing the greens.
Remove Stems and Chop the Leaves
Place each leaf flat on your cutting board with the stem side facing up. Using a sharp chef’s knife, cut along both sides of the thick center stem to remove it. I find this method faster than trying to tear the stems out by hand, and it preserves more of the leaf.
Stack several stem-free leaves together and roll them tightly like a cigar. Slice crosswise into 1-inch wide ribbons. This cutting technique creates uniform pieces that cook evenly. You should end up with about 8-10 cups of chopped greens, which will cook down significantly.
Cook the Aromatics for Flavor Foundation
In a large pot or Dutch oven, cook diced bacon or smoked ham hock over medium heat for 5-7 minutes until it renders fat and becomes slightly crispy. This fat will flavor your greens beautifully. Remove the meat but leave the fat in the pot.
Add diced onion to the rendered fat and cook for 3-4 minutes until translucent. Then add minced garlic and cook for 30 seconds until fragrant. Be careful not to burn the garlic—it should just soften and release its aroma. This aromatic base is crucial for authentic Southern flavor.
Simmer Until Perfectly Tender
Add the chopped collard greens to the pot along with chicken broth or water to just cover the greens. Bring to a boil, then reduce heat to low and cover. Let them simmer for 45-60 minutes, stirring occasionally.
You’ll know they’re done when the greens are deep green in color and tender enough to cut with a spoon. The liquid should reduce by about half, creating a flavorful “pot likker.” If the greens seem tough, cook them 10-15 minutes longer—they should melt in your mouth, not be chewy.
Season and Serve with Love
Return the cooked meat to the pot and stir in apple cider vinegar and red pepper flakes to taste. The vinegar brightens the flavor while the pepper adds a subtle heat. Season with salt and black pepper, but go easy—you can always add more at the table.
Let the greens rest for 5 minutes off heat before serving. This allows the flavors to meld together. Serve them hot with some of the pot likker spooned over the top, and don’t forget the cornbread for soaking up that delicious broth!
Tips and Common Mistakes
After years of cooking collards in Southern kitchens, I’ve learned these key details make all the difference between tough greens and that melt-in-your-mouth tenderness we’re after.
Cleaning Secret: In Step 1, don’t rush those 5-minute soaks—this is where most home cooks fail. I’ve seen grit ruin perfect pots of greens. The cold water keeps leaves crisp while dirt settles, and you’ll need all 2-3 soaks until the water stays clean. Trust me, nobody wants crunchy sand in their tender greens.
Knife Technique: For Step 2, use a sharp chef’s knife when removing stems. Dull blades crush leaves instead of cleanly cutting, which leads to uneven cooking. When rolling leaves for those 1-inch ribbons, keep the roll tight—loose rolls create uneven pieces that cook at different rates.
Flavor Foundation: The 5-7 minutes in Step 3 for rendering bacon fat is crucial. Don’t pull the meat too early—you want crispy bits that’ll flavor the greens later. When cooking onions, let them truly soften during those 3-4 minutes; translucent means you can see the cutting board through them. And those 30 seconds for garlic? Count them—burnt garlic turns bitter.
Simmering Wisdom: During the 45-60 minute simmer in Step 4, resist lifting the lid too often. Each peek adds cooking time. The greens are done when they’re that perfect deep green and cut easily with a spoon. If they’re still tough after 60 minutes, the 10-15 extra minutes will save them—just keep the heat low and stir occasionally.
Pro Tips for Clean And Cook Collard Greens
- After years of cooking collards in Southern kitchens, I’ve learned these key details make all the difference between …
- Cleaning Secret: In Step 1, don’t rush those 5-minute soaks—this is where most home cooks fail. I’ve seen grit ruin p…
- Knife Technique: For Step 2, use a sharp chef’s knife when removing stems. Dull blades crush leaves instead of cleanl…
Frequently Asked Questions
How long do collard greens take to cook until tender?
Collard greens typically need 45–60 minutes of simmering for that melt-in-your-mouth tenderness. Start checking at 40 minutes—stems should be soft, and leaves should yield easily to a fork. For a quicker bite, chop them finely and cook for 25–30 minutes.
Can I use bacon grease or oil instead of ham hocks?
Swap ham hocks for 2 tbsp bacon grease, smoked turkey wings, or olive oil (for vegetarian options). Bacon grease adds smoky depth, while olive oil keeps it light. Adjust salt to taste—ham hocks are salty, so you may need to add more seasoning with substitutes.
Why are my collard greens bitter? How do I fix it?
Bitterness comes from undercooking or older leaves. Simmer longer (up to 90 minutes) to mellow flavors, or add a pinch of sugar or apple cider vinegar (1 tsp) to balance. Always remove thick stems—they’re the main culprit for harsh taste!
Do I have to blanch collard greens before cooking?
Nope! Blanch only if you prefer extra-tender greens or plan to freeze them. For stovetop cooking, a thorough wash (3 rinses!) and chopping is enough. Skip blanching to save time—just simmer low and slow for the best texture.
What’s the best alternative if I don’t have collard greens?
Try kale, mustard greens, or turnip greens—they cook similarly but may need 5–10 fewer minutes. Kale is milder; mustard greens add a peppery kick. Adjust seasoning to match your recipe’s flavor profile!
Now you’ve got the know-how to turn tough collard greens into a tender, flavorful Southern-style dish in under an hour! 🌿✨ Remember: thorough cleaning and low-and-slow cooking are the secrets to that melt-in-your-mouth magic. Whether you’re serving them as a hearty side or a plant-powered main, these greens are sure to impress.
Ready to dig in? Grab a fork and enjoy your homemade collards—or try experimenting with spices like smoked paprika or red pepper flakes next time for a bold twist! Let us know your favorite way to serve them in the comments. 👇