
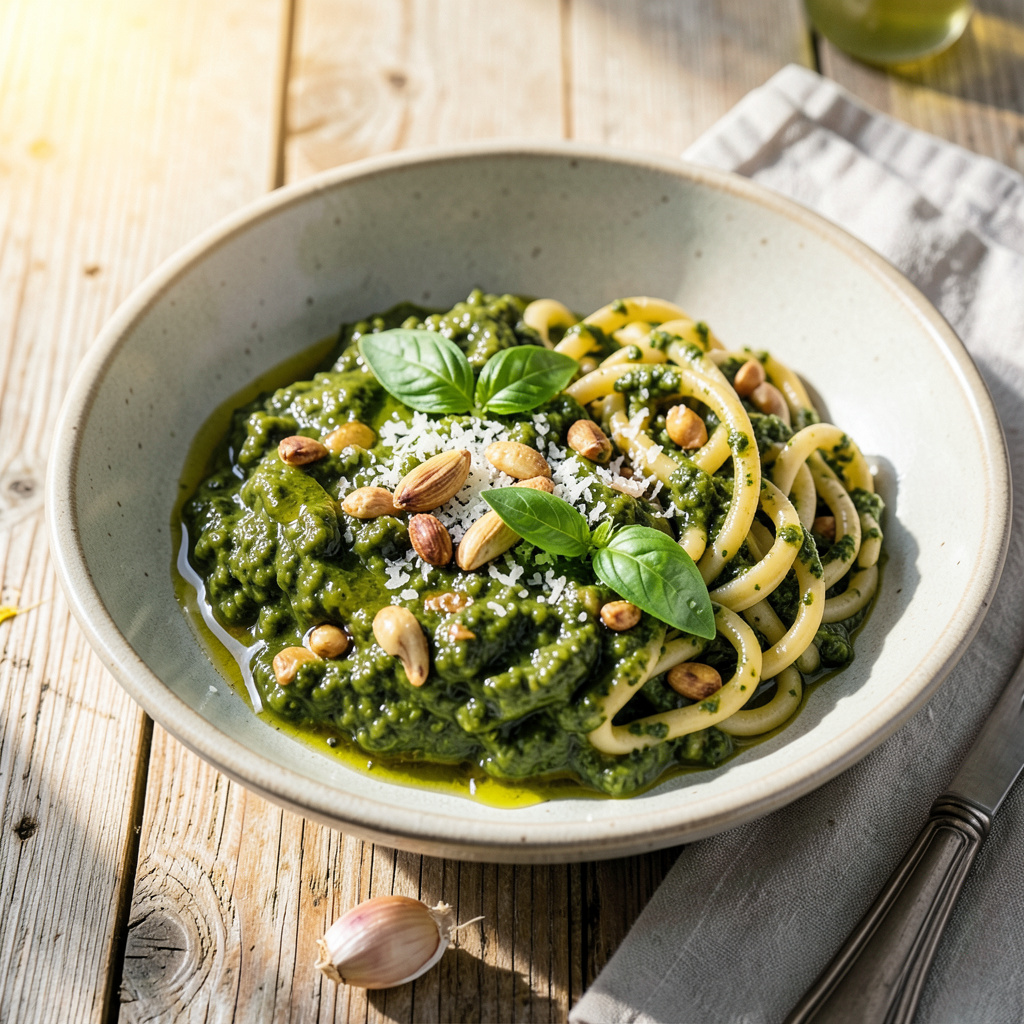
Store-bought pesto can be a real lifesaver, but let’s be honest—it often tastes flat compared to what you’d get at a good Italian restaurant. After years of tweaking jarred pesto in my own kitchen (and yes, I’ve burned through my fair share of mediocre batches), I’ve landed on a 5-ingredient upgrade that transforms basic pesto into something vibrant and complex.
The trick isn’t complicated: fresh garlic, toasted nuts, quality olive oil, lemon zest, and a sprinkle of good cheese. Each addition serves a purpose—garlic adds punch, toasted nuts deepen the nuttiness, olive oil smooths the texture, lemon brightens the flavors, and cheese rounds everything out. No fancy techniques required, just simple ingredients that wake up those dormant flavors in the jar.
What you end up with is pesto that actually tastes homemade—herbaceous, balanced, and with real texture instead of that one-note paste. It clings to pasta better, brightens up sandwiches, and makes a killer dip for crusty bread. The best part? This upgrade takes less than 10 minutes and works with any brand of store-bought pesto you already have in your pantry.
Whether you’re tossing it with noodles, spreading it on pizza, or stirring it into soup, this elevated version will make you wonder why you ever settled for pesto straight from the jar. Here’s exactly how to do it—no food processor required.
📚 In This Guide
- What You’ll Need
- Instructions
- Tips and Common Mistakes
What Youll Need
- ● 1 jar (6–8 oz) store-bought pesto – Any brand works, but opt for one with real olive oil (check the label!).
- ● 2–3 tbsp extra-virgin olive oil – The good stuff! Cold-pressed is ideal for rich, fruity flavor.
- ● 1–2 cloves fresh garlic – Minced or grated (or ½ tsp garlic powder in a pinch).
- ● ¼ cup freshly grated Parmesan or Pecorino Romano – Skip the pre-shredded stuff; it’s coated in anti-caking agents.
- ● 1 tbsp fresh lemon juice – Brightens flavors like magic! 🍋
- ● Salt & black pepper – To taste (sea salt or kosher salt preferred).
- ● Handful of fresh basil or spinach – ¼ cup chopped, for extra freshness.
- ● 1–2 tbsp toasted pine nuts or walnuts – Adds crunch and depth.
- ● Pinch of red pepper flakes – For a subtle kick. 🌶️
- ● Food processor or mortar & pestle – If you’re blending in fresh ingredients.
Step-by-Step Instructions for Upgrading Store-Bought Pesto
Transforming basic pesto into something extraordinary takes just minutes with these simple techniques.
Bloom the Aromatics in Warm Oil
Start by gently warming 2 tablespoons of extra virgin olive oil in a small skillet over low heat. You want the oil to shimmer but not smoke—this takes about 1-2 minutes. The goal is to wake up the flavors without burning them.
Add 2 minced garlic cloves and 1/4 teaspoon red pepper flakes to the warm oil. Cook for 30-45 seconds, stirring constantly, until the garlic turns light golden and becomes fragrant. You’ll smell when it’s ready—the aroma will be rich and toasty. Remove from heat immediately to prevent burning.
This quick blooming step transforms harsh raw garlic into something sweet and mellow while infusing the oil with warmth. The red pepper flakes will release their oils, adding subtle heat that balances the pesto’s richness.
Toast the Nuts for Depth
While the garlic cools, place 1/4 cup pine nuts in a dry skillet over medium-low heat. Toast them for 3-5 minutes, shaking the pan frequently, until they turn light golden brown and smell nutty. Watch them closely—they can go from perfect to burnt in seconds.
You’ll hear a subtle popping sound as the nuts toast, and their color will deepen gradually. Transfer them immediately to a plate to cool—they’ll continue cooking from residual heat if left in the pan. This toasting step adds incredible depth and crunch that store-bought pesto lacks.
If you prefer walnuts or almonds, use the same quantity and toasting method. The key is achieving that perfect golden color without any bitter, burnt notes.
Brighten with Fresh Herbs and Citrus
Transfer your store-bought pesto to a food processor or blender. Add the cooled garlic oil mixture and toasted pine nuts. Then add 1/4 cup fresh basil leaves and 1 tablespoon freshly grated Parmesan cheese. The fresh basil will intensify the herbal notes, while the Parmesan adds umami depth.
Squeeze in 1 tablespoon fresh lemon juice and add 1/2 teaspoon lemon zest. The citrus brightens all the flavors and cuts through the richness. Pulse 3-4 times just until combined—you want texture, not a completely smooth purée.
Taste and adjust the seasoning. I often find store-bought pesto needs more salt, so add 1/4 teaspoon salt if needed. The pesto should taste vibrant and balanced, with no single flavor overpowering the others.
Finish with Quality Cheese
Transfer the upgraded pesto to a bowl and fold in 1/4 cup freshly grated Pecorino Romano cheese by hand. The Pecorino adds a sharper, saltier dimension than regular Parmesan. Its crystalline texture also gives the pesto a wonderful mouthfeel.
If the pesto seems too thick, stir in 1-2 tablespoons of the pasta water you’ll be using (or plain warm water) to reach your desired consistency. The starch in pasta water helps the pesto cling beautifully to noodles. For a creamier texture, you can add 1 tablespoon heavy cream instead.
Let the pesto sit at room temperature for 10 minutes before using. This resting time allows all the flavors to meld together. You’ll notice the color deepens slightly and the aromas become more pronounced.
Use Properly for Maximum Impact
When tossing with pasta, use 1/2 cup of pesto per 8 ounces of cooked pasta. Add the pesto to the warm pasta in a large bowl along with 2-3 tablespoons of pasta water. Toss vigorously for 1-2 minutes until every strand is evenly coated.
The heat from the pasta will gently warm the pesto without cooking it, preserving its fresh, vibrant flavors. For extra richness, finish with a drizzle of your best extra virgin olive oil and a sprinkle of toasted pine nuts. This upgraded pesto will cling beautifully to the pasta and deliver restaurant-quality flavor in every bite.
Store any leftover upgraded pesto in an airtight container in the refrigerator for up to 5 days, or freeze for up to 3 months. The flavors will continue to develop and deepen over time.
Tips and Common Mistakes
These simple but powerful techniques will transform your store-bought pesto from basic to extraordinary with minimal effort.
The Heat Factor: When blooming your garlic in Step 1, keep the heat at exactly low as specified. The 1-2 minutes needed for the oil to shimmer is crucial—too hot and your garlic will burn, too cool and the flavors won’t develop. I always remove the pan from heat the moment the garlic turns light golden (after 30-45 seconds) to prevent any bitterness from creeping in. This single step makes all the difference in achieving that sweet, mellow garlic flavor.
Toasting Technique: For the pine nuts in Step 2, don’t walk away during those 3-5 minutes over medium-low heat. The moment you hear that first subtle pop and smell their nutty aroma, start shaking the pan constantly. Pine nuts go from perfectly toasted to burnt in seconds, and burnt nuts will ruin your entire batch. Transfer them immediately to a cool plate—they’ll continue cooking from residual heat even after you remove them from the pan.
Texture Secret: In Step 3, when you pulse the pesto 3-4 times, stop before you think it’s ready. You want visible texture—tiny flecks of basil and nuts—not a smooth purée. This gives your upgraded pesto that artisanal, rustic quality that makes it feel homemade. The brief pulsing also prevents the oils from separating, which can happen with over-processing.
Cheese Wisdom: When folding in the Pecorino Romano in Step 4, do it by hand rather than mixing with a spoon. The gentle folding motion preserves the cheese’s crystalline texture, which adds wonderful mouthfeel to the finished pesto. Also, don’t skip the 10-minute resting time—this allows the flavors to marry and the cheese to fully integrate, creating a more cohesive, restaurant-quality result.
Pro Tips for Make Store Bought Pesto Better
- These simple but powerful techniques will transform your store-bought pesto from basic to extraordinary with minimal …
- The Heat Factor: When blooming your garlic in Step 1, keep the heat at exactly low as specified. The 1-2 minutes need…
- Toasting Technique: For the pine nuts in Step 2, don’t walk away during those 3-5 minutes over medium-low heat. The m…
Frequently Asked Questions
Can I use dried herbs instead of fresh ones to upgrade store-bought pesto?
Fresh herbs (like basil or parsley) are ideal for brightening flavor, but dried herbs work in a pinch! Use half the amount (e.g., 1 tsp dried = 1 tbsp fresh) and rehydrate them in 1 tsp warm water or olive oil for 5 minutes before mixing. Pro tip: Crumble dried herbs between your fingers to release more aroma!
How long does upgraded pesto last in the fridge?
Your enhanced pesto will stay fresh for 5–7 days in an airtight container. Press plastic wrap directly on the surface to prevent browning, or add a thin layer of olive oil on top. For longer storage, freeze in ice cube trays for up to 3 months. Note: Fresh ingredients like garlic or cheese may slightly reduce shelf life.
What’s the best oil to use for thinning pesto (besides olive oil)?strong>
For a neutral flavor, try avocado oil or light sesame oil. For richness, melted butter (unsalted) works wonders! Avoid strong oils like toasted sesame or walnut—unless you want a bold twist. Bonus: A splash of pasta water (from cooking) emulsifies pesto beautifully without extra oil.
My pesto turned bitter after adding upgrades—how do I fix it?
Bitterness often comes from over-blended herbs or low-quality oil. Balance it with:
- 1 tsp honey or pinch of sugar (cuts bitterness)
- Squeeze of lemon juice (brightens flavors)
- Extra grated Parmesan (adds umami)
Is there a dairy-free way to make pesto creamier?
Swap cheese for:
- Nutritional yeast (2 tbsp for cheesy flavor)
- Silken tofu (1 tbsp blended in for creaminess)
- Vegan Parmesan (store-bought or homemade)
With just a few simple tweaks, that basic jar of pesto can transform into a restaurant-worthy masterpiece! 🌿 Whether you added fresh basil, a splash of lemon, or a sprinkle of Parmesan, the key is balancing flavors to match your taste. Now that you’ve unlocked the secret, why not experiment with different herbs or nuts next time? Grab a spoon, taste as you go, and make it uniquely yours—your pasta, sandwiches, and pizzas will thank you! 🍝