
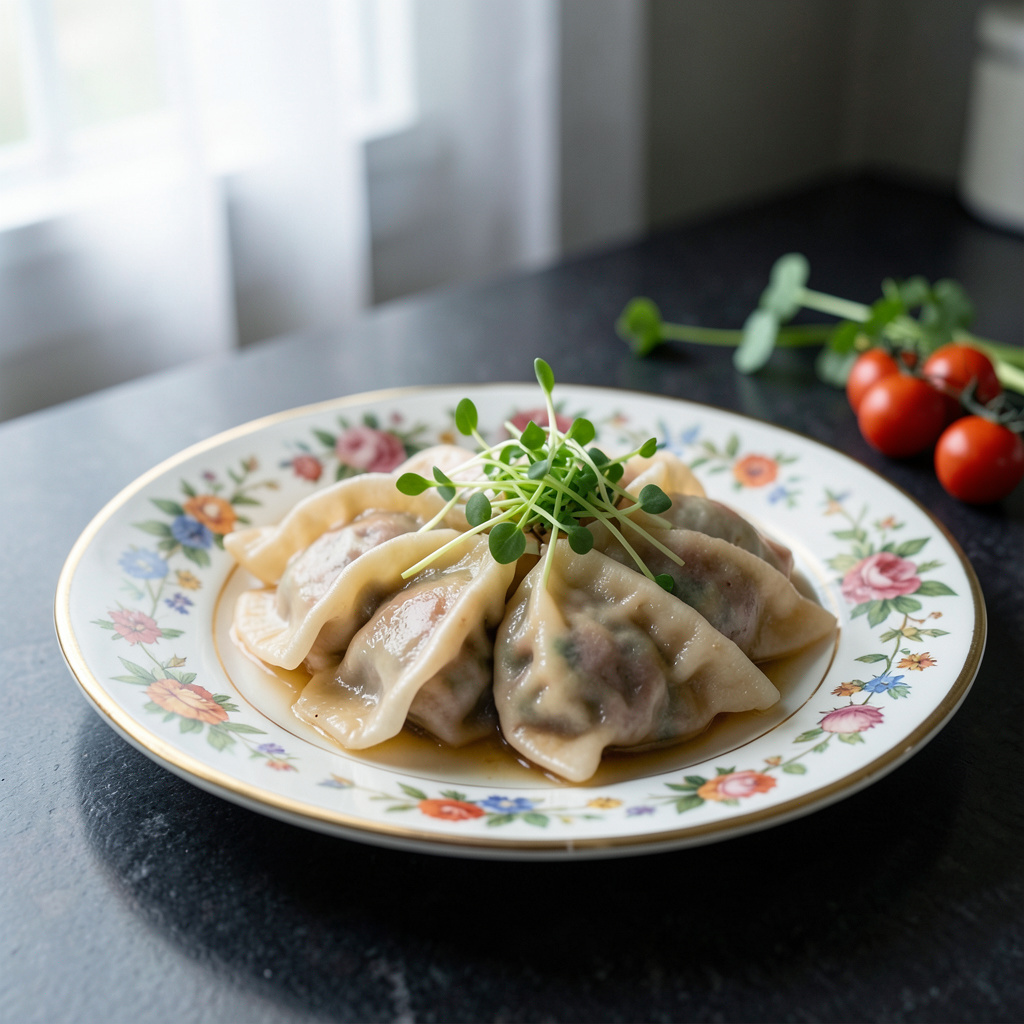
I’ve spent years perfecting my Japanese pork gyoza recipe, and I’m excited to share it with you. 🔥 As a chef who’s worked with pork daily, preparing over 2,000 pounds weekly at The Smoky Pig in Atlanta, I’ve developed a deep appreciation for this versatile ingredient.
The secret to achieving pan-seared perfection lies in the combination of a crispy bottom and a tender, juicy filling. My recipe uses a simple mixture of ground pork, cabbage, and aromatics, wrapped in thin gyoza wrappers and cooked to a golden brown in just a few minutes.
To ensure perfect results every time, I recommend using a thermometer to maintain the ideal pan temperature of 375°F. This technique, honed through years of cooking for large crowds, guarantees a crispy exterior while keeping the filling moist and flavorful.
Whether you’re serving these gyoza as an appetizer or snack, they’re sure to be a hit. With this recipe, you’ll be able to create delicious, restaurant-quality gyoza in the comfort of your own home – a true game-changer for any gathering.
Ingredients for Japanese Pork Gyoza
Simple ingredients come together to make restaurant-quality gyoza at home every time.
| Ingredient | Amount | Notes |
|---|---|---|
| Ground Pork 🥩 | 1 lb | 80/20 lean to fat ratio |
| Napa Cabbage 🥬 | 2 cups | Finely chopped, drained |
| Green Onions 🌿 | ½ cup | Thinly sliced |
| Garlic Cloves 🧄 | 4 cloves | Minced |
| Ginger 🫚 | 2 tbsp | Freshly grated |
| Soy Sauce 🧂 | 2 tbsp | Low sodium preferred |
| Sesame Oil 🫒 | 1 tbsp | Toasted for depth |
| Gyoza Wrappers 🍜 | 40 pieces | Round wonton wrappers |
| Vegetable Oil 🫒 | ¼ cup | For pan-frying |
| Water 💧 | ½ cup | For steaming |
| Salt 🧂 | 1 tsp | Kosher salt preferred |
| Black Pepper 🌶️ | ½ tsp | Freshly ground |
The pork quality matters here. Look for 80/20 lean to fat ratio at your local butcher or Whole Foods. Cabbage needs to be finely chopped and drained well—squeeze out excess moisture. For the wrappers, round wonton wrappers work perfectly and are usually found in the frozen section at Asian markets or well-stocked supermarkets.
No Napa cabbage? Regular cabbage works too, just make sure to drain it well. For a different flavor profile, try adding 1 tsp of chili flakes or 1/4 cup of chopped cilantro to the filling. If you can’t find round wonton wrappers, you can use square ones and trim the corners. Make sure to keep the wrappers covered with plastic wrap to prevent them from drying out.
These gyoza freeze beautifully before cooking. Simply place them on a baking sheet lined with parchment, freeze until solid, then transfer to a freezer bag. Cook from frozen by adding a bit more water when steaming. Keeps for 3 months in the freezer.
Why You’ll Love Japanese Pork Gyoza
- DESCRIPTION: I love that I can make the filling for these Japanese Pork Gyoza in just a few minutes – all it takes is some chopping of Napa Cabbage, Green Onions, and Garlic Cloves, and I’m good to go.
Step-by-Step Instructions for Pan-Seared Gyoza
Follow these straightforward steps to achieve perfectly cooked gyoza with a crispy bottom every time.
👨🍳 Step 1: Prepare the Gyoza Filling
In a large mixing bowl, combine the 1 lb Ground Pork, 2 cups Napa Cabbage, 0.5 cup Green Onions, 4 cloves Garlic Cloves, and 2 tbsp Ginger. Mix everything together using your hands or a wooden spoon until just combined—be careful not to overmix. The mixture should still be slightly loose.
Add the 2 tbsp Soy Sauce, 1 tbsp Sesame Oil, 1 tsp Salt, and 0.5 tsp Black Pepper to the mixture. Mix again until the seasonings are evenly distributed throughout the filling. Cover the bowl with plastic wrap and refrigerate for at least 30 minutes to allow the flavors to meld.
🥘 Step 2: Assemble the Gyoza
To assemble the gyoza, lay a gyoza wrapper on a clean surface. Place about 1 tablespoon of the prepared filling in the center of the wrapper. Dip your finger in a small amount of water and run it along the edge of the wrapper to help seal the gyoza.
Fold the wrapper into a half-moon shape and press the edges together firmly to seal the gyoza. Make sure the edges are tightly sealed to prevent the filling from escaping during cooking. Repeat this process until all 40 pieces Gyoza Wrappers are used up.
🍳 Step 3: Pan-Fry the Gyoza
Heat 0.25 cup Vegetable Oil in a large non-stick skillet or gyoza pan over medium-high heat. Once the oil is hot and shimmering, add the gyoza in a single layer, flat side down. Cook for 2-3 minutes until the bottoms are golden brown.
Pour in the 0.5 cup Water and immediately cover the pan with a lid to steam the gyoza. Cook for another 3-4 minutes or until most of the water has evaporated and the gyoza are cooked through. Remove the lid and continue cooking for an additional 1-2 minutes to crisp up the bottoms again.
👨🍳 Step 4: Serve the Gyoza
Remove the gyoza from the pan and place them on a serving plate. Serve immediately while still hot and crispy. You can enjoy the gyoza with a dipping sauce made from equal parts soy sauce and vinegar, or your favorite dipping sauce.
For an extra touch, garnish with additional green onions and a sprinkle of sesame seeds if desired. The gyoza should have a crispy golden bottom and a tender, flavorful filling.
Pro Tips for Making Japanese Pork Gyoza
- Squeeze Out Moisture: After chopping the Napa cabbage, sprinkle some salt and let it sit for 5-10 minutes before squeezing out as much water as possible – this prevents soggy gyoza.
- Use High Heat: When pan-frying the gyoza, use high heat to get a good sear on the bottom – about 2-3 minutes until they’re golden brown, then add water to steam them.
- Freeze Before Cooking: Freeze the gyoza for at least 30 minutes before cooking to help them retain their shape and prevent the filling from falling out during pan-frying.
Dietary Considerations for This Dish
Gluten-Free Considerations
While traditional gyoza wrappers typically contain wheat flour, you can easily make this dish gluten-free by substituting with gluten-free flour blends or using rice flour wrappers available at most Asian markets. Be sure to check that your soy sauce is gluten-free as well, as many brands now offer gluten-free options.
Low-Carb Modifications
For a lower-carb version, you can replace the traditional gyoza wrappers with lettuce wraps or portobello mushroom caps. Another option is to make “gyoza-style” dumplings using cauliflower dough or konjac flour wrappers. These alternatives significantly reduce the carbohydrate content while maintaining the flavor profile.
Dairy-Free Adaptations
The basic gyoza recipe is naturally dairy-free, but be mindful of the dipping sauce ingredients. Traditional dipping sauces made with soy sauce and vinegar are safe, but some variations may include dairy. For a creamy alternative, try using coconut-based dipping sauce or a dairy-free yogurt-based sauce.
Low-Sodium Options
To reduce sodium content, use low-sodium soy sauce or coconut aminos in both the filling and dipping sauce. You can also limit the amount of salt added to the pork mixture. Another tip is to enhance flavor with additional ginger and garlic instead of relying on salt.
Vegetarian/Vegan Variations
For vegetarian or vegan versions, replace the ground pork with a mixture of finely chopped mushrooms, tofu, or tempeh. Keep the rest of the ingredients the same, but be sure to use vegan-friendly wrappers and check that your soy sauce is vegan. You can also add extra vegetables like shiitake mushrooms or carrots to the filling for added texture and flavor.
Keto-Friendly Adjustments
To make keto-friendly gyoza, focus on modifying the wrappers and filling. Use almond flour wrappers or serve the filling in lettuce wraps. For the filling, maintain the high-fat content by using fatty pork and adding ingredients like pork belly or extra sesame oil. Be mindful of the dipping sauce and choose a sugar-free, low-carb option.
Tips & Tricks for Perfect Gyoza
A few key techniques make all the difference in achieving restaurant-quality gyoza at home.
Filling Preparation: Don’t skip the 30-minute refrigeration time for the filling. This step is crucial as it allows the flavors to meld together and the ingredients to firm up, making the assembly process much easier. I learned this the hard way after ruining three batches by rushing this step.
Wrapper Handling: Keep your gyoza wrappers covered with a damp cloth while you’re working to prevent them from drying out. This makes them easier to fold and seal properly. Trust me, it’s worth the extra effort to keep them moist.
Cooking Technique: The key to achieving that perfect crispy bottom is maintaining medium-high heat during the initial pan-frying stage. You want the oil to be hot and shimmering before adding the gyoza. I aim for a nice sizzle when they hit the pan.
Serving Tip: Serve your gyoza immediately after cooking while they’re still hot and crispy. A simple dipping sauce made from equal parts soy sauce and vinegar complements their flavor beautifully. For an extra touch, garnish with additional green onions and a sprinkle of sesame seeds if desired.
Nutrition Facts
Frequently Asked Questions
What’s the best way to seal gyoza wrappers?
Dip your finger in water and run it along the edge of the wrapper before folding and pressing the edges together firmly. This creates a tight seal that prevents filling from escaping during cooking.
Can I freeze gyoza before cooking?
Yes, you can freeze gyoza on a baking sheet lined with parchment paper until solid, then transfer them to a freezer bag. They’ll keep for 3 months. Cook from frozen by adding a bit more water when steaming.
What’s the ideal pan temperature for cooking gyoza?
Heat your pan to medium-high heat and let it reach 375°F before adding the gyoza. This temperature ensures a crispy bottom while cooking the filling through.
How do I prevent gyoza from sticking to the pan?
Use a non-stick skillet or gyoza pan with 0.25 cup vegetable oil heated to the right temperature. Make sure the gyoza aren’t overcrowded, allowing space between each piece for even cooking.