
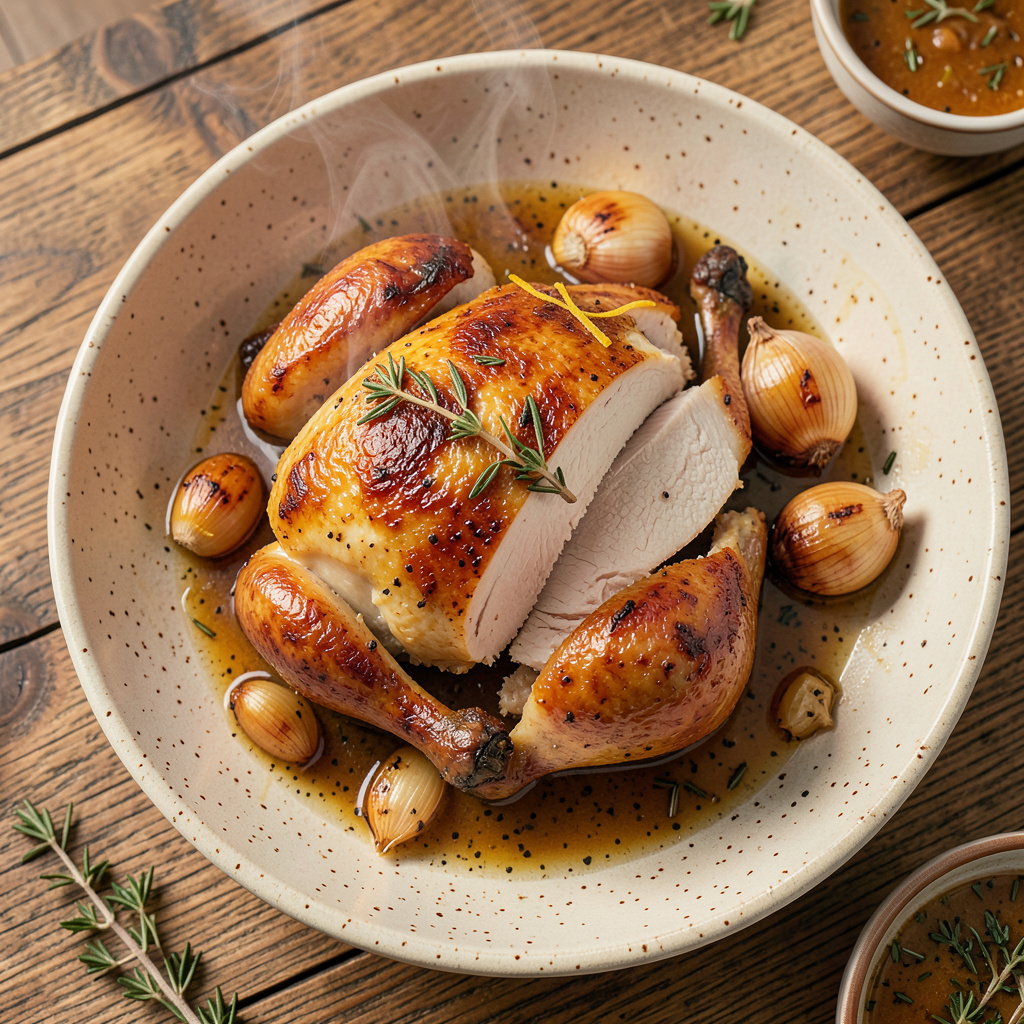
I’ll be real with you—roasting chicken for soup is a game-changer you didn’t know you needed. After years of making broth from bland grocery store rotisserie chickens, I finally perfected a method that delivers fall-off-the-bone tender meat and a carcass packed with flavor for your next pot of soup. This isn’t just roasting a chicken; it’s building the foundation for the best soup you’ve ever made.
The secret starts with seasoning—not just salt and pepper, but a mix of garlic, onion, and fresh herbs tucked under the skin. I learned this trick during my Charleston days, where we’d roast whole hogs with aromatics for maximum flavor. Here, we’re applying that same principle to chicken, ensuring every bite (and every spoonful of future soup) is packed with rich, savory depth.
What you’ll end up with is perfectly cooked chicken that shreds effortlessly, leaving behind a golden-brown carcass that’s ideal for making stock. The meat stays juicy enough to eat on its own, but its real purpose is transforming your next chicken noodle or tortilla soup from good to restaurant-quality. No more watery broth or tasteless chicken—just pure, homestyle flavor.
Best part? This method takes about 90 minutes start to finish, with most of that time being hands-off roasting. By the time you’re done, you’ll have dinner tonight and the makings of soup for later in the week. That’s what I call a win-win.
📚 In This Guide
- What You’ll Need
- Instructions
- Tips and Common Mistakes
What Youll Need
- ● Whole chicken – 1 (3–5 lbs / 1.4–2.3 kg), preferably fresh or fully thawed if frozen
- ● Olive oil or melted butter – 2 tbsp (for crispy, golden skin)
- ● Kosher salt – 1 tbsp (plus extra for seasoning to taste)
- ● Black pepper – 1 tsp, freshly ground
- ● Garlic powder – 1 tsp (or 3–4 fresh cloves, minced)
- ● Dried herbs – 1 tsp each thyme, rosemary, and sage (or 1 tbsp fresh, chopped)
- ● Paprika or smoked paprika – ½ tsp (for depth and color)
- ○ Lemon – 1, halved (optional, for brightness)
- ○ Onion – 1 medium, quartered (optional, for aromatic flavor)
- ○ Carrots & celery – 2 stalks each, roughly chopped (optional, for soup base prep)
- ● Roasting pan or baking dish – with a rack (for even cooking)
- ● Meat thermometer – instant-read (to hit that perfect 165°F / 74°C)
- ○ Kitchen twine – to tie legs (optional but helpful)
- ● Basting brush – for oil/butter application
- ● Aluminum foil – to tent if browning too fast
- ● Sharp chef’s knife & cutting board – for prep and carving
- ● Tongs or wooden spoons – for safe handling
Step-by-Step Instructions for Roast Chicken for Soup
Here’s how to transform a simple chicken into the richest, most flavorful soup base you’ve ever made.
Prepare the Chicken for Maximum Flavor
Start by removing any giblets from the chicken cavity and patting the bird completely dry with paper towels. I can’t stress enough how important this drying step is—moisture on the skin will steam instead of roast, giving you rubbery skin instead of crispy, flavorful browned bits that make soup so rich.
Place the chicken on a rack in your roasting pan. This elevation allows hot air to circulate completely around the bird, ensuring even cooking and preventing the bottom from steaming in its own juices. The rack also makes it easier to collect all those delicious drippings later for your soup.
Season Generously Inside and Out
Season the chicken cavity first with a generous sprinkling of salt and pepper. I like to add a halved lemon, a few garlic cloves, and some fresh herb sprigs (thyme or rosemary work beautifully) to the cavity—these will infuse the meat with subtle flavor as it roasts. Don’t worry about peeling the garlic; the paper will come off easily after roasting.
Then rub the outside of the chicken with olive oil—this helps the skin crisp up beautifully. Season aggressively with salt and pepper, making sure to get into all the nooks and crannies. The seasoning might seem like a lot, but remember: you’re creating a flavor base for your entire soup, so don’t be shy. The salt will also help draw out moisture for crispier skin.
Roast Low and Slow for Fall-Off-the-Bone Tenderness
Preheat your oven to 325°F—this lower temperature ensures the chicken cooks evenly without drying out. Roast the chicken for about 2 to 2½ hours, or until the internal temperature reaches 165°F when measured at the thickest part of the thigh (not touching bone). The low, slow heat breaks down the connective tissues, giving you that perfect fall-off-the-bone texture that makes soup so satisfying.
About halfway through cooking, I like to baste the chicken with its own juices. This not only adds flavor but helps render out more fat, which you’ll want for your soup base. You’ll know it’s getting close when the skin turns a deep golden brown and the juices run clear when you pierce the thigh with a knife. The aroma filling your kitchen will be incredible—rich, savory, and comforting.
Rest and Shred for Soup
When the chicken is done, transfer it to a cutting board and let it rest for 15-20 minutes. This resting period allows the juices to redistribute throughout the meat instead of running out onto your cutting board. While it rests, you’ll notice the skin becomes even crispier as it cools slightly—a perfect contrast to the tender meat underneath.
After resting, remove all the meat from the bones. For soup, I like to shred the meat into bite-sized pieces rather than chopping—it gives a more rustic, homey texture. Don’t discard the bones and skin! These will go back into your soup pot to create a rich, gelatinous broth. The carcass might not look like much now, but it’s packed with flavor that will transform your soup from good to extraordinary.
Collect All the Flavorful Drippings
Pour all the juices and browned bits from your roasting pan into a fat separator or small bowl. Let it sit for a few minutes so the fat rises to the top. The browned bits at the bottom are pure gold—these are called fond, and they’re packed with concentrated chicken flavor. You’ll add these directly to your soup pot.
You can skim off most of the fat if you prefer a leaner soup, or leave some in for extra richness. I usually leave about 1-2 tablespoons of fat in my soup—it adds incredible body and mouthfeel. The fond might stick to the pan, so use a wooden spoon to scrape it all up. Every bit of these caramelized juices will deepen the flavor of your finished soup dramatically.
Tips and Common Mistakes for Perfect Roast Chicken
Getting this right means the difference between good soup and extraordinary soup. Here’s what I’ve learned from years of making broths and stocks.
Drying is Everything: In Step 1, when you’re patting the chicken dry, really take your time with this. I use about 5-6 paper towels and press firmly all over—even inside the cavity. Any moisture left on the skin will create steam instead of that beautiful browning we want. The drier the skin, the crispier your final product will be, and that means more flavor for your soup base.
Temperature Matters: The 325°F oven temperature in Step 3 isn’t arbitrary—it’s the sweet spot for breaking down collagen without drying out the meat. If your oven runs hot (and most do), check the chicken at the 1 hour 45 minute mark. I’ve found that some ovens hit 165°F faster than expected, especially if they’re well-calibrated. Use an instant-read thermometer for accuracy rather than relying solely on time.
Resting Makes All the Difference: Don’t rush the 15-20 minute resting period in Step 4. I know it’s tempting to dive right into shredding, but this is when the meat reabsorbs all those delicious juices. If you cut too soon, you’ll lose up to 30% of the moisture to your cutting board. The chicken will also be much easier to handle and shred after proper resting.
Fat is Your Friend: When collecting drippings in Step 5, don’t be too quick to discard all the fat. While you can skim most of it off for a leaner soup, leaving that 1-2 tablespoons of fat in your broth adds incredible body and mouthfeel. The fat carries flavor and helps create that rich, velvety texture we all love in homemade chicken soup. Trust me, it’s worth the extra calories.
Pro Tips for Roast Chicken For Soup
- Getting this right means the difference between good soup and extraordinary soup. Here’s what I’ve learned from years…
- Drying is Everything: In Step 1, when you’re patting the chicken dry, really take your time with this. I use about 5-…
- Temperature Matters: The 325°F oven temperature in Step 3 isn’t arbitrary—it’s the sweet spot for breaking down colla…
Frequently Asked Questions
How long should I roast chicken for soup to get the best flavor?
Roast a whole chicken at 375°F (190°C) for 20–25 minutes per pound (about 1.5–2 hours for a 4-lb bird). For extra flavor, sear it at 425°F (220°C) for the first 15 minutes, then reduce heat. Use a meat thermometer—165°F (74°C) in the thickest part ensures juicy, safe meat!
Can I use rotisserie chicken instead of roasting my own?
A store-bought rotisserie chicken saves time and adds rich flavor. Remove the skin (or leave some for extra richness) and shred the meat. Simmer the carcass for 1–2 hours to make a quick broth—just skim off excess fat before using.
Why is my roasted chicken dry when I add it to soup?
Overcooking or simmering the chicken too long in the broth can zap moisture. Roast just until tender (165°F), then add shredded meat to the soup in the last 10 minutes of cooking. Pro tip: Brine the chicken for 1 hour before roasting to lock in juices!
What’s the best way to store leftover roasted chicken for soup?
Cool the chicken completely, then store in an airtight container. Refrigerate for up to 3 days or freeze for 3 months. For broth, freeze the carcass in a sealed bag—it’ll keep for 6 months. Label with dates to track freshness!
Can I roast chicken parts (like thighs or breasts) instead of a whole chicken?
Yes! Bone-in, skin-on thighs or drumsticks roast in 35–45 minutes at 400°F (200°C) and add deep flavor. Breasts cook faster (25–30 minutes) but can dry out—brine them first or use them for shredding. Mix parts for a balanced taste!
Now you’ve got the secret to juicy, flavor-packed roast chicken that’ll take your soups from good to unforgettable! 🍲 Whether you’re simmering a classic chicken noodle or a hearty veggie-loaded stew, that fall-off-the-bone tenderness makes all the difference. Don’t stop here—try your hand at a homemade broth next using those golden leftovers, or experiment with herbs like thyme or rosemary for a twist. Your coziest bowl of soup yet is just a pot away!